background image

 Installation of the VX-MD4024 


20 / 44


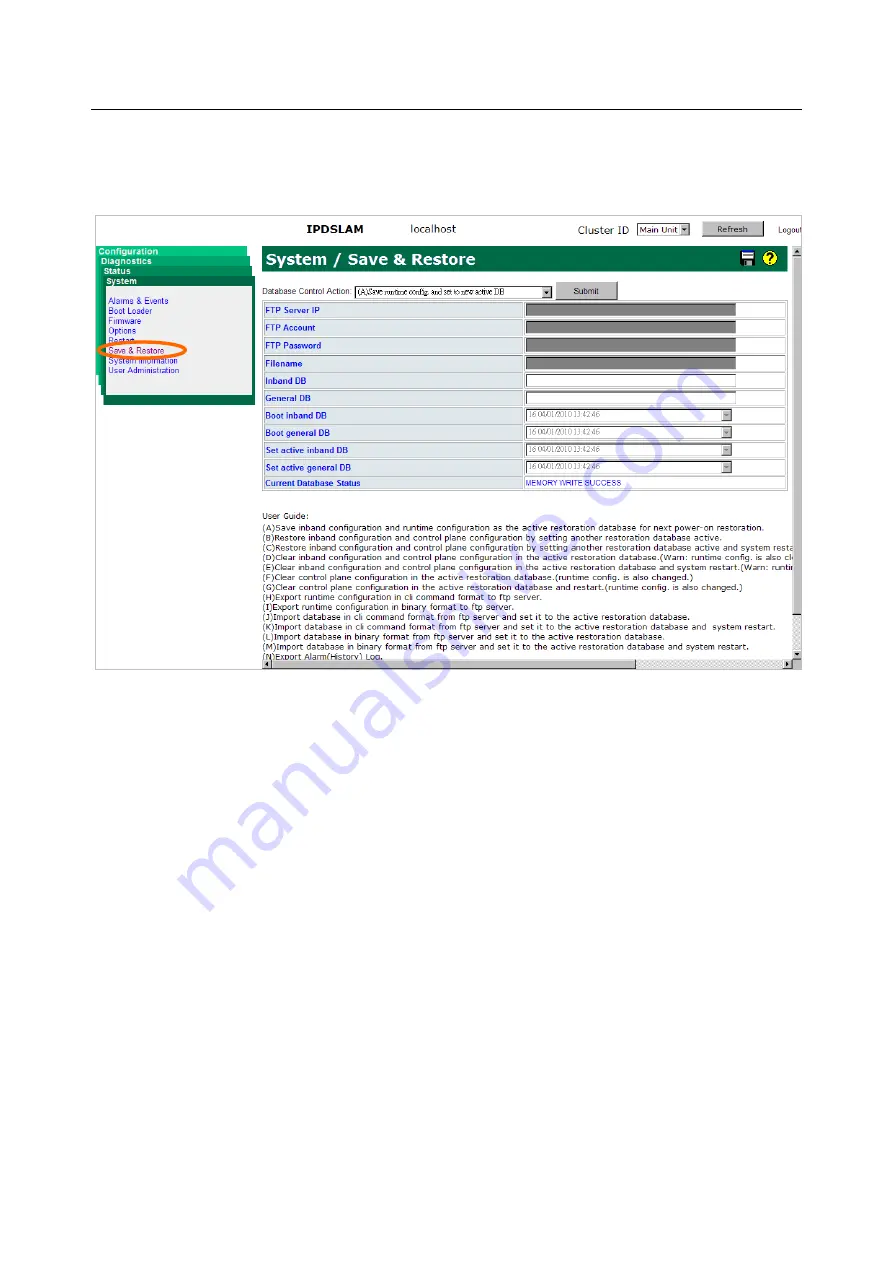
will save inband configuration and runtime configuration as the active restoration database for 

next power-on restoration. You shall wait for memory write success message. 


Summary of Contents for VX-MD4024

Page 1: ...VX MD4024 IP Digital Subscriber Line Access Multiplexer HW Installation and User Guide Part Number A0 31 0129 2 1 Issue 2 1 Draft April 2010...

Page 2: ......

Page 3: ...ions so that your system meets regulatory requirements Prevention of Access The VX MD4024 must be accessible only to authorized personnel Install this apparatus in a restricted access location or simi...

Page 4: ...tified in EN60950 2000 Over Voltage Protection Requirements of ITU T K 20 EMI EMC The system meets the requirements of Telecommunications Network Equipment EN300 386 Electromagnetic Compliance The sys...

Page 5: ...tory Default Management IP Addresses 5 1 2 3 Installation Overview 5 1 2 4 Mounting the VX MD4024 6 1 2 5 Power and Ground Connections 8 1 2 6 Connecting the VDSL ADSLx and POTS interfaces 10 1 2 7 Co...

Page 6: ...ring the VX MD4024 28 2 3 Controls and LED Indication 29 2 4 Replacing Units 31 3 Troubleshooting the VX MD4024 32 3 1 Introduction to Troubleshooting 33 3 2 Resolving Problems Indicated Through LEDs...

Page 7: ...E Interface VDSL2 30a Horizontal Tip Ring model 10 Figure 1 7 Pin Assignment of LINE Interface VDSL2 17a Vertical Tip Ring model 10 Figure 1 8 Pin Assignment of POTS Interface 11 Figure 1 9 Connecting...

Page 8: ...le 2 1 Required Installation Tools and Materials 26 Table 2 2 Procedures of Powering Up the DSLAM 28 Table 2 3 Procedures of Powering Down the DSLAM 28 Table 2 4 VX MD4024 Controls and LED Indication...

Page 9: ...nd Line Interface CLI commands refer to the VX MD4024 CLI Command Reference For information about how to manage the DSLAM through Web GUI refer to the VX MD4024 Web Configuration Tool Guide Documentat...

Page 10: ...nstallation of the VX MD4024 2 44 1 Installation of the VX MD4024 1 1 Pre Installation 1 2 Hardware Installation 1 3 Provisioning a Management IP Port 1 4 Configuration Import Export 1 5 Firmware Upda...

Page 11: ...erious injury do not apply power to the VX MD4024 system at the central office or any remote site until you ve completed all of the installation procedures and connected it to the external facilities...

Page 12: ...tricity from damaging the system and injury to the operator Handle electronic components as little as possible This chapter provides the VX MD4024 system hardware installation procedures and install s...

Page 13: ...p 2 Wire electrical ground for the system and connect the cables between system and MDF Step 3 Please check the cable connection robustness and correctness Step 4 Check the voltage of the DC power sup...

Page 14: ...e installed at the specified location When mounting the chassis practice good safety habits Use two or more people to secure the chassis Relay rack mounting normally requires at least two people Step...

Page 15: ...1 Installation of the VX MD4024 7 44 For 23 Rack For 19 Rack Figure 1 7 Mounting Bracket Position for Standard Mount VX MD4024 DC shown...

Page 16: ...ce is a 5 pin terminal block with polarity signs on the front panel of the DSLAM The VX MD4024 can be powered from two 48V DC power supply The DC power connector is a 5P terminal block 2P is for accom...

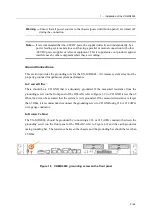
Page 17: ...d for optimum system performance In Central Office There should be a CO GND that is adequately grounded If the measured resistance from the grounding screw on the front panel of the DSLAM refer to Fig...

Page 18: ...the connector figures below represent PIN numbers Please be aware of the different style pin assignment Line port 1 24 1 25 26 50 Pin No 25 24 23 22 21 20 19 18 8 7 6 5 4 3 2 1 Port No X Ring 23 Tip 2...

Page 19: ...Tip 25 Tip 24 Tip 23 Tip 22 Tip 21 Tip 20 Tip 19 Tip 8 Tip 7 Tip 6 Tip 5 Tip 4 Tip 3 Tip 2 Tip 1 Pin No 50 49 48 47 46 45 44 43 33 32 31 30 29 28 27 26 Port No X Ring 25 Ring 24 Ring 23 Ring 22 Ring...

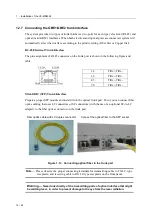
Page 20: ...Rx Mini GBIC SFP Trunk Interface Prepare a proper SFP module and install it into the optical trunk port Then you can connect fiber optics cabling that uses LC connectors or SC connectors with the use...

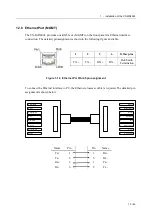
Page 21: ...pins TX TX RX RX Bob Smith Termination Figure 1 14 Ethernet Port RJ 45 pin assignment To connect the Ethernet interface to PC the Ethernet crossover cable is required The detailed pin assignment is sh...

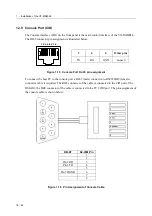
Page 22: ...Figure 1 15 Console Port RJ 45 pin assignment To connect the host PC to the console port a RJ45 male connector to RS232 DB9 female connector cable is required The RJ45 connector of the cable is conne...

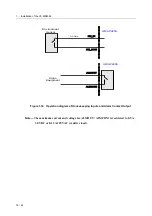
Page 23: ...24 to detect the open or close status of the loop between HK_IN and HK_COM user does not need to feed 3 3v power into the circuit As to the alarm output there is a relay between ALMOUT and ALMCOM to c...

Page 24: ...3 Vdc Environment Sensor UMAP2200 Alarm Equipment ALMOUT ALMCOM Figure 1 18 Operation diagram of Housekeeping Inputs and Alarm Contact Output Note The maximum current and voltage for ALMOUT ALMCOM is...

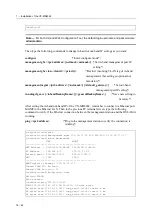
Page 25: ...to enable command mode show management Display all system management port IP setting WDS login admin Password VDSL2 IP DSLAM v1 01 04 19 2010 11 26 51 Hardware Version D CPLD Version B3 CLI Module Ver...

Page 26: ...ort MGMT to the Ethernet LAN Then in the previous PC terminal screen type the following command to verify if the Ethernet connection between the management station and the DSLAM is working ping ipv4 a...

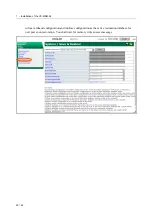
Page 27: ...e in band out band management IP of the VX MD4024 in the Web GUI a On the menu tree click on Configuration Management Mgmt Link Config b Enter new IP setting in the GBE In Band section for in band IP...

Page 28: ...stallation of the VX MD4024 20 44 will save inband configuration and runtime configuration as the active restoration database for next power on restoration You shall wait for memory write success mess...

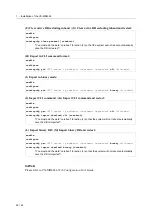
Page 29: ...onfiguration DB export import in CLI and Web In CLI A Save runtime config and set to new active DB enable configure runningcfg save inbandBackup Name generalBackup Name Backup Name is optional When in...

Page 30: ...name password binary filename J Import CLI command K Import CLI command and restart enable configure runningcfg get FTP server ip address username password cli filename runningcfg import download cli...

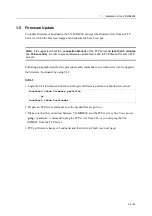
Page 31: ...graph describes the procedures and commands to use when users want to upgrade the firmware bootloader by using CLI In CLI 1 Login the CLI interface and check current system firmware partition or bootl...

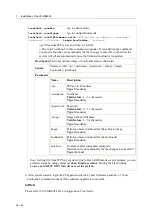
Page 32: ...andatory username Username Valid values 1 31 characters Type Mandatory password Password Valid values 0 31 characters Type Mandatory string Image path and filename Valid values 1 64 characters Type Ma...

Page 33: ...25 44 2 Operating and Maintaining the VX MD4024 2 1 Maintenance Requirement 2 2 Powering the DSLAM Up or Down 2 3 Controls and LED Indication 2 4 Replacing Units...

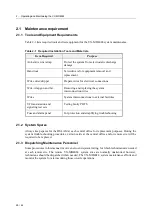
Page 34: ...rconnections to external facilities VF transmission and signaling test sets Testing faulty POTS Fuse and alarm panel For protection and simplifying troubleshooting 2 1 2 System Spares Always keep spar...

Page 35: ...system performance at the central office remote sites using the SNMP It allows user to view the current system status alarm information and to take the necessary corrective action if a problem is rep...

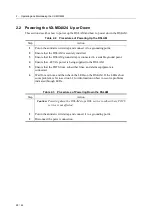
Page 36: ...a suitable ground point 4 Ensure that 48 Vdc power is being supplied to the DSLAM 5 Ensure that the POTS lines subscriber lines and alarm equipment are connected 6 Wait for a minute and then check the...

Page 37: ...off cycle Slow BLINK Blinking at estimated frequency of 2700 ms per on off cycle SCAN The LEDs ON OFF in sequence Table 2 4 VX MD4024 Controls and LED Indication VX MD4024 Front Panel LED Color Indic...

Page 38: ...K ALM RJ 50 port for housekeeping inputs and one alarm contact output GBE1 Gigabit Ethernet trunk port 1 including an electrical RJ 45 and an optical SFP interface GBE2 Gigabit Ethernet trunk port 2 i...

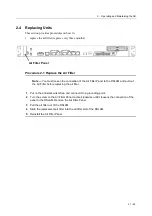
Page 39: ...Air Filter Panel to the DSLAM and pull out the Air Filter before replacing the air filter 1 Put on the antistatic wrist strap and connect it to a grounding point 2 Turn the screw on the Air Filter Pan...

Page 40: ...Troubleshooting the VX MD4024 3 1 Introduction to Troubleshooting 3 2 Resolving Problems Indicated Through LEDs 3 3 Resolving Problems Indicated Through Alarms 3 4 Procedures for Troubleshooting the V...

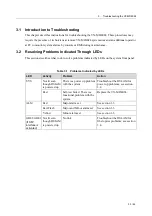
Page 41: ...dicated by LEDs on the system front panel Table 3 1 Problems Indicated by LEDs LED Activity Problem Action SYS Not lit even though DSLAM is powered up There is a power up problem with the system Troub...

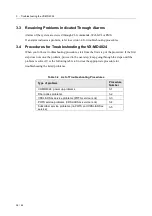
Page 42: ...step of the procedure If the first step does not solve the problem proceed to the next step keep going through the steps until the problem is solved Use the following table to find out the appropriate...

Page 43: ...ont panel is not lit maybe the signal power detected by the fiber optical receiver being below the minimum power threshold but the SFP interface has been activated Alarm that indicates loss of signal...

Page 44: ...n the front panel if it is red replace the DSLAM 3 Check the GBE1 GBE2 LED if SFP interface is activated if it is not lit follow Procedure 3 3 to troubleshoot the DSLAM for fiber optics problems 4 If...

Page 45: ...ults in POTS service to the affected subscribers but there is still no VDSL ADSLx service to them follow Procedure 3 3 to troubleshoot VDSL ADSLx service problems If this step results in ADSL service...

Page 46: ...MS element management system DSL digital subscriber line EMC electromagnetic compatibility EMI electromagnetic immunity ETSI European Telecommunications Standards Institute Mbps megabit per second MDF...

Page 47: ...39 44...

Page 48: ......

Reviews: