– 10 –
4.0 Operation
4.1 Start-Up
Remove front cover by depressing lock tabs on front panel (see fig.1) and pulling
forward. With the front cover off, turn the water on at the piercing valve. This brings water
to the ball valve. Disconnect the orange tubing from the bottom of the 2nd stage carbon
filter and place a pan or bucket underneath the filter to
catch water. Open ballvalve inside the cooler 1/4-turn
(handle in line with tube is "on"). and let water flow
through filters into the bucket or pan to push out air and
carbon fines. When water runs clear, turn off ball valve
and re-connect the orange line to the filter .
Turn on the water to the filter system by opening
the ballvalve inside the cooler 1/4-turn (handle in line
with tube is “on”). Check all connections to assure there
are no leaks.
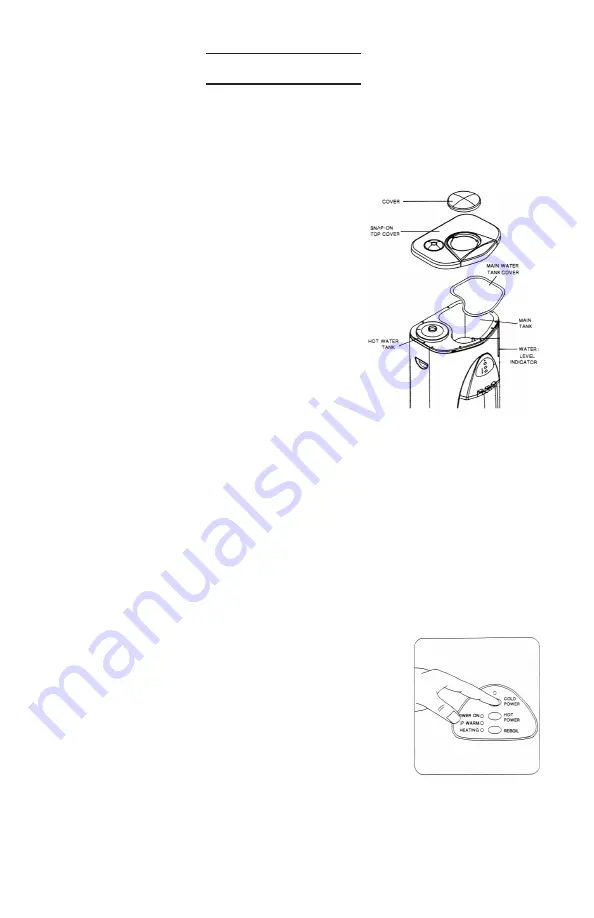
Remove the top cover of the
PureWaterCooler™
.
Pull the cover off, exposing the main tank cover.
Remove this cover to expose the inside of the main tank.
Plug in the power cord to115-volt wall socket to activate the solenoid shut-off valve- you
should hear an audible click.
CAUTION. DO NOT
PUSH ANY HOT OR COLD
POWER CONTROLS ON YET.
Water will flow into the main tank and then the cold and hot tanks as well. Let cool-
er tanks fill with the filtered water until full - about 2-hours for the ‘R’version, about 10-
15 minutes for the ‘F’version.
Observe the water level when full, and see that water input to the tank stops when it
is full. The solenoid valve will click off as well.
4.2 Tank Flush
Flush tanks out by draining all water through the (2) drain
plugs located on the back of the cooler. Let the tanks fill again
with the filtered water. When full, drain water again through the
drain ports located on the back as well as through the dispensing
spigots. When the tank has filled again automatically with filtered
water the cooler is ready to dispense water.


