7 CHECKLIST FOR COMPLETED INSTALLATION
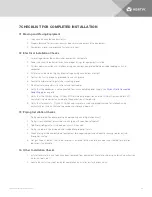
7.1 Moving and Placing Equipment
1.
Unpack and check received material.
2.
Proper clearance for service access has been maintained around the equipment.
3.
Equipment is level and mounting fasteners are tight.
7.2 Electrical Installation Checks
1.
Line voltage connected and matches equipment nameplate.
2.
Power line circuit breakers or fuses have proper ratings for equipment installed.
3.
CANbus communication and interlock wiring connections completed between indoor cooling unit and
condenser.
4. All internal and external high and low voltage wiring connections are tight.
5.
Confirm that unit is properly grounded to an earth ground.
6. Control transformer setting matches incoming power.
7.
Electrical service conforms to national and local codes.
8.
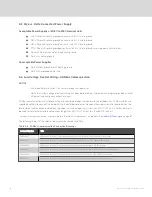
Verify that the condenser is not connected to an unacceptable power supply, see
9. Verify that the CANbus wiring, CANbus END of Line jumper position, and the CANbus Device Address DIP
Switch setting are correct according to the application at the job site.
10. Verify that terminals 70, 71, (and 230 when applicable) are used and properly wired for interlock wiring,
particularly on systems that use two condensers for one indoor unit.
7.3 Piping Installation Checks
1.
Piping completed to corresponding indoor cooling unit refrigeration circuit.
2.
Piping is leak checked, evacuated and charged with specified refrigerant.
3.
Additional refrigerant oil is added per circuit, if required.
4. Piping is properly sized, sloped, and trapped for proper oil return.
5.
Check piping inside and outside of equipment for proper support and adequate spacing to prevent rub
through or chafing.
6. Hot gas line on Liebert® Lee-Temp receiver is fastened to the side of the cabinet and isolated for vibration
reduction, if applicable.
7.4 Other Installation Checks
1.
Installation materials and tools have been removed from equipment (literature, shipping materials, construction
materials, tools, etc.).
2.
Locate blank startup sheet, ready for completion by installer or startup technician.
7 Checklist for Completed Installation
39
Summary of Contents for Liebert MC series
Page 1: ...Liebert MC Installer User Guide 60 Hz Air Cooled Microchannel Condenser Premium EC Fan ...
Page 8: ...Vertiv Liebert MC Installer User Guide 4 This page intentionally left blank ...
Page 14: ...Vertiv Liebert MC Installer User Guide 10 This page intentionally left blank ...
Page 28: ...Vertiv Liebert MC Installer User Guide 24 This page intentionally left blank ...
Page 44: ...Vertiv Liebert MC Installer User Guide 40 This page intentionally left blank ...
Page 46: ...Vertiv Liebert MC Installer User Guide 42 This page intentionally left blank ...
Page 48: ...Vertiv Liebert MC Installer User Guide 44 This page intentionally left blank ...
Page 76: ...Vertiv Liebert MC Installer User Guide 72 This page intentionally left blank ...
Page 88: ...Vertiv Liebert MC Installer User Guide 84 This page intentionally left blank ...
Page 90: ...Vertiv Liebert MC Installer User Guide 86 This page intentionally left blank ...


