5 INSTALLING IN ENCLOSURE ROW
Built-in casters let you roll the Liebert® XDU into position for installation. Adjustable leveling feet prevent it from moving
after positioning, See
Adjusting Base Supports/Leveling Feet
Once positioned, secure the unit to the floor or to an adjacent cabinet.
Adjustable brackets for attaching the unit to an adjacent cabinet are included with each unit. A bracket to attach the unit to
the floor is available from your Vertiv representative.
5.1 Adjusting Base Supports/Leveling Feet
1.
After the unit is in its final installation position, open the display door and remove the lower front baffle panel
using a 5/16-inch (7.9 mm) hex head or slotted screwdriver to prepare for installation.
2.
Open the rear panel.
3.
Using an adjustable wrench, adjust the four base supports or feet, shown in Figure 5.1 below. Ensure that the
unit is level.
4. Turning the base supports (leveling feet) clockwise, extends them and lifts the unit one corner at a time.
5.
Tighten the nut on the top of each foot to lock the feet. The nut on 600-mm (24-inch.) units is inside the cabinet.
See Figure 5.2 on the next page.
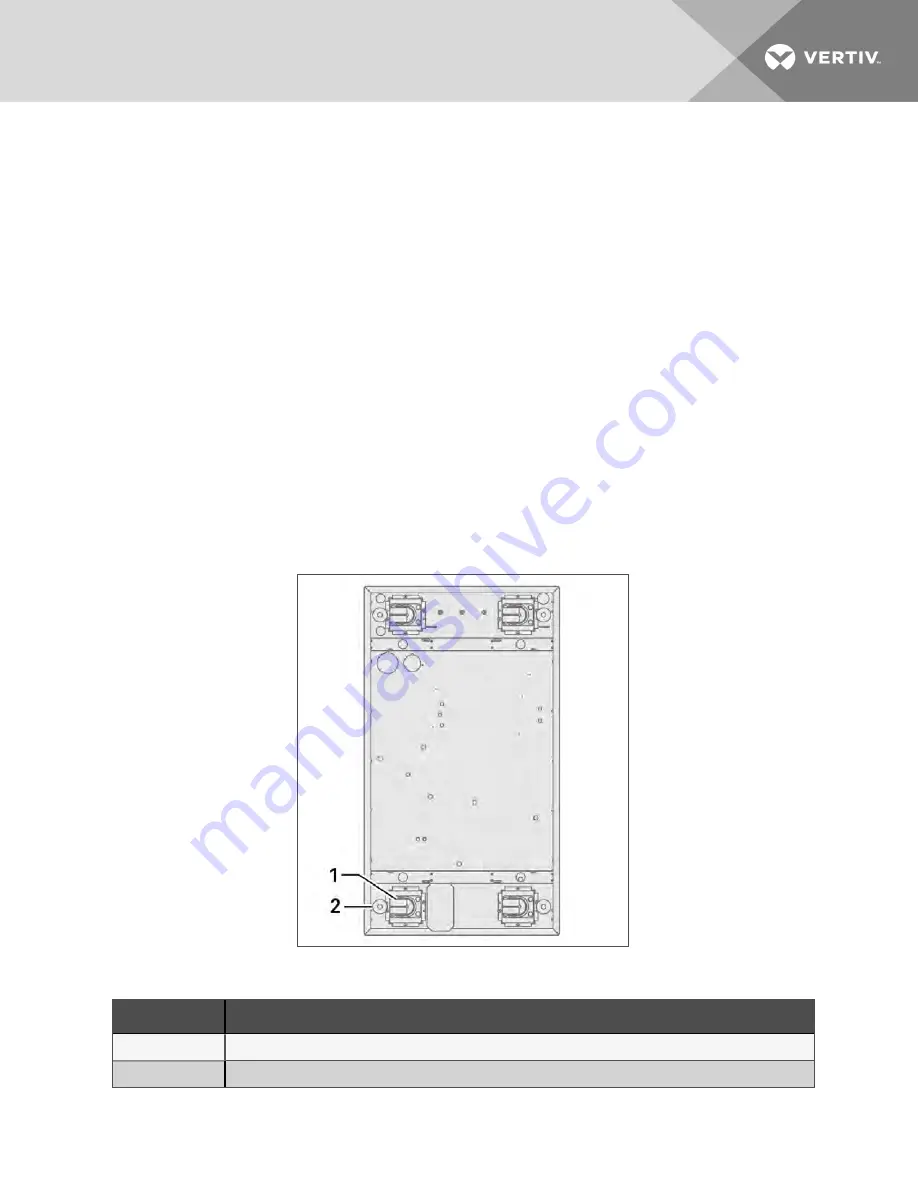
Figure 5.1 Caster Locations
Item
Description
1
Caster, one at each corner
2
Adjustable leveling foot, one at each corner
5 Installing in Enclosure Row
23
Summary of Contents for Liebert XDU 060
Page 1: ...Liebert XDU Liquid to Air Heat Exchanger for Chip Cooling Installer User Guide 600 mm Wide ...
Page 10: ...Vertiv XDU Liquid to Air Heat Exchanger for Chip Cooling 6 This page intentionally left blank ...
Page 38: ...Vertiv XDU Liquid to Air Heat Exchanger for Chip Cooling 34 ...
Page 74: ...Vertiv XDU Liquid to Air Heat Exchanger for Chip Cooling ...


