


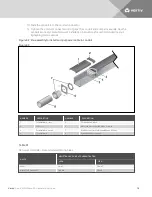
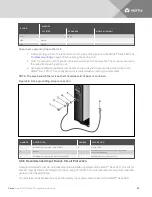

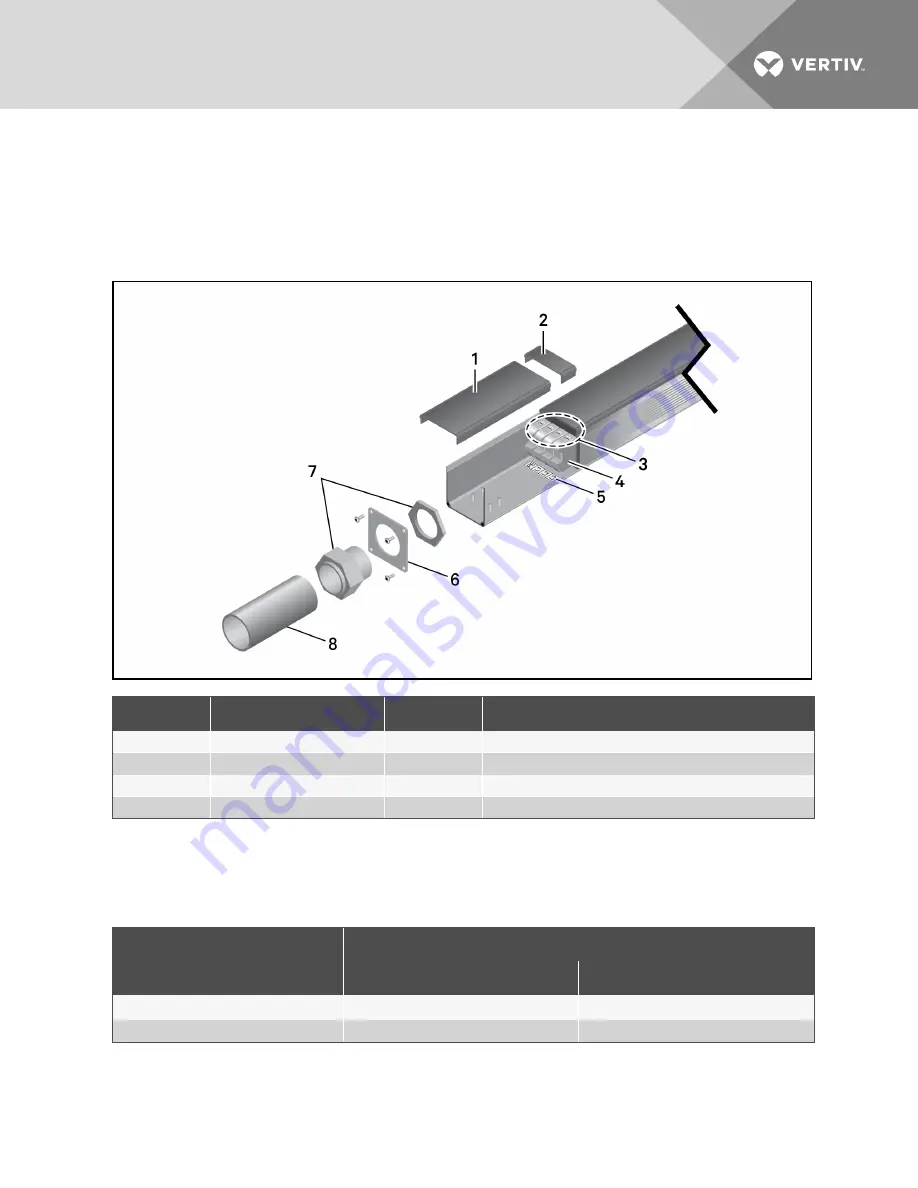
10. Slide the conduit into the conduit connector.
11. Tighten the conduit connector until it grips the conduit and crimps it securely. See the
conduit connector manufacturer's installation instructions for recommended locknut
tightening torque values.
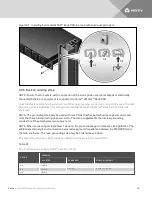
Figure 3.2 Re-assembly to install an input power cable in conduit
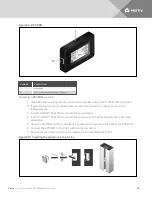
Figure 3.3
NUMBER
DESCRIPTION
NUMBER
DESCRIPTION
1
Terminal block cover
5
Terminal block labels
2
Filler cover
6
Metal end plate (attached with 4 screws)
3
Terminal block screws
7
Conduit connector (field-supplied) and locknut
4
Terminal block
8
Conduit (cable not shown)
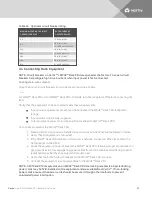
UNITS
MPH2™ RACK PDU INPUT CURRENT RATING
≤32 A
>32 A
Metric
4 mm²
10 mm
²
Imperial (US Standard)
10 AWG
6 AWG
Table 3.1
Hard-wired models—Recommended Wiring Sizes
Vertiv
| Vertiv™ MPH2 Rack PDU Installer/User Guide
15
Summary of Contents for MPH2
Page 1: ...Vertiv MPH2 Rack PDU Installer User Guide ...
Page 16: ...Vertiv Vertiv MPH2 Rack PDU Installer User Guide 12 This page intentionally left blank ...
Page 42: ...Vertiv Vertiv MPH2 Rack PDU Installer User Guide 38 This page intentionally left blank ...
Page 48: ...Vertiv Vertiv MPH2 Rack PDU Installer User Guide 44 This page intentionally left blank ...
Page 49: ......


