Vertiv
|
NetSure -48V DC Bulk Output Power System Installation and User Instructions (UM582127100)
|
Rev. E
14
Securing the Relay Rack to the Floor
Secure the relay rack to the floor per site requirements. Refer to “General Requirements” on page 13.
Ventilation Requirements
Refer to “General Requirements” on page 13.
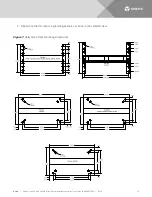
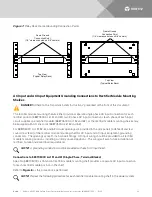
Relay Rack Floor Mounting Dimensions
for relay rack floor mounting dimensions.
Mounting System Components in a Relay Rack
NOTE!
If the power system was ordered in a relay rack, these procedures have been performed at the
factory.
This power system is designed to mount in a standard 23” relay rack having 1” or 1-3/4” multiple drillings. Refer
to System Application Guide SAG582127100 for overall dimensions and a list of available relay racks.
Mounting the Rectifier Module Mounting Shelf(s) to a Relay Rack
DANGER!
The relay rack must be securely anchored to the floor before the rectifier module mounting
shelf(s) is installed.
NOTE!
If the system was shipped on shipping rails, rectifier module mounting shelves are installed in
groups of two or less. Space has been provided for pallet forks to fit between the sets of rectifier module
mounting shelves. Simply rest the pallet forks on the bottom-most rectifier module mounting shelf,
unbolt the shelves from the shipping rails, transfer the shelves to the relay rack, and re-secure the
shelves to the relay rack.
NOTE!
as this procedure is performed.
Procedure
1.
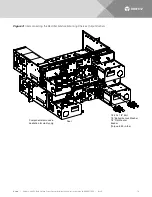
If multiple shelves are in the system, remove the rear center shield from each. Save hardware for later
re-installation.
2.
If multiple shelves are in the system, remove and discard the bottom section of the rear center shield
from all shelves except the bottom shelf.
NOTE!
In multiple shelf systems, apply electrical anti-oxidizing compound to busbar mating surfaces
before performing the next step.
3.
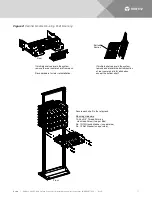
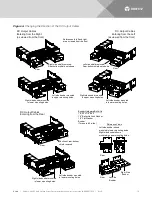
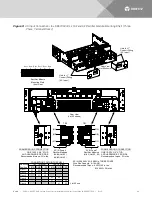
Position the rectifier module mounting shelf in the relay rack. In multiple shelf systems, align the holes in
the mating busbars before securing the shelves to the relay rack.
NOTE!
Install the ground washers in the next step so the teeth dig into the paint on the mounting
angles.


