03_33
03_34
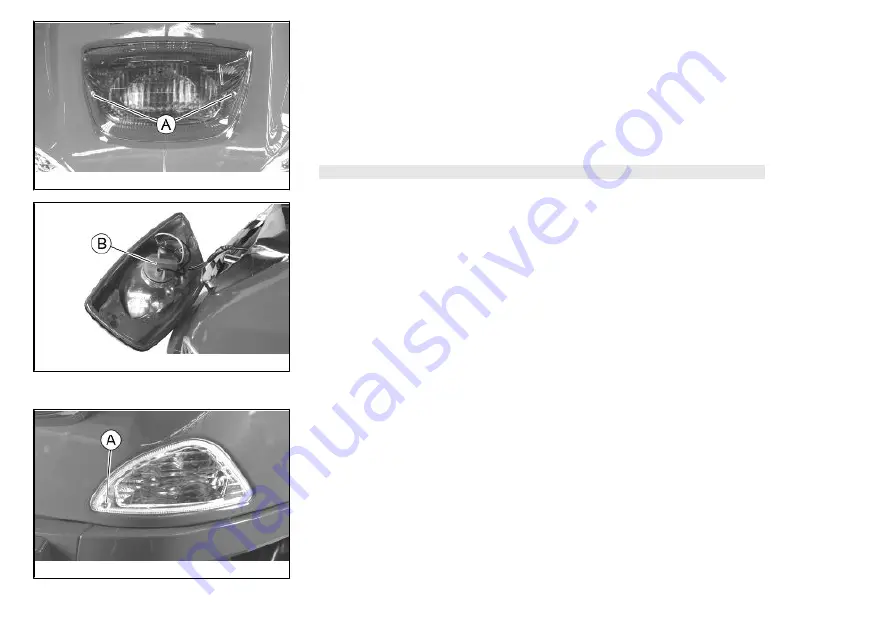
Rear optical unit (03_33, 03_34)
To replace the taillight bulb:
1.
Remove the two screws «
A
».
2
. Take out the bulb holder «
B
» from its fitting by turning it anticlockwise.
3
. Press the bulb, turn it anticlockwise and then take it out.
To refit, proceed in reverse order.
N.B.
IF MISTING IS NOTICED ON THE INSIDE OF THE HEADLAMP GLASS, THIS
DOES NOT INDICATE A FAULT AND IS ATTRIBUTABLE TO HUMIDITY AND/OR
TO LOW TEMPERATURES.
THE PHENOMENON SHOULD QUICKLY DISAPPEAR WHEN THE LIGHT IS
SWITCHED ON.
THE PRESENCE OF DROPS OF WATER, ON THE OTHER HAND, COULD INDI-
CATE THAT WATER IS INFILTRATING. CONTACT THE AFTER-SALES SERVICE
NETWORK.
03_35
Rear turn indicators (03_35, 03_36)
To replace the bulbs:
1.
Remove the turn indicator from its fitting by undoing the screw «
A
».
2.
Take out the bulb holder «
B
» from its fitting by turning it anticlockwise.
3.
Press the bulb, turn it anticlockwise and then take it out.
To refit, proceed in reverse order.
55
3 Maintenance
Summary of Contents for S 150 2008
Page 4: ...4 ...
Page 7: ...Vespa S 150 Chap 01 Vehicle 7 ...
Page 8: ...01_01 8 1 Vehicle ...
Page 10: ...01_02 10 1 Vehicle ...
Page 19: ...Vespa S 150 Chap 02 Use 19 ...
Page 31: ...31 2 Use ...
Page 32: ...32 2 Use ...
Page 33: ...Vespa S 150 Chap 03 Maintenance 33 ...
Page 66: ...66 3 Maintenance ...
Page 67: ...Vespa S 150 Chap 04 Technical data 67 ...
Page 68: ...04_01 68 4 Technical data ...
Page 73: ...Vespa S 150 Chap 05 Spare parts and accessories 73 ...
Page 75: ...Vespa S 150 Chap 06 Scheduled maintenance 75 ...
Page 80: ...80 6 Scheduled maintenance ...


