background image

-12-

12

GB

4. Remove the items of food. Place them 

in the refrigerator or wrap them in 

newspaper to keep them as cold as 

possible.

5. Place a bowl of hot (but not boiling) water 

in the freezer.

6. To prevent the floor from becoming wet 

during defrosting, check progress from 

time to time and lay towels around the 

bowl on the floor to protect against ice 

and splashes. When all the frost and 

ice have melted, clean the inside of the 

cabinet with a mild detergent solution. 

Dry the freezer with a soft cloth.

7. Restart the freezer by turning the freezer 

thermostat button to the required setting. 

If many items are to be returned to the 

freezer, activate the Super Freeze button.

Remember to switch Super Freeze off 

again. 

8. Return items to the freezer approx. 5 

minutes after having switched it on. 

Automatic defrosting of 

refrigerator section

The refrigerator is defrosted automatically. 

Defrost water runs through a pipe and is 

collected in a tray above the compressor 

where the heat generated by the 

compressor causes it to evaporate. The 

defrost water tray should be cleaned at 

intervals.

Defrosting the freezer

The items stored and the humidity of the 

air gradually cause frost and ice to form 

in the freezer. A thin layer of frost or ice 

does not affect freezer performance, but 

the thicker the layer, the higher the energy 

consumption. Loose frost can be removed 

using a plastic or wooden scraper.

Never use a knife or other sharp 

implement that might damage the inside 

of the freezer.


When the layer of frost and ice exceeds 

4-5 mm the freezer should be completely 

defrosted.

Proceed as follows:

1. Press the Super Freeze button 4-5 

hours before defrosting. This lowers 

the temperature of the items stored to 

approx. -25°C, thus prolonging the length 

of time they remain frozen after having 

been removed from the freezer (see step 

4 below).

2. Switch the freezer off by turning the 

freezer thermostat button to 0. 

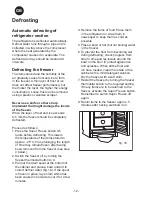
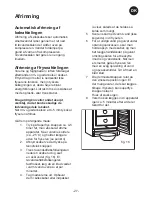
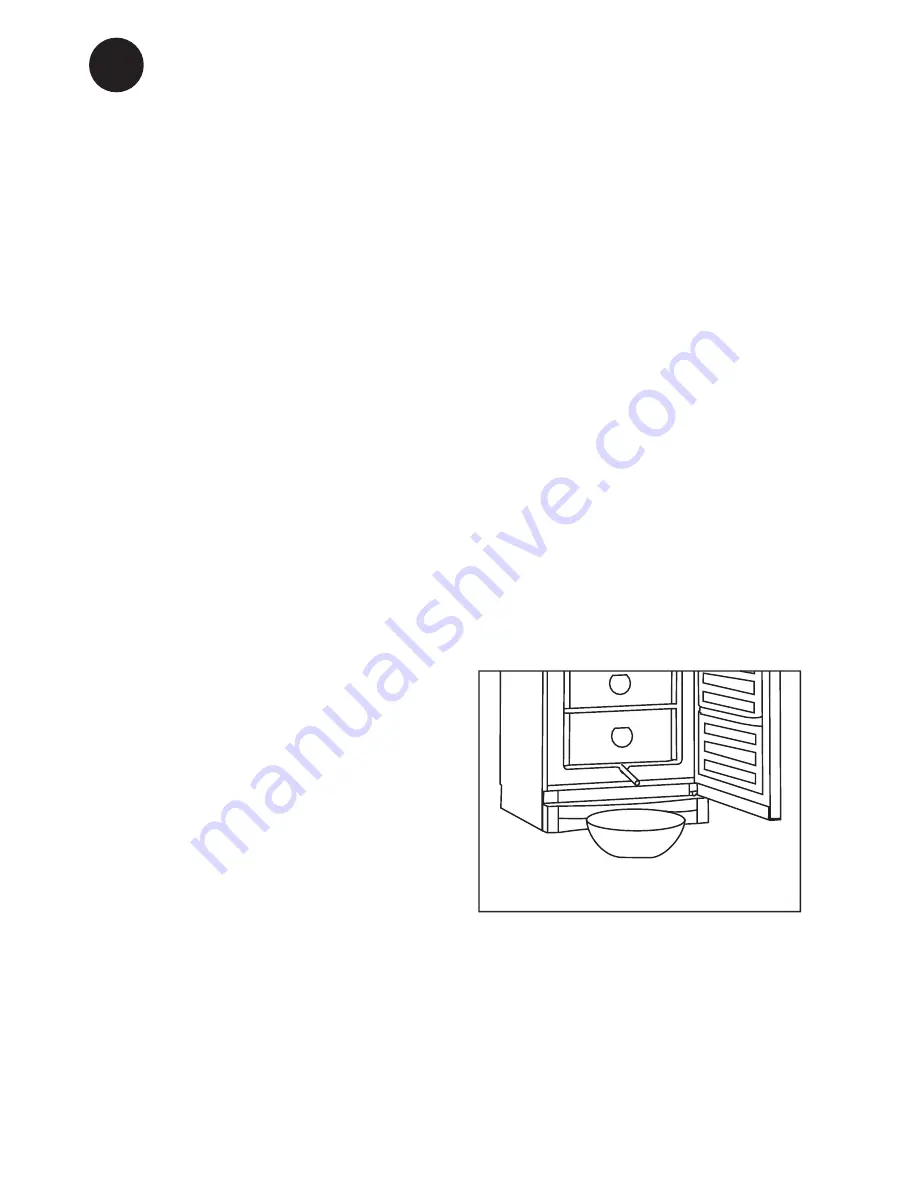
3. Pull out the drain spout at the bottom of 

the cabinet and place a bowl under it to 

collect defrost water (fig. 16). If the spout 

is frozen in place, lay a cloth which has 

been soaked in hot water over it for a few 

minutes.

Defrosting

fi

g. 16

Summary of Contents for SW***M

Page 1: ...jzing ES Instrucciones para el uso CZ N vod k pou it PL Instrukcja obs ugi RUS UK Instructions for use DE Bedienungsanleitung FR Mode d emploi DK Brugsanvisning NO Bruksanvisning UK Instructions for u...

Page 2: ...event children from being exposed to great dan ger by getting locked inside the unit Before use Before operating your new appliance please read the following instructions care fully as they contain im...

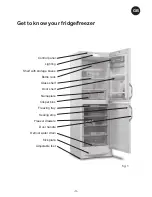
Page 3: ...idge freezer fig 1 Control panel Lighting Shelf with storage boxes Bottle rack Glass shelf Door shelf Nameplate Crisper bins Freezing tray Sealing strip Freezer drawers Door handle Defrost water drain...

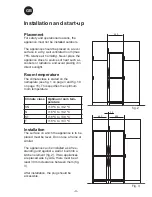
Page 4: ...3 and fig 18 on page 15 This specifies the optimum room temperature Climate class Optimum room tem perature SN 10 C to 32 C N 16 C to 32 C ST 18 C to 38 C T 18 C to 43 C Installation The surface on w...

Page 5: ...1650 1950 100 100 1560 1860 fig 6 fig 7 The appliance viewed from above If the appliance is placed beside a wall there must be sufficient room for the freezer door to be opened wide enough to allow th...

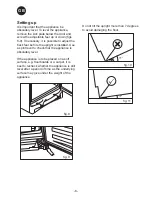
Page 6: ...et before the upright is installed Use a spirit level to check that the appliance is absolutely level If the appliance is to be placed on a soft surface e g floorboards or a carpet it is best to reche...

Page 7: ...t Be careful not to heat the strip so much that it melts 13 Fit the upper door 14 Fit the upper hinge 7 GB The door s can be changed from right hinged to left hinged and vice versa as follows Reversin...

Page 8: ...dent wall socket outlet Technical data This appliance complies with CE marking regulations directives and standards Low Voltage Directive 73 23 EEC EMC Directive 89 336 EEC Council Directive 92 75 EEC...

Page 9: ...ed correctly The control lamp lights yellow when Super Freeze is activated Thermostat button refrigerator Thermostat button freezer Lighting Control lamp S S O I Thermometer S Super freeze O Alarm off...

Page 10: ...items such as butter and cheese Bottle rack The bottle rack is ideal for both large and small bottles Crisper bins The crisper bins are ideal for storing fruit and vegetables The shelf above the bins...

Page 11: ...es or cans containing carbonated fizzy drinks must never be placed in the freezer as they may explode 11 GB Freezer section Freezer section The freezer section is a four star freezer approved for free...

Page 12: ...n in place lay a cloth which has been soaked in hot water over it for a few minutes Defrosting fig 16 12 GB 4 Remove the items of food Place them in the refrigerator or wrap them in newspaper to keep...

Page 13: ...e that the door s is are not pre vented from closing tightly Cleaning and maintenance fig 17 Max 12 W 13 GB Cleaning Disconnect the power supply at the mains socket before cleaning the inside of the c...

Page 14: ...temperature setting Distribute items within the cabi net to improve air circulation Keep door closed 14 GB Fault finding Fault Possible cause Remedy The control lamp is not lit Power failure the fuse...

Page 15: ...estfrost dk Warranty spare parts and service Model XXXX Basic Type No XXXX Serial nr XXXXXXXXX fig 18 15 GB Warranty disclaimer Faults and damage caused directly or indirectly by incorrect operation m...

Page 16: ...environment and human health which could otherwise be caused by inappropriate waste handling of this product The symbol on the product or on the documents accompanying the product indicates that this...

Page 17: ...og kommer i livsfare Inden brug Inden du anvender dit nye apparat b r du l se brugsanvisningen grundigt Brugsanvisningen indeholder vigtige informationer vedr rende sikkerhed intallation drift og vedl...

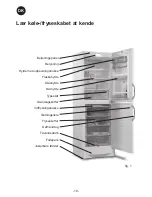
Page 18: ...abet at kende fig 1 Betjeningspanel Belysning Hylde med opbevaringsbokse Flaskehylde Glashylde D rhylde Typeskilt Gr ntsagskuffer Indfrysningsbakke T tningsliste Fryseskuffer D rh ndtag T vandsafl b F...

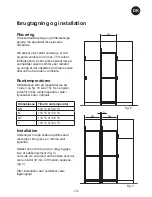
Page 19: ...ig 1 side 3 og fig 18 side 15 Den angiver indenfor hvilke rumtemperaturer k le frysekabet k rer optimalt Klimaklasse Tilladt rumtemperatur SN 10 C til 32 C N 16 C til 32 C ST 18 C til 38 C T 18 C til...
Page 20: ...mkring skabet fig 6 7 1650 1950 100 100 1560 1860 fig 6 fig 7 Skabet set fra oven N r skabet placeres ved siden af en v g skal man sikre at der er tilstr kkeligt plads til at d ren e kan bnes s meget...

Page 21: ...ndigt kan de bagerste f dder indstilles f r skabet s ttes p plads Kontroller med et vaterpas at skabet st r helt lige St r skabet p et bl dt underlag som f eks et tr gulv eller et t ppe b r man efter...

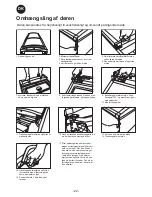
Page 22: ...tningslisten ikke bliver s varm at den smelter 13 S t den verste d r p plads 14 Toph ngslet monteres 7 DK D ren kan ndres fra h jreh ngt til venstreh ngt og omvendt p f lgende m de Omh ngsling af d r...

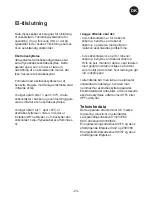
Page 23: ...den stikkontakt k le fryseskabet skal forbindes til I begge tilf lde skal der hvis stikkontakten er for trebenet stikprop benyttes en trebenet stikprop og lederen med gul gr n isolation skal tilslutte...

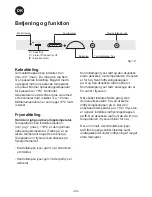
Page 24: ...tilsluttet Kontrollampen lyser gult n r Superfrys er aktiveret Termostatknap k l Termostatknap frys Belysning Kontrollampe Termometer 0 1 2 3 4 5 6 7 S S O I S Superfrys O Alarm off Superfrys off Akus...

Page 25: ...vare varer s som sm r og ost Flaskehylden Flaskehylden passer til b de store og sm flasker Gr ntsagsskuffer Gr ntsagsskufferne er ide lle til opbevaring af frugt og gr nt Hylden over gr ntsagsskuffern...

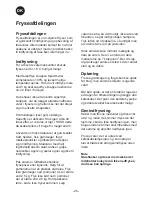
Page 26: ...varerne i luftt tte beholdere fryseposer eller lignende S rg for at portionerne har en praktisk st rrelse Frys ikke gr ntsager ned i portioner der er st rre end 2 5 kg Frys ikke k d ned i portioner d...

Page 27: ...ovenp i et par minutter 4 Tag madvarerne ud Opbevar dem i k leskabet eller indpakket Afrimning fig 16 12 DK i aviser s leds at de holdes s kolde som muligt 5 S t en sk l med varmt vand ikke kogende in...

Page 28: ...e lang holdbarhed Brug rent vand Efter reng ring af d rens t tningsliste b r du kontrollere om den fortsat slutter t t P kompressoren og i kompressorrummet fjernes st vet bedst med en st vsuger Ved at...

Page 29: ...tigt eller sidder i klemme Beholdere eller flasker ber re hinanden i skabet Indstil skabet med et vaterpas Ryk skabet v k fra k kkenel ementerne eller apparater som st r umiddelbart op ad skabet Kontr...

Page 30: ...rksom p at ved indgreb i apparatets opbygning ndring af apparatets komponentbestykning bortfalder Vestfrosts garanti og produktansvar og apparatet kan ikke lovligt anvendes Godkendelse anf rt p Vestf...

Page 31: ...r milj et og folkesundheden der kunne opst gennem uhensigtsm ssig bortskaffelse af dette produkt Symbolet p produktet eller p dokumenterne der ledsager produktet angiver at produktet ikke m bortskaffe...

Page 32: ...UK Vestfrost reserves the right to alter specifications without prior notice DK Ret til ndringer forbeholdes 91931030006 52044792...

Reviews: