EN - 50
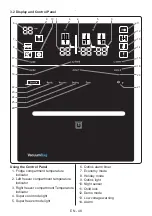
3.3.7 Freezer / Cooler 1 (ZONE 1)
To use the zone 1 compartment as a
freezer, press the 'zone1' button to set the
temperature of the bottom-left compartment
to -16, -17, -18, -19, -20, -21, -22, -23 or
-24 °C.
To use the bottom-left compartment as a
cooler, press and hold the 'zone1' button for
3 seconds. Then, set the temperature to 2,
3, 4, 5, 6, 7 or 8 °C.
3.3.8 Freezer (ZONE 2)
Press the 'zone2' button to set the
temperature of the bottom-left compartment
to -16, -17, -18, -19, -20, -21, -22, -23 or
-24 °C.
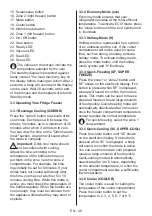
3.3.9 Child Lock (Key Symbol)
To activate the child lock, press and
hold the cooler and 'zone2' buttons
simultaneously for 3 seconds. The child
lock prevents changes from being made
to the settings as the buttons will be
deactivated. To deactivate the child lock,
press and hold the cooler and 'zone2'
buttons simultaneously for 3 seconds.
3.3.10 Screensaver (s.saver)
This function saves energy by switching
the lights on the electronic display panel
off. To activate the screensaver, press and
hold the 's.saver' button for 3 seconds. To
deactivate the screensaver, press and hold
the 's.saver' button for 3 seconds.
3.3.11 Night Sensor
This night sensor function saves energy by
switching the lights inside the refrigerator
off if there is sufficient illumination in the
room. To activate this function, press and
hold the mode and 's.saver' buttons for 3
seconds.
3.3.12 Demo Mode
This mode is reserved for service and is not
related to the use of refrigerator.
3.3.13 Alarm
If an alarm light illuminates, contact an
authorised service centre.
Press the 's.saver' button to switch the
alarm sound off when there is an alarm and
an exclamation mark on the display. The
exclamation mark will continue to show on
the electronic display panel until the error
is fixed.
3.3.14 Compartment On-Off Mode
To turn off Zone1, Zone2 and the cooler
at the same time;
Press and hold the [mode] and [cooler]
buttons simultaneously for 3 seconds.
All figures indicating the part turned off
will disappear on the digital indicator
panel.
or
Press and hold the [mode] and [zone 2]
buttons simultaneously for 3 seconds.
All figures indicating the part turned off
will disappear on the digital indicator
panel.
To turn off the Zone1 compartment;
Press and hold the [mode] and [zone 1]
buttons simultaneously for 3 seconds. All
figures indicating the part turned off will
disappear on the digital indicator panel.
To reactivate the turned-off compartment,
use the same combination of buttons.
3.3.15 Using a Freezer Compartment as
a Cooler Compartment
The bottom left compartment on the
appliance can be used either as freezer or
as a cooler.
Press and hold the [zone 1] button for
3 seconds to change the bottom-left
compartment from a freezer to a cooler.
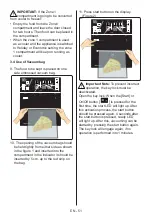
IMPORTANT:
If the Zone1
compartment is going to be converted
from a freezer to a cooler:
•
Empty the food from the Zone1
compartment and leave the door closed
for four hours. Then food can be placed
in the compartment.
• Baskets and/or shelves removed from the
compartment should be re-fitted.
Similarly, in order to utilize any of bottom
compartments used as a cooler, as
freezers again, press and hold the related
compartment button for 3 seconds.
Summary of Contents for VRM906NFEX
Page 1: ...RU VRM906NFEX Multizone Fridge Freezer User Manual EN...
Page 2: ...RU 2...
Page 4: ...RU 4 1 1 1 R600a...
Page 5: ...RU 5 R600a...
Page 6: ...RU 6 16 8 3 8 0 3 3 8...
Page 7: ...RU 7 8 14 2000...
Page 8: ...RU 8...
Page 9: ...RU 9 1 2 220 240 50 50 5 2 150 90...
Page 10: ...RU 10 75 1 3...
Page 11: ...RU 11...
Page 13: ...RU 13 8 3 3 1 No Frost No Frost No Frost...
Page 14: ...RU 14...
Page 18: ...RU 18 3 3 13 s saver 3 3 14 1 2 3 2 3 1 1 3 3 3 15 1 3 1 1 3 1 1 1 1...
Page 19: ...RU 19 3 4 9 10 1 5 11 Start 2 4 1 12 3 3 5 13 Ready 14 15 Seal...
Page 20: ...RU 20 16 Seal done Done 1 Start Ready Start Start 3 1 18 2 3 7 4 7 cm...
Page 21: ...RU 21 4 5 3 5 cm 5 6 7 8 40 9 10 11 12 1 13...
Page 22: ...RU 22 14 15 16 17 18 1 2 3 4 5...
Page 23: ...RU 23 X X X X...
Page 24: ...RU 24 X 2 X X...
Page 25: ...RU 25 X 1 X X 1 X X 2 1 2 X X X X...
Page 26: ...RU 26 2 X 20 C 1 2 3 4 5 6 7 8 9 10 1 2...
Page 27: ...RU 27 3 4 5 6 7 3 6 10 C 24 5 5 16 C 43 T N o C T 16 43 C ST 16 38 C N 16 32 C SN 10 32 C...
Page 28: ...RU 28 42 C 23 C 24 C 16 C 17 C 18 C 19 C 20 C 21 C 22 C 3 7 3 7 1 3 4 2 3 7 2 0 C 0 C 1 2 0 C...
Page 29: ...RU 29 3 7 3 4 4 1 4 C 6 C 1 2...
Page 30: ...RU 30 1 2 3 3 4 1 1 2 4 2 18 C 20 C...
Page 31: ...RU 31...
Page 34: ...RU 34 5 1 6...
Page 35: ...RU 35 7 1 2 3 4 o C 1 2 1 2 170...
Page 36: ...RU 36 No Frpst...
Page 37: ...RU 37 4 5 8 1 2 3 4 5 6 7...

