background image

TABLE OF CONTENTS


Rev. 5.24.2022 

LAD-RAF, MANUAL 

TABLE OF CONTENTS


Copyright 2022 Vestil Manufacturing  

Page 13 of 19 


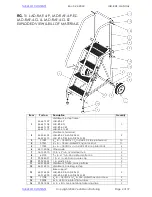
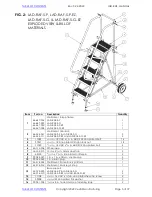
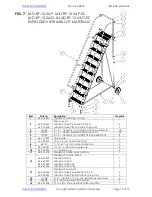
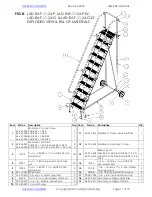
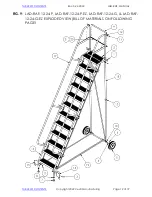
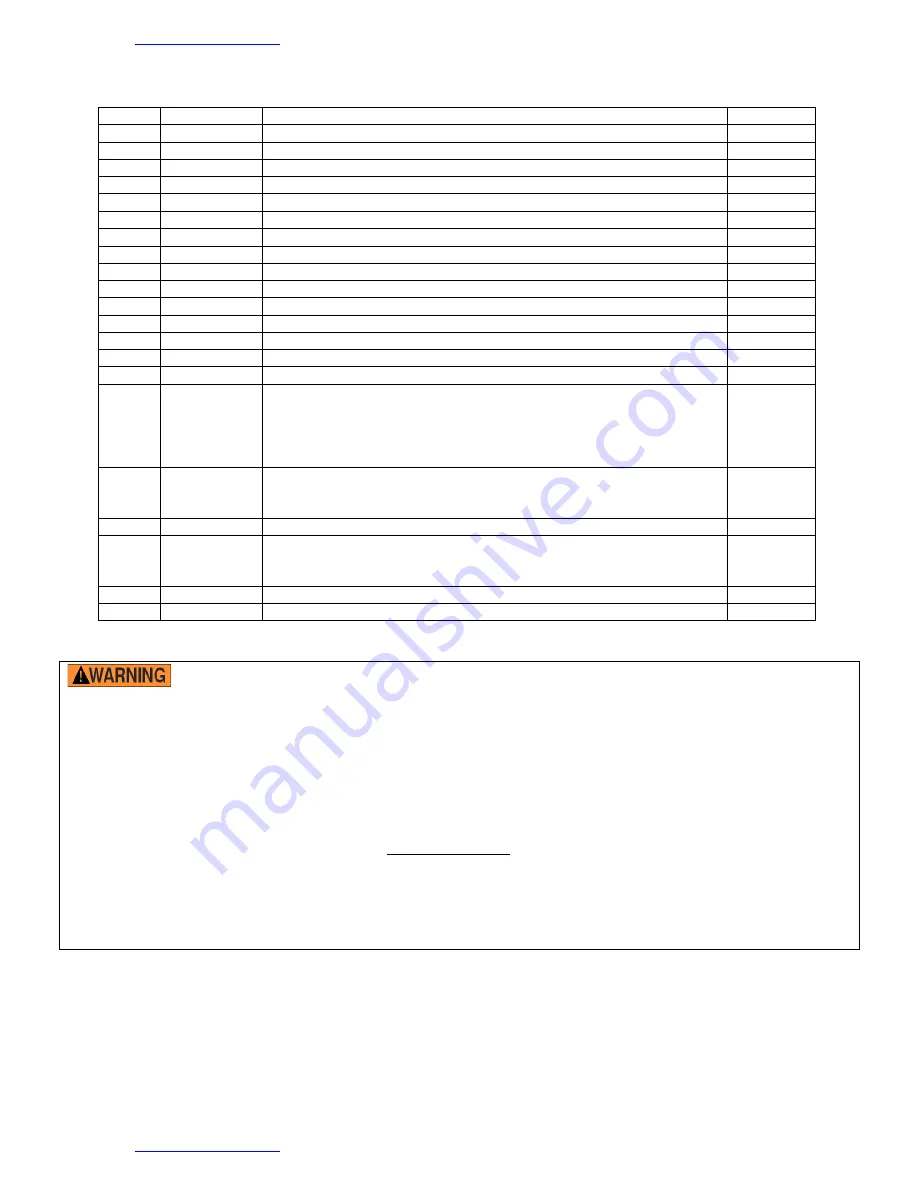
BILL OF MATERIALS 

LAD-RAF-12-24-P, LAD-RAF-12-24-P-EZ, LAD-RAF-12-24-G, & LAD-RAF-12-24-G-EZ  


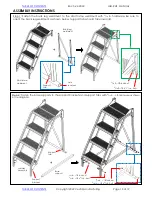
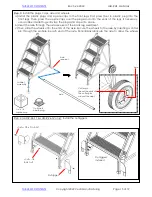
ASSEMBLY INSTRUCTIONS 

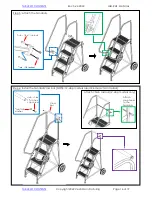
  Read the entire instruction manual before assembling this ladder. Improper assembly might 

make the ladder unsafe to use. 


Visually inspect the ladder components 

prior to assembly

.  Look at each part of the ladder immediately 

after you receive the package from the shipper.  Look for damage that might have occurred during 

shipping. DO NOT assemble or use the ladder stand if you notice any damage to one or more of the steps 

or to any other structural element (step weldment, back leg weldment, base supports, and handrails) of the 

ladder.  Using the ladder stand despite weakness of a frame member could result in serious personal injuries.  

DO NOT use your ladder stand if any of the hardware (bolts, nuts, etc.) is damaged.  Contact Vestil to order 

replacement parts. 


DO NOT assemble the ladder by yourself.  At least 2 people are needed for assembly. 


Read the entire instruction manual before assembling this ladder. 


DO NOT use the ladder if a wheel is damaged.  Damaged wheels might cause the ladder to wobble and 

tip when used. 


ALWAYS use proper lifting techniques to minimize back strain if you must pick up ladder parts or move the 

ladder. 


The following tools are necessary to assemble the ladder: 

1.


2 crescent wrenches (1/2in. or adjustable to 1/2in.) 

2.


Rubber mallet 

3.


Pliers, preferably needle nose, to bend arms of cotter pins  

4.


Proper work clothing, eye protection, gloves 

5.


Sturdy wall no shorter than 8 feet high 

6.


At least 30ft by 10ft of floor space is required to raise or collapse the ladder 

7.


(If indoors) ceiling at least 16ft high. 


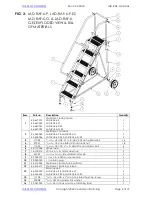
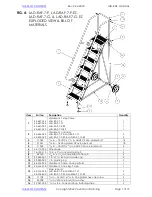
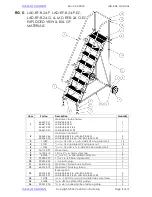
Item 

Part no. 

Description 

Quantity 

11059 

5

/

16

 in. – 18 UNC x 1

1

/

2

 in. #2 zinc-plated bolt 

18 

37021 

5

/

16

 in. – 18 #2 zinc-plated nylon lock nut 

22 

11055 

5

/

16

 in. – 18 x 1 in. HHCS #2 zinc-plated bolt 

44-112-007  Wheel axle 

16-132-310  10 in. x 2

1

/

2

 in., 16mm steel hub wheel  

65125 

2

/

16

 in. x 1

1

/

2

 in. zinc-plated cotter pin  

99-024-027  1 in. x 1 in., 60 Duro. square cap 

99-025-025  1 in. plastic plug 

44-514-314  Weldment, frame, back platform 

10 

11053 

5

/

16

 in. – 18 x 

3

/

4

 in. HHCS #2 zinc-plated bolt 

11 

11108 

3

/

8

 in. – 16 x 1

3

/

8

 in. zinc-plated hex cap screw 

12 

33008 

3

/

8

 in. USS zinc-plated flat washer 

13 

99-051-005 

1

/

2

 in. x 8 in. hook-and-loop fastening strap 

14 

44-514-310  Assembly, outrigger, right 

15 

44-514-311  Assembly, outrigger, left 

16 


44-647-021 

44-647-029 

44-647-037 

44-647-0 

Weldment, 12-step frame: 

LAD-RAF-12-24-P 

LAD-RAF-12-24-G 

LAD-RAF-12-24-P-EZ 

LAD-RAF-12-24-G-EZ 


17 


44-524-048 

44-524-054 

Weldment, handrail: 

LAD-RF-12-24-P & LAD-RF-12-24-G 

LAD-RF-12-24-P-EZ & LAD-RF-12-24-G-EZ 


18 

44-514-323  Weldment, back leg 

19 


44-014-403 

44-014-516 

Base support: 

LAD-RF-12-24-P & LAD-RF-12-24-G 

LAD-RF-12-24-P-EZ & LAD-RF-12-24-G-EZ 


20 

99-145-031 

3

/

16

 in. chain 24 in. long 

21 

08-145-008 

1

/

4

 in. snap hook 


Summary of Contents for LAD-RAF Series

Page 1: ...line at https www vestil com page parts request php Electronic Copies of Instruction Manuals Additional copies of this instruction manual may be downloaded from https www vestil com page manuals php V...

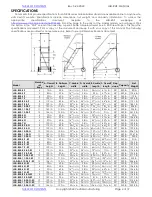
Page 2: ...n 28 in 451 4 in 523 4 in 58 350 lb 120 2 lb LAD RAF 7 G 7 100 in 70 in 1613 16 in 28 in 511 2 in 601 8 in 58 350 lb 133 8 lb LAD RAF 8 24 G 8 110 in 80 in 239 16 in 341 4 in 573 4 in 663 8 in 58 350...

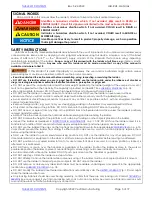
Page 3: ...ladder DO NOT increase the height of the platform or of a step by standing on other objects placed on the ladder Inspect the ladder as described in INSPECTIONS MAINTENANCE on p 17 18 DO NOT use the l...

Page 4: ...6 in 18 UNC x 3 4 in HHCS 2 zinc plated bolt 4 6 44 112 006 Wheel axle 1 7 16 132 310 10 in x 21 2 in 16mm steel hub 2 8 65125 3 16 in x 11 2 in zinc plated cotter pin 2 9 99 024 027 1 in x 1 in 60 Du...

Page 5: ...3 5 16 in 18 UNC x 3 4 in HHCS 2 zinc plated bolt 4 6 44 112 006 Wheel axle 1 7 16 132 310 10 in x 21 2 in 16mm steel hub 2 8 65125 3 16 in x 11 2 in zinc plated cotter pin 2 9 99 024 027 1 in x 1 in...

Page 6: ...3 5 16 in 18 UNC x 3 4 in HHCS 2 zinc plated bolt 4 6 44 112 006 Wheel axle 1 7 16 132 310 10 in x 21 2 in 16mm steel hub 2 8 65125 3 16 in x 11 2 in zinc plated cotter pin 2 9 99 024 027 1 in x 1 in...

Page 7: ...3 5 16 in 18 UNC x 3 4 in HHCS 2 zinc plated bolt 4 6 44 112 006 Wheel axle 1 7 16 132 310 10 in x 21 2 in 16mm steel hub 2 8 65125 3 16 in x 11 2 in zinc plated cotter pin 2 9 99 024 027 1 in x 1 in...

Page 8: ...053 5 16 in 18 UNC x 3 4 in HHCS 2 zinc plated bolt 4 6 44 112 007 Wheel axle 1 7 16 132 310 10 in x 21 2 in 16mm steel hub 2 8 65125 3 16 in x 11 2 in zinc plated cotter pin 2 9 99 024 027 1 in x 1 i...

Page 9: ...UNC x 11 2 in HHCS 2 zinc plated bolt 18 4 37021 5 16 in 18 zinc plated 2 nylon lock nut 22 5 11053 5 16 in 18 UNC x 3 4 in HHCS 2 zinc plated bolt 4 6 44 112 007 Wheel axle 1 7 16 132 310 10 in x 21...

Page 10: ...in 18 UNC x 3 4 in HHCS 2 zinc plated bolt 4 6 44 112 007 Wheel axle 1 7 16 132 310 10 in x 21 2 in 16mm steel hub 2 8 65125 3 16 in x 11 2 in zinc plated cotter pin 2 9 99 024 027 1 in x 1 in 60 Dur...

Page 11: ...nt back leg 11 step 1 3 11059 5 16 in 18 UNC x 11 2 in HHCS 2 zinc plated bolt 18 13 44 014 402 44 014 515 Base support LAD RAF 11 24 P LAD RAF 11 24 G LAD RAF 11 24 P EZ LAD RAF 11 24 G EZ 2 4 37021...

Page 12: ...v 5 24 2022 LAD RAF MANUAL TABLE OF CONTENTS Copyright 2022 Vestil Manufacturing Page 12 of 19 FIG 9 LAD RAF 12 24 P LAD RAF 12 24 P EZ LAD RAF 12 24 G LAD RAF 12 24 G EZ EXPLODED VIEW BILL OF MATERIA...

Page 13: ...assemble the ladder 1 2 crescent wrenches 1 2in or adjustable to 1 2in 2 Rubber mallet 3 Pliers preferably needle nose to bend arms of cotter pins 4 Proper work clothing eye protection gloves 5 Sturd...

Page 14: ...he back leg weldment as shown below support tabs should face inwards Step 2 Fasten the base supports to the support brackets and support tabs with 5 16in 18 hardware as shown in the diagrams 5 16 in 1...

Page 15: ...p the plugs and caps into place b Insert the axle through the axle receiver of the back leg weldment c Then slide the wheels onto the ends of the axle Secure the wheels to the axle by inserting a cott...

Page 16: ...e 16 of 19 Step 5 Attach the handrails Step 6 Install the handrail cross bar NOTE 12 step models also include a chain midrail Cross bar 3 8in flat washer 3 8in 16 x 13 8in hex cap screw Attach chain m...

Page 17: ...must solidly contact the ground The caps are provided to help the ladder resist movement during use Confirm solid contact between the entire bottom surface of each cap and the floor before climbing th...

Page 18: ...vement Outriggers 11 and 12 step models Examine the outriggers and confirm that they are securely fastened to the step weldment Both outriggers should make solid contact with the ground i e the ladder...

Page 19: ...lic pumps motor controllers and cylinders It also covers defects in original parts that wear under normal usage conditions wearing parts such as bearings hoses wheels seals brushes and batteries How l...

Reviews: