Rev. 3/7/2022
VST-4-Y, MANUAL
Copyright 2021 Vestil Manufacturing Corp. Page 7 of 10
4.
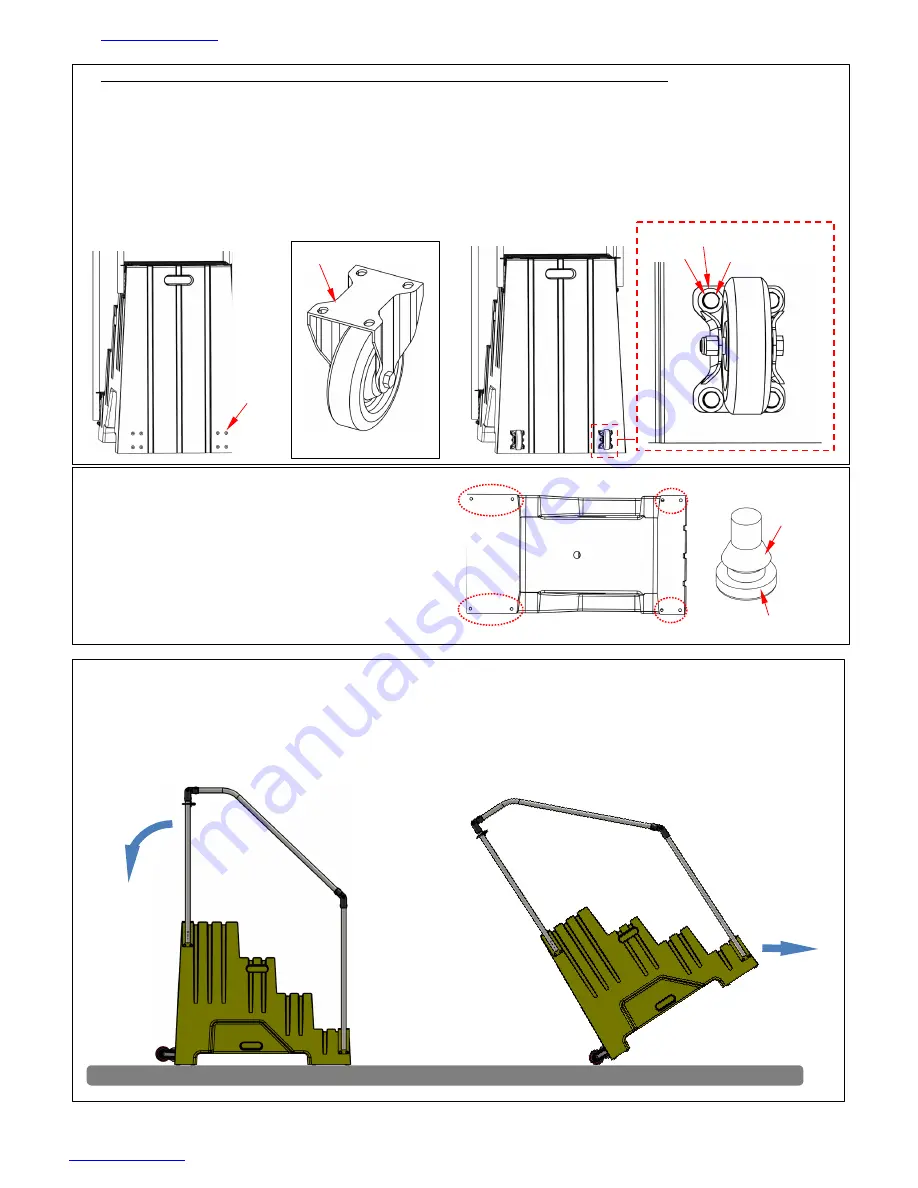
Fasten casters (16-132-197) to the back of the steps with 1/4” hardware
a.
Put a 1/4” flat washer (33004) followed by a 1/4” lock washer (33618) onto each of 8
bolts (11007). Bolts are 1/4”-20 x 1.25”.
b.
Eight (8) pilot holes are provided in the rear wall of the steps.
c.
Fasten each caster to the rear wall with four sets of bolts (11007), flat washers (33004),
and lock washers (33618). Insert the bolts through the bolt holes in the caster mounting
brackets and wind them into the pilot holes. NOTE: Expanding insert nuts (99-145-196)
are preinstalled in the pilot holes.
5.
Install the molded rubber feet (14-145-179)
a.
Lay the steps on the left or right side.
b.
Locate the 8 openings that receive
the feet (circled).
c.
Press a foot into each opening. The
yellow floor material of the steps
should seat between the floor pad
and the retaining ring.
Rear view
Mounting bracket
Caster
Pilot
holes
Bolt
Lock washer
Retaining
ring
Floor pad
USING THE STEPS
Only use the steps on level, even ground. Make sure that all (8) molded feet make solid
contact with the ground before standing on the steps.
Move the steps by grasping the handrail posts at the top of the steps. Pull the handrails
towards you to tip the steps onto the casters. Push the steps to the desired location.
Flat washer


