8
9
THE ICE-DUCER™ SYSTEM*
The Ice-Ducer system provides a quick and easy way to set up the
transducer for ice fishing. All of the adjustments needed to find the true
perpendicular point are done automatically. To use the Ice-Ducer,
simply adjust the transducer to the desired depth and drop the
assembly in the ice hole.
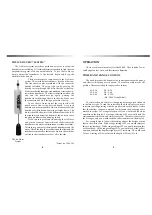
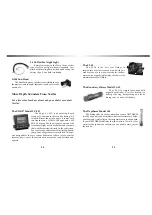
There are three main components to the Ice-Ducer
system. They include the transducer, float, and the stop.
The transducer comes assembled with the connector
already installed. The stop is put on by passing the
transducer cord through the slit in the side of the stop.
Make sure that the tapered or rounded end is facing down,
toward the transducer. The float is installed between the
stop and the transducer by, again, passing the
transducer cord through the slit in the side. Make sure
the countersunk hole is facing up towards the top.
To use the Ice-Ducer, adjust the stop to allow the
transducer to float at the desired depth. A six inch
minimum is recommended in order to make sure that the
transducer will indeed be pointing straight down. The
most it should be down is to the bottom of the ice hole. If
the transducer is below the bottom of the ice it can cause
tangling problems when bringing in fish.
If you run into problems when using the Ice-Ducer
and you can't see your bait try this, rub the bottom of the
transducer with water to eliminate any residue or air film.
This insures good contact between the transducer and the
water. Check the length of cord between the float and the
transducer to make sure there are no kinks in the cord that
will cause the transducer to shoot off to the side
*Patent no. 5,546,362
OPERATION
There are three main controls for the FL-8SE. They include Power
and Range control, Gain, and Interference Rejection.
POWER AND RANGE CONTROL
The knob located at the bottom of the control panel turns the unit on
and selects which range is to be used. The center position is the Off
position. There are six depth ranges to choose from.
S1 - 0-20'
D1 - 0-30'
S2 - 0-40'
D2 - 0-60'
S4 - 0-80'
D4 - 0-120'
(D8 - 0-240' Deep Model)
To activate the unit and select the appropriate range turn the knob
to the left or right. To read the correct depth on the display you must
correlate your range setting with the proper scale on the display. Notice
that the shallow ranges are marked in white and the deep ranges are
marked in yellow. For a range selection of S1 you would read the white
numbers on the display. For a range selection of S2 you would read the
white numbers times two, and times four for S4. The same is the case for
the D ranges, only you would read the yellow numbers on the display.
For example, figure J shows the leading edge of the bottom at nine
feet on the white scale. With a range setting of S1 you would interpret
this as nine feet deep. With a range setting of S2 you would interpret this
as 18 feet deep. With a range setting of D1 you would look at the yellow
numbers and read the depth as slightly over 13 feet deep. D2 would read
26 feet. A setting of D4 would read the depth at 52 feet (13 x 4).
The Ice-Ducer
System

