4
98MANAL544 Rev. C 3/21/17
BASIC OPERATION & INTERNAL CALIBRATION CIRCUIT
(See Maintenance and Repair for calibration frequency recommendations.)
Note:
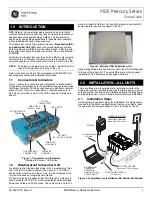
The casting of the module has raised numbers at the adjustment screw positions. Those numbers
reflect the following function of the assigned screw.
Screw 1: Top Left, Coarse Zero Pot (CCW - Lower, CW - Raise)
Screw 2: Top Right, Fine Zero Pot (CCW - Lower, CW - Raise)
Screw 3: Lower Left, Internal Cal. Activation Pot (12 or 6 o’clock position – Disengage; 3 o’clock position - Engage)
Screw 4: Lower Right, Span Adjustment Pot (CCW - Lower, CW - Raise)
1. Outside of using the calibration circuit or the availability of a metrology lab for obtaining a pressure
(Full Scale) reading, no object should be used to physically move the sensor.
2. Once proper connections and power are applied, the unit should begin to function.
3. Check the zero output (4.00 mA) with the performance certificate to verify readings. If it is out of
specification from the performance certificate, use the coarse and fine zero adjustment screws to
obtain the proper reading.
4. With no pressure applied, engage the calibration circuit by slowly rotating the calibration screw until
the current output rises to about 8.80 mA’s. Check the reading with the performance certificate. If
the reading is off, adjust the span screw to raise or lower the reading – return the calibration circuit to
the original position.
5. When making zero and/or span adjustments, there may be some interaction between the zero and
span readings - repeat adjustments if needed.
6. Always return the calibration screw to off or full CCW position before installing the transmitter into the
application. Note: This is a common reason for incorrect readings at start-up. The calibration circuit
must be deactivated in order for the product to perform properly.
7. Once the product has been tested and functionality verified, the power and meter connections may be
removed and the product reconnected to the instrumentation loop.
NON-STANDARD RANGE (NSR) CALIBRATION
NSR: A non-standard range is an alternate scaled reading as requested by the customer. Through the
use of a single transmitter, numerous pressure ranges can be set-up. The Model 544 can be scaled
down to any pressure range, from five times the original range. Only NSR requests for ranges less than
the sensor rated range are recommended and in most cases possible. The NSR is possible due to the
ability of the adjustment screws to alter where the zero and span will fall. Refer to the below example for
field NSR calibration.
NSR EXAMPLE
You have Viatran’s Model 544 with a standard range of 0 to 100 PSI. You would like to set an NSR of 0
to 50 PSI. Refer to the Performance Certificate and obtain the following:
Zero = 0 PSI = 4.00 mA
Full Scale = 100 PSI = 20.00 mA
Cal Value = 20.04 PSI = 8.81 mA
In order to recalibrate the transmitter, you must determine the cal reading in mA’s at the NSR range. This
is done by calculating what the cal output should be at the NSR range. For the example listed, the
standard calibration value is set to represent 20.04 PSI. Once internally set, the calibration (Cal) will
always represent this pressure.
Use the formula: Cal mA’s = [(16 x Standard Cal Pressure) / desired range] + 4
Substitute Actual Numbers: Cal mA’s = [(16 x 20.04) / 50] + 4
Cal mA’s = (320.64 / 50) + 4
Cal mA’s = 6.413 + 4 Cal mA’s = 10.413 mA’s
The zero would be set for 4.00 mA’s, and the calibration circuit will read (after adjusting span) 10.413
mA’s when activated. This would provide a new NSR range for the unit of 4-20 mA’s over 0-50 PSI.


