VIAVI Rail Kit | 9
VIAVI Rail Kit
Decide on a suitable location for the rack unit that will hold your chassis. It should be a
clean, dust-free area that is well ventilated. Avoid areas where heat, electrical noise and
electromagnetic fields are generated. A nearby grounded power outlet is required.
How to attach the rails
Rail assemblies must be attached to the chassis and rack before inserting the system into your
rack.
Prerequisite(s):
The box your chassis was shipped in should include:
♦
two sets of rail assemblies
♦
two rail mounting brackets
♦
mounting screws and washers to mount the system into the rack
This rail will fit a rack between 26.5" and 36.4" deep.
1.
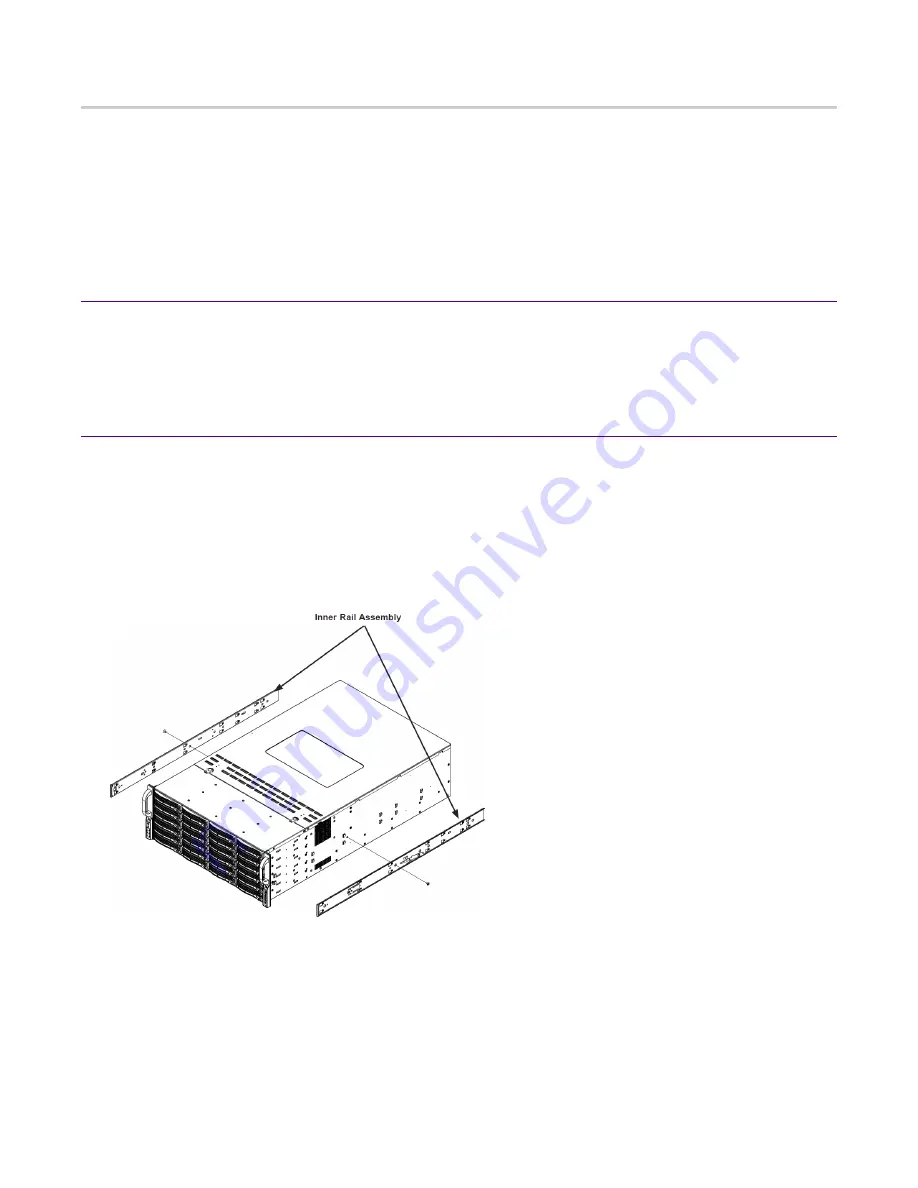
Identify the inner rack rails.
The chassis package includes one pair of rack rail assemblies in the rack mounting kit.
Each assembly consists of an inner rail that secures to the chassis and an outer rail that is
attached directly to the rack. The inner rails are etched with “L” (Left side) and "R" (Right
side). The rail is on the correct side and mounted correctly if the lettering if face-up.
Figure 8: Rail kit inner assemblies
2.
Identify the left and right side inner rails. Place the correct inner rail on the side of the
chassis, aligning the hooks of the chassis with the inner rail holes. Make sure the rail faces
"outward" so that it will fit with the rack's mounting bracket.
3.
Slide the rail toward the front of the chassis to hook the inner rail onto the side of the
chassis.
4.
(Optional) If desired, secure the rail with two flat head M4 x 4mm screws (and washers) as
illustrated.
5.
Repeat for the other inner rail.


