Limit Function
22
2
Setting by Weighing Actual Samples
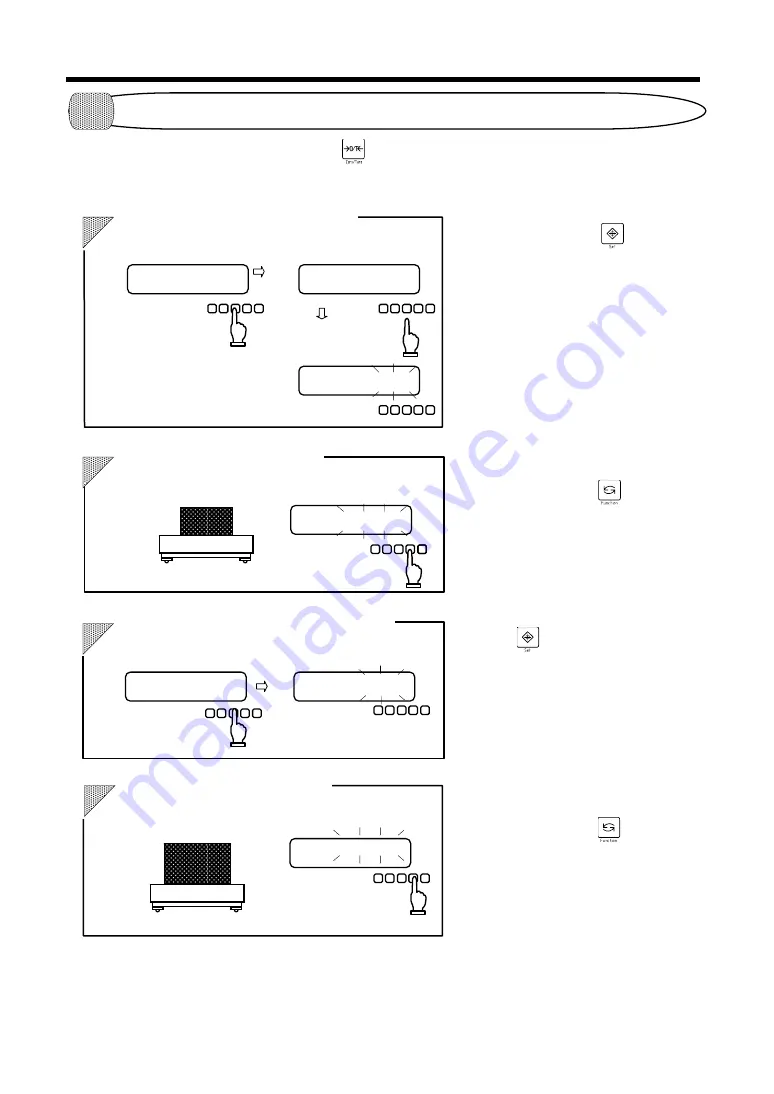
If zero is not shown in the display, press the key to make the display show zero before starting
the procedure. If a container is used, perform the taring process to make the display show zero.
Press and hold the key for
approximately 3 seconds. When
“
” is displayed, release the
finger. Now the lower limit value can be
set.
The judgment display “LO” is flagged with
the “
W
” mark and blinks.
Place the sample for the lower limit value
on the scale and press the key.
The display disappears temporarily. When
the lower limit value is saved, the display
blinks.
Press the key, and the upper limit
value can be set.
“
” is displayed temporarily
and the judgment display “HI” is now
flagged with the “
W
” mark.
Place the sample for the upper limit value
on the scale and press the key.
The display disappears temporarily. When
the upper limit value is saved, the display
blinks.
g
HI
OK
LO
g
W
HI
OK
LO
W
g
HI
OK
LO
HI
OK
LO
1
W
2
W
W
HI
OK
LO
HI
OK
LO
g
3
g
HI
OK
LO
W
4
Start setting the limit values.
Set the lower limit value.
Start setting the upper limit value.
Set the upper limit value.
Start entering the lower limit
value.
Press and hold.
Release the finger.
Call the setting.
The set value is displayed.
Place the sample on
the scale.
Set the lower limit value.
Start setting the upper limit value.
The set value is displayed.
Place the sample on
the scale.
Set the upper limit value.

