ESS3/ESS4
- 11 -
SECTION 1
8.
LEAK TEST
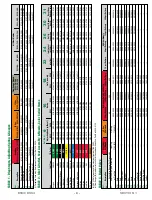
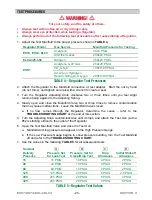
a. With the Test Gun closed and the Manifold Valve open, adjust the Regulator to
deliver
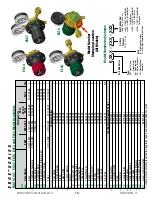
A
PSIG.
b. Close the Manifold Valve and turn the Adjusting Knob one turn counterclockwise.
c. Observe the Low Pressure and High Pressure Gauges for five (5) minutes:
1. If the High Pressure Gauge reading drops, there is a leak in the Cylinder Valve,
Inlet Connection, High Pressure Gauge or the rear plugged high pressure port.
2. If the Low Pressure Gauge reading drops, there is a leak in the downstream
equipment, Low Pressure Gauge, Outlet Connection or Relief Valve port.
3. If the High Pressure Gauge reading drops at the same time the Low Pressure
Gauge reading increases, there is a leak in the Regulator Seat.
d. If any leaks are found, isolate if possible using a liquid leak detector, disassemble and
repair or replace parts as needed, and start the test over again. Refer to
TROUBLESHOOTING CHART
for more detailed cause and possible corrective
action information.
9.
DROP TEST
a. With the Test Gun closed and the Manifold Valve open, adjust the Regulator to
deliver
B
PSIG.
b. Open the Test Gun and note the new indicated delivery pressure. Drop (indicated
pressure static minus indicated pressure flowing) must not exceed
C
PSIG.
10.
CREEP TEST / SLOW SHUT-OFF TEST
a. With the Test Gun closed and the Manifold Valve open, adjust the Regulator to
deliver
B
PSIG.
b. Open and close the Test Gun several times to stabilize the Regulator. Leave the test
gun closed.
c. Observe the Low Pressure Gauge for five (5) minutes:
1. During the first minute, an initial shut-off increase of
D
PSIG is permissible.
2. During the next 4 minutes, no further increase (creep) is allowed.
11. Close the Manifold Valve and release all pressure from the Regulator by opening the
Test Gun. Turn the Adjusting Knob counterclockwise until it stops.
12. Remove the Test Gun from the Regulator.
13. Remove the Regulator from the Test Manifold. The Regulator is now ready to use.


