background image

User Manual for ICHA Freezers 

Victory

Rev. 09/21

Victory

8

UNPACKING AND SET UP

CAUTION

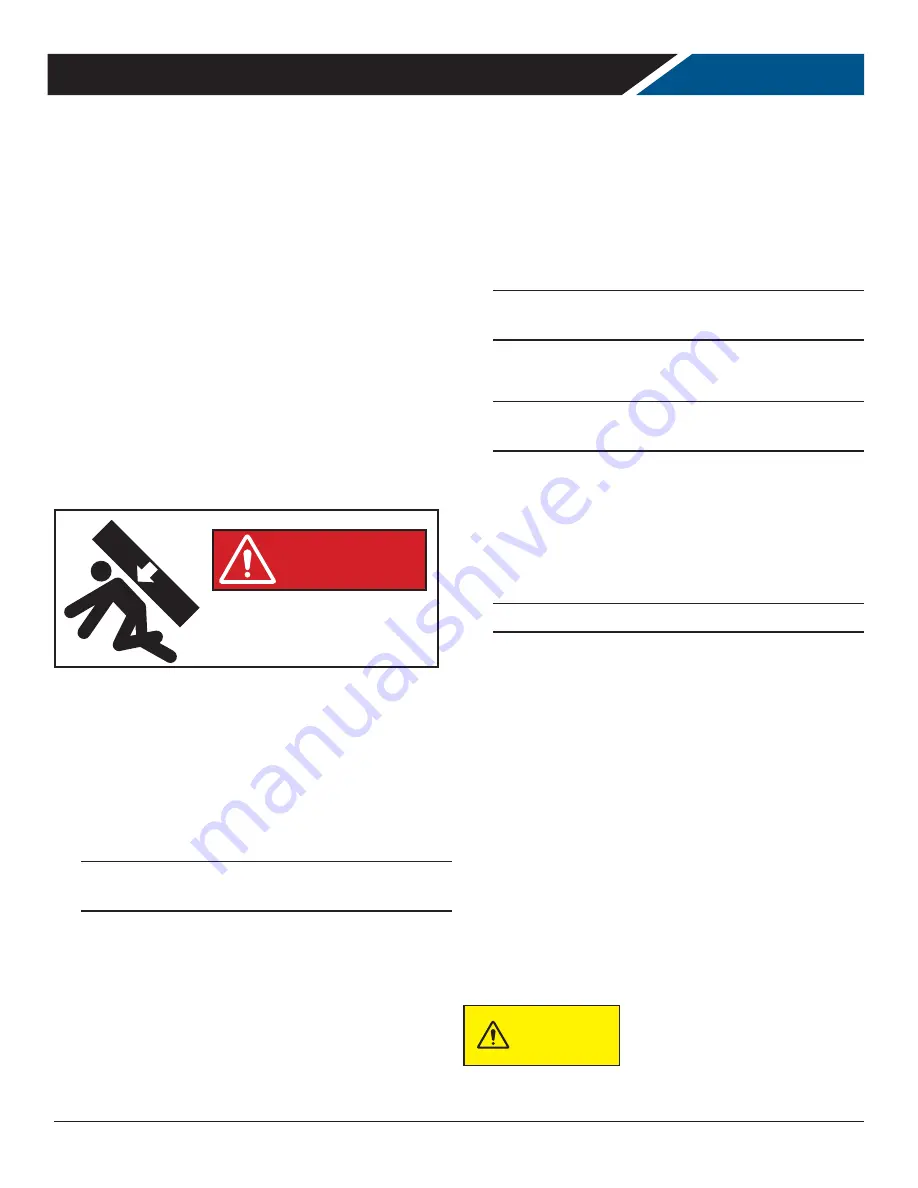
Carefully inspect the shipping carton for damage. This is the only time that shipping damage may be claimed. If damage is 
suspected, open the carton immediately and, if there is damage, retain the carton and contact the shipper to make a claim. 
Do NOT contact the manufacturer.

Uncrating

Tools Needed: ¾" box wrench, adjustable wrench, level, flat 
head screw driver, and box cutter.

1.  Remove the cardboard top capping, all clear tape, 

and all staples including those at the bottom of the 
cardboard carton and skid.

2.  Start from the top of the carton. Using the box cutter, 

carefully make one continuous cut to the bottom of the 
skid. Remove cardboard carton and discard.

3.  Move unit as close to final position as possible before 

removing the skid.

Note: The skid must be removed before the casters or 
legs can be attached.

Do NOT tip unit on its front or sides. If tipped onto the back, 
unit must not be started for 3 hours.

Note: additional clear plastic protective wrap is applied 
directly to any product with a glass door.

Skid Removal and Caster Attachment

Tip the unit forward and remove the skid.

4.  Remove the shipping bolts using the ¾" box wrench 

while cabinet is held in one direction. Repeat the 
process while the cabinet is held in the opposite 
direction.

5.  Tilt the cabinet in one direction approximately 8" and 

block it securely with pieces of 2x4 lumber or other 
suitable material.

Note for the following: None of the threads on the leg or 
caster stem should be visible once screwed in.

6.  Thread the stem casters or legs into the ½ -13 holes in 

the bottom of the cabinet.  Tighten by hand as much 
as possible.  Some models may already have levelers 
installed.  If so, then the levelers will need to first be 
removed and discarded. 

Note: 3 inch casters may NOT  be used

7.  Once the caster or leg cannot be turned any further, 

use a 3/4 inch wrench to tighten the nut in between the 

mounting plate and the wheel of the caster until snug.

8.  Repeat this procedure with unit secured in the opposite 

direction so as to access the remaining legs/casters/

levelers

9.  If plate casters or legs are installed instead of stem 

casters or legs, then repeat step 3 above and secure 

the plate with either #14  AB screws, or ¼-20 screws, 

depending upon which are required.

10.  If levelers are employed, then repeat step 3 above and 

thread the leveler in place. Then repeat step 5.

Leveling

Cabinets must be leveled when installed. Level should be 
measured on the headrail.

Failure to level your cabinet may result in door not sealing, 
closing correctly, or condensed water not draining properly.

For cabinets with legs, rotate the foot of the leg with an 
adjustable wrench to achieve desired height for leveling.

For cabinets with casters, level by placing large washers in 
between the ½' stud and the holes in the bottom of the case.

Do NOT loosen casters to level the 
cabinet. Casters MUST be tightly 
secured to cabinet for full strength 

Install or attach any accessories that will be used  Remove 
any plastic covering the stainless steel.

Risk of personal injury.  

Unit must be securely supported 

while attaching casters or legs.

WARNING

Summary of Contents for CARPIGIANI ICHA-1D-S1-EW-HD-HC

Page 1: ...S for all Hydrocarbon Ice Cream Hardening Freezers ICHA 1D S1 EW HD HC 3779 CHAMPION BLVD WINSTON SALEM NC 27105 Phone 888 845 9800 Fax 800 253 5168 Web victoryrefrigeration com 809 232A 9 29 2021 SEE...

Page 2: ...information is located with this manual Please complete the card and submit it to Victory within TEN days of installation Failure to properly register equipment may limit or void the warranty Victory...

Page 3: ...ers There may be pinch points near the door hinges Maintenance Do NOT Clean a frozen evaporator with a sharp object Clean a dirty condenser with a sharp object Store gasoline kerosene or any other fla...

Page 4: ...necessary to move the Freezer after removal from the skid remove all doors and carefully push the unit at a point of no more than 36 from the bottom to avoid damage CAUTION SAFETY Push ONLY below the...

Page 5: ...in any way Alterations or part substitutions will void the warranty Limitations The machine is designed for use indoors in a controlled environment It must be kept dry not overheated or subjected to...

Page 6: ...d 7 2 each 130 4 59 These models have two refrigeration systems and each is equipped with a 5 15P plug Charge numbers are for each system Height includes legs PRODUCT INFORMATION Freezer Capable Of Ma...

Page 7: ...ht side 6 0 in at the bottom for legs Do NOT use 3 inch casters on this model Floor Load the floor on which the Freezer is located must be even and level free from vibrations and strong enough to supp...

Page 8: ...one of the threads on the leg or caster stem should be visible once screwed in 6 Thread the stem casters or legs into the 13 holes in the bottom of the cabinet Tighten by hand as much as possible Some...

Page 9: ...ntion bar facing up Be careful not to dislodge clips during installation 6 Place shelves so that the retaining tab on the clip captures the shelf as shown 7 Confirm that the shelf is resting on ALL 4...

Page 10: ...prong on electrical plug Initial Start Up Plug the power cord into the proper power supply The cabinet will soon begin to blow warm air out of the top area and cool air will flow from the inside blow...

Page 11: ...ere is no set time for defrost Push and immediately release the melting or defrost button for a manual defrost Note Holding the defrost button in too long will shut the controller off The internal fan...

Page 12: ...wired to the Fan Contact The Evaporator Fan turns off when the Compressor is not running and when door is opened while Compressor is running The Evaporator Fan is wired to the Fan Contact ERC 112 Term...

Page 13: ...d Off No Alarm Fan LED Compressor LED On fixed Fan active On fixed Compressor active Off Fan Off Flashing Delay protection or activation blocked Off No Alarm Keyboard Functions UP DEFROST ESC SELECT O...

Page 14: ...9 21 Victory 14 Control Panel Connections Changing the Set point Note When the controller is in a Standby Mode a blue dot will be displayed as shown here To switch out of Standby Mode push and hold th...

Page 15: ...Con If configured cut in alarm relay beep the buzzer Condenser alarm dor Door open for more than Always Blink dor If configured cut in alarm relay beep the buzzer Door open alarm uHi Line voltage is h...

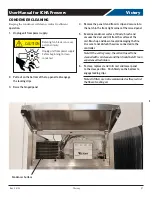
Page 16: ...Rinse with clean water 3 Dry with a soft cloth 4 Polish with a soft cloth wiping with the grain 5 Wipe weekly with stainless steel cleaner Weekly Interior Cleaning 6 Remove all food food related item...

Page 17: ...p and secure into the notch in the front right corner of the raised panel 5 Examine condenser surface if dusty brush and vacuum the dust and lint from the surface of the coil Brush up and down to avoi...

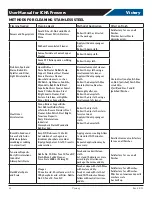
Page 18: ...ount of cleaner Heat tint or discoloration Penny Brite or Copper Brite Past NuSteel DuBois Temp or Tarnite Revere Stainless Steel Cleaner Allen Polish Steel Bright Tenacious Deposits Rusty Discolorati...

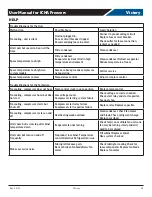
Page 19: ...hum Temp control stuck in open position Replace temp control No cooling compressor hums but does not start Low voltage to unit Compressor starting system failure Check voltage correct as needed Check...

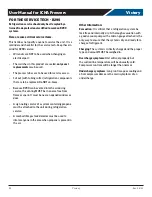
Page 20: ...MUST be in an area free from flame or spark It must be near an opened window or door A sign noting service of a system containing propane must be attached to the unit during refrigeration service A c...

Page 21: ...NTROLLER DETAIL 2 3 SEE CONTROLLER DETAIL WHITE BLACK COMPRESSOR DETAIL L E D LAMP DIGITAL INPUT SIGNAL START RELAY 10 COMP CONDENSER FAN C R S 2 4 OL 1 R C S C 2 SEE CONTROLLER DETAIL 4 SOLID DOOR MO...

Page 22: ...hours Any service requested outside of a servicer s normal working hours will be covered under this warranty at the normal rate and any additional overtime rate will be the responsibility of the equi...

Page 23: ..._________ Date Of Installation _________________ Cabinet Serial Number _____________________________________________ Location Of Product Business Name _________________________________________________...

Reviews: