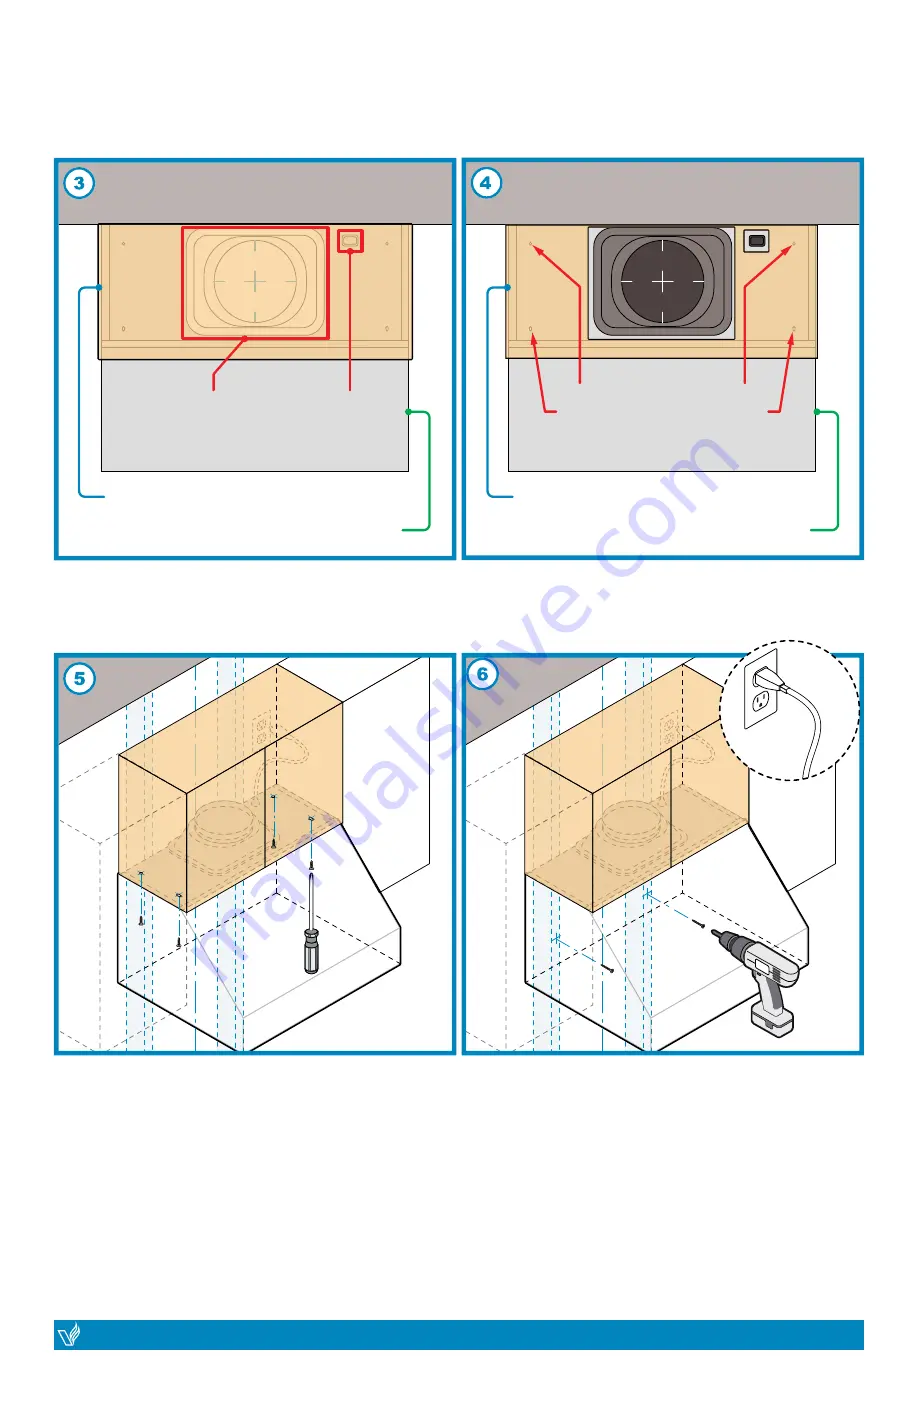
Back Wall
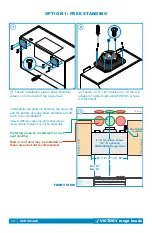
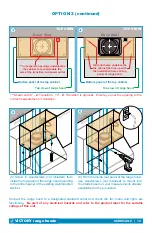
TOP VIEW
Bottom panel of the top cabinet
Top view of range hood
***Cut separate openings underneathe
the cabinet to accommodate the
size of the transition and power outlet
Back Wall
TOP VIEW
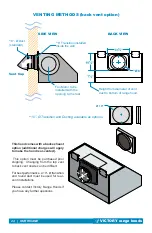
Drill pilot holes underneathe
the cabinet that line up with
the installation holes on top
panel of range hood.
Bottom panel of the top cabinet
Top view of range hood
Ceiling
Ca
binet
Wall
Centerline
Ceiling
Ca
binet
Wall
Centerline
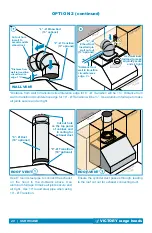
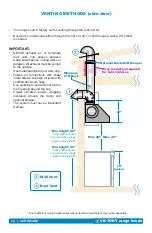
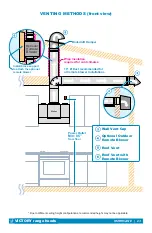
***Shown with 8” - Ø Transition. 10” - Ø Transition is optional. Ensure you cut the opening to the
correct measurement of transition.
(5) Screw in woodscrews (not included) from
inside the top panel of the range hood mounting
to the bottom panel of the existing wall-mounted
cabinet.
(6) From the inside rear panel of the range hood,
use woodscrews (not included) to mount into
the studs based on your measurements already
established in the pre-install.
Connect the range hood to a designated standard outlet and check the fan motor and lights are
functioning.
Be alert of any electrical hazards and refer to the product label for the suitable
voltage of this unit.
VICTORY range hoods
| HURRICANE
18
VICTORY range hoods
HURRICANE | 19
OPTION 2 (continued)

