10
4. POWERING UP
4.1 Connecting the battery
Close the connection to the battery, but
DO NOT
connect the solar array.
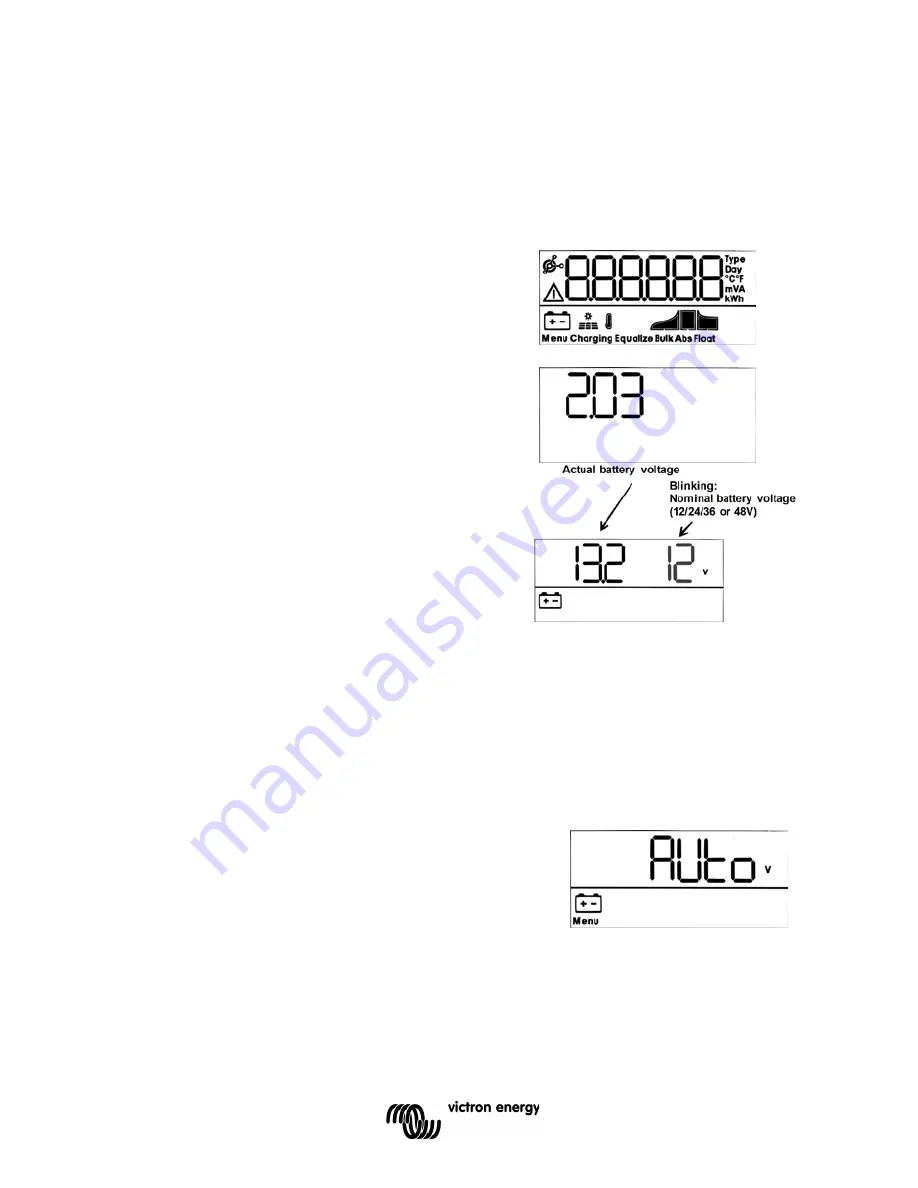
All the icons of the display will now light up:
This is followed by the software version:
In this case the Software-version is 2.03
After the software-version has been displayed, the
charger will start the system voltage recognition
phase.
The LCD-screen displays two values:
Left:
actual measured battery voltage.
Right:
system (= nominal battery) voltage (12/24/36
or 48V), blinking during the battery recognition
phase.
In some instances the charge controller might not reflect the correct system voltage (e. g. if
the battery is deeply discharged and the actual battery voltage is far below the nominal
voltage). In that case the system voltage can be adjusted manually, see section 4.2.
If the nominal battery voltage shown is correct, press the SETUP button to accept.
Alternatively, the battery voltage shown becomes final automatically after connecting the PV
array, when PV current starts flowing.
4.2 Adjusting system voltage
(adjust only if the system voltage as displayed is
wrong)
a. Press SETUP during 3 seconds: the “Menu” icon will light up.
b. Press the "-" or "+" button several times until the
screen shows “
”.
c. Press SELECT: “
” or the system voltage will
blink.
d. Use the "-" or "+" button to decrease or increase
system voltage.
e. Press SELECT to confirm the change, the value will stop blinking, and the change is
made final.
f.
Press SETUP during 3 seconds: the display is back in normal mode and the “Menu”
icon will disappear.
Note:
a 36V system will not be detected automatically and must be set with help of the
above mentioned procedure.


