14
5
CONFIGURING A MULTI OR QUATTRO
The Multi is controlled by the Lynx Ion, via the allow-to-charge and allow-to-discharge
contacts.
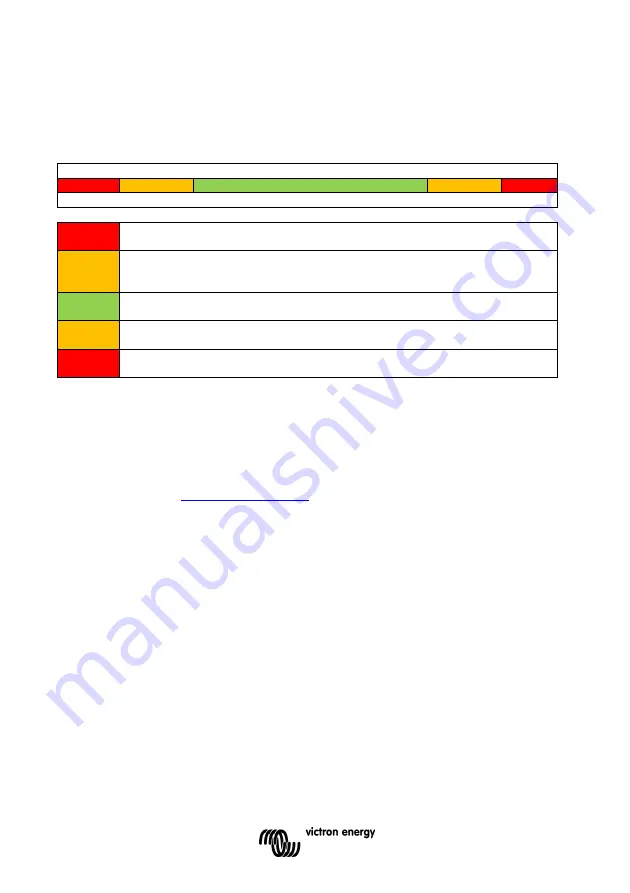
State of Charge
A
B
C
D
E
0% 100%
A
The batteries are discharged too low. The 350A safety contactor in the Lynx
Ion will open.
B
The batteries are discharged. The allow-to-discharge signal contact will open.
The Multi will switch to ‘Charger Only’, to prevent further discharging the
batteries.
C
OK. The Multi can both charge and discharge the batteries. The allow-to-
charge and the allow-to-discharge contacts are closed.
D
The batteries are full. The allow-to-charge contact will open. The Multi will
switch to float, to prevent further charging the batteries.
E
The batteries are almost over charged. The 350A safety contactor in the Lynx
Ion will open.
Condition A and E are error conditions. Proper configuration of the system will prevent these
conditions from occurring. When they occur, correct the situation, and press the start button
again to restart the Lynx Ion.
Connections
To configure the Multi for BMS support, VEConfigure3 is necessary. See the Support &
downloads section at
www.victronenergy.com
for more information on installing
VEConfigure3 and updating the Multi to firmware version xxxx200 or higher.
1.
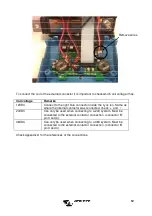
Connect the allow-to-charge signal to the AUX input on the Multi
2.
Connect the allow-to-discharge signal to Temp sense input on the Multi. It is not
necessary to use a temperature sensor with the Multi, since the batteries have
their own internal temperature sensors.
Summary of Contents for Lynx Ion
Page 1: ...Manual EN Lynx Ion 24V 180Ah Lithium Ion Batteries ...
Page 2: ......
Page 17: ...15 3 Start VEConfigure3 and configure the Li ion BMS Support assistant as follows ...
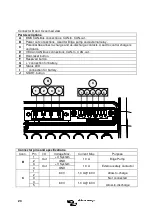
Page 23: ...21 APPENDIX A OVERVIEW LYNX ION Bottom view B A D E F C ...
Page 24: ...22 Front view I G H J ...
Page 28: ......


