background image

015/04

016/04

42” On-Wall 

Installation

Videotree 32”+ Outdoor Television’s are quick 

& easy to install:

Videotree 32” and up Outdoor televisions come with the 

bracket mounted to the back of the screen.* Please ensure 

that the mount is installed onto a load bearing wall or a 

horizontal wood stud.

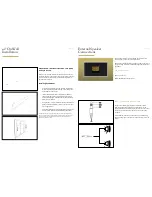
Installing Wall Mount

1. 

Using the wall plate(a) as a template to drill 4 holes 

with a 10mm drill bit 50mm deep. Push the 4 plastic 

anchors(B) into the holes.

2. 

Install the wall plate(a). Put the plate on the wall,  

then screw the self-tap screws(A) into each plastic 

anchor(B) through a metal washer(C) to fix the wall 

plate(a) onto the wall.

3. 

Hang the two monitor brackets together with the TV 

panel on the wall plate(A), relax your grip until they 

are caught hold of.

4. 

Optionally slide the locking pin(D) through the holes 

and secure in place with a padlock (not included).

*This will be subject to change dependent on each individual order, 
Videotree cannot guarantee all screens will have the mounting bracket 
pre-assembled. If not assembled the mount will be provided with 
instructions with the order.

External Speaker 

Connections

L

R

L

R

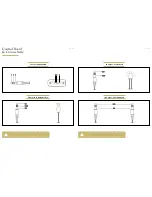
The ‘Speaker Out’ port can be found on the left of the 

control panel on the rear of the television.

Two external speakers (left and right) can be connected to 

this port using standard red and black speaker cables (not 

provided). 

Cable Connections:

Red = Pove

Black /Red & Black = Negative -ve

STEP 1 - Connect To A 3.5mm Jack

Prepare the cable by placing some cable heat shrink. 

Take the wires of the speaker and solder them to the 

appropriate wires of a male 3.5mm jack. Be sure to solder 

the correct cables to each other to ensure it functions 

properly.

Once soldered, slide the heat shrink over the soldering 

and use a heat gun to shrink it into position to protect the 

joints. 

Summary of Contents for Asteria Outdoor

Page 1: ...01 04 OUTDOOR TELEVISIONS 27 42 46 55 65 98 Outdoor Television User Manual...

Page 2: ...Viewing Beautiful Slimline Design with No Fans Range of Sizes 3 Different Framed Finishes Available Crius Oceanus Asteria Designed Built in the UK Warning Improper mounting and installation of your Vi...

Page 3: ...e back cover of the television or attempt to open the unit There are no user serviceable parts inside Risk of electric shock or fire Ensure there is always easy access to the mains supply and the powe...

Page 4: ...devices Electromagnetic interference may occur Cautions Do NOT install the television on an unstable surface If you are unsure remove the television immediately Risk of injury or damage to the unit On...

Page 5: ...uded a wide range of inputs in each module however to ensure each television is completely waterproof many of these connections remain enclosed inside the inner panel If you require any of these optio...

Page 6: ...m to IR Extender Eye IR Output Unmodulated All television connections should use stereo 3 5mm mini jack Use of other types of mini jack will damage the television All television connections should use...

Page 7: ...television power supply We recommend using at least two persons to lift the television Note Before installing your television we recommend that you connect the television to a power source and ensure...

Page 8: ...installed at a height and angle that suits the eye line of the user 27 Outdoor Installation Videotree 27 Outdoor Television s are quick easy to install Videotree 27 Outdoor televisions come with the b...

Page 9: ...the holes and secure in place with a padlock not included This will be subject to change dependent on each individual order Videotree cannot guarantee all screens will have the mounting bracket pre a...

Page 10: ...S DVBS00 15 TERRESTRIAL DVBT DVBT00 16 COMPONENT IYPB01 17 COMPOSITE IAVX01 18 SCART ISCT01 19 SELECT SLCT00 20 EPG GUIDE EPGX00 21 LEFT WEST00 22 RIGHT EAST00 23 UP NRTH00 24 DOWN SUTH00 25 CHANNEL 1...

Page 11: ...wer button to start it Sleep Function When your TV is ON start the Sleep function by pressing the sleep button This function will automatically turn the TV OFF after a certain period of time Currently...

Page 12: ...Electronic Programme Guide EPG Press the GUIDE button and the EPG will appear on the screen Use the and buttons to navigate through the channels and the and buttons the view the different programmes...

Page 13: ...ite System menu for settings Auto Installation Step 8 Favourite List Menu Step 7 Channel List Menu Key Stroke Action KEY_UP Focus on the previous item program KEY_DOWN Focus on the next item program K...

Page 14: ...rating Storage 10 to 90 RH non condensing 10 to 90 RH non condensing Installation On wall installation Indoor or outdoor use OSD Language English French German Spanish Italian Russian 16 languages Ava...

Page 15: ...idity on page 27 Remote control batteries should last for 3 years if unopened and stored in a dark cool place All Videotree televisions come with a 2 year manufacturer warranty as standard The warrant...

Page 16: ...Product Notes...

Page 17: ...Unit 1 Ember Centre Hersham Trading Estate Lyon Road Walton On Thames Surrey KT12 3PU United Kingdom Telephone 01932 267 797 Overseas 44 0 1932 267 797 Email sales videotree com Web www videotree com...

Reviews: