background image

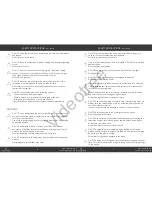
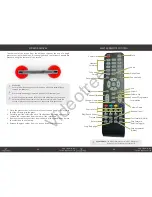
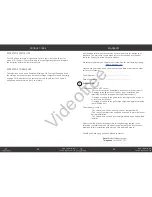
The removal of the screen from the backbox requires the use of a single 

glass sucker (pictured below). It is strongly advised that at least 2 people are 

present during the removal of the screen.

1.  Place the glass sucker in the center of the screen and apply the levers so 

that the suckers grip the glass.

2.  Carefully pull the television out of the backbox with enough room to 

remove the connections from the rear of the television.

3.  Remove the cable connections from the back of the television and place 

the television in a safe area.

4.  Release the glass sucker from the screen by pulling the levers.

www.videotree.com

Tel: +44 (0)1932 267 797

22

www.videotree.com

Tel: +44 (0)1932 267 797

23

SCREEN REMOVAL

MASTER REMOTE CONTROL

Volume Up

Volume Down

Record

Rewind (Text)

Power On

Picture Mode

Mute

Main Menu

Skip backwards 

(Guide)

Play/Pause (Index)

Fast Forward (Hold)

Channel/Programme 

Information

Sleep Mode

Channel Up

Channel Down

Source Select

Skip Forward  

(Subtitle Toggle)

TV Source 

Select

Stop (Subpage)

PLEASE NOTE:

 The Master Remote Control is NOT waterproof. 


          Do NOT get wet or submerge under water.

Exit

Favourite

Aspect

Sound Mode

Audio

Timeshift

Number 

Selection

WARNING:

Ensure the mains supply socket is switched off before attempting to 

remove the television. 


We recommend using at least two persons to lift the television.

When lifting your television, face the screen away from your body and 

hold the top and the bottom of the frame securely. Do NOT hold the 

screen or place excessive pressure on the screen with your hands.

Videotree

Summary of Contents for lifestyle

Page 1: ...9 27 32 42 46 55 USER MANUAL INSTALLATION GUIDE User manual and installation guide for Videotree s in wall range of waterproof televisions Please read this guide carefully before installing and operat...

Page 2: ...your Videotree television can lead to damaged or broken property bodily injury or death If you do not feel confident that you can complete any step in this guide please STOP IMMEDIATELY Place the tel...

Page 3: ...sure you read the following safety precautions and check the contents of your packaging before you begin to install your in wall television If any of the below contents are missing please contact Vide...

Page 4: ...expose the rear of your television to water The rear of the television is not protected against water Water damage may result in fire or electric shock Do NOT remove the back cover of the television o...

Page 5: ...been placed into the unit If any of the above applies please contact Videotree immediately Do NOT install the television on an unstable surface If you are unsure remove the television immediately Ris...

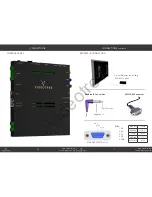
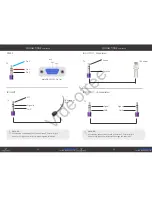
Page 6: ...ONTINUED 2 wire IR Blaster controlling DVD Set Top Box Reverse IR Connection Tip Positive Negative RS232 DB9 Connector PIN 1 NC 2 RX 3 TX 4 NC 5 GND Male DB9 RS232 Pin Out Pin 2 Pin 3 Pin 5 Baud Rate...

Page 7: ...C Signal In GND TV TV WARNING All television connections should use stereo 3 5mm mini jack Use of other types of mini jack will damage the television IR Extender Eye Signal IR OUTPUT Modulated Anode C...

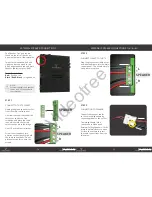
Page 8: ...NECTION TO SPEAKER Connect the speaker cables to the external speakers by connecting them to the socket The image shown is the connection to Videotree s External Ceiling Speakers Lift or press the pla...

Page 9: ...alling in this area i e cables or pipework beneath the wall When mounting your television in stud walls check for any supporting framework behind the plasterboard 88 88 WARNING Do NOT install your tel...

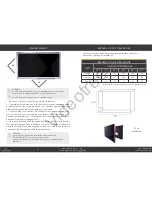
Page 10: ...9 27 32 42 46 55 A 450 633 741 980 1066 1260 B 50 50 60 60 60 60 C 279 383 446 584 632 741 D 456 639 747 986 1073 1266 E 285 389 452 589 637 747 F 35 35 60 60 60 60 PACKAGING DIMENSIONS Length 553 735...

Page 11: ...to tidy the area power supply HDMI aerial cable etc Slide the backbox into the cutout and fix into place with enough fittings to secure it Ensure the box fits tight into the cutout and fill in any ga...

Page 12: ...1932 267 797 23 SCREEN REMOVAL MASTER REMOTE CONTROL Volume Up Volume Down Record Rewind Text Power On Picture Mode Mute Main Menu Skip backwards Guide Play Pause Index Fast Forward Hold Channel Progr...

Page 13: ...er Selection Number Description RS232 Code 1 POWER ON POWR01 2 POWER OFF POWR00 3 VOLUME UP RGHT00 4 VOLUME DOWN LEFT00 5 CHANNEL UP UPXX00 6 CHANNEL DOWN DOWN00 7 MUTE ON MUTE99 8 MUTE OFF MUTE99 9 H...

Page 14: ...DB9 Pin connection signals 2 RX 3 TX 5 Ground INDEX NAME FUNCTION 1 Power On Off the Power Supply 2 Info Display the information of the Current Signal Channel 3 Mute Mute the Sound 4 Sleep On Off the...

Page 15: ...Pressing the PMODE button will change the parameters of the displayed picture such as Luminance Contrast Sharpness Hue Colour etc This function can also be found in the Main Menu Set up Sound Mode Se...

Page 16: ...30 www videotree com Tel 44 0 1932 267 797 31 AUTO INSTALLATION CONTINUED AUTO INSTALLATION CONTINUED Setup 2 Select the Country Setup 3 Select the Language Setup 4 Select Auto Power Off Setup 5 Sele...

Page 17: ...et up the Satellite OPTION VALUE Load Default Database Database Import Import default Satellite database Satellite System Enter Satellite System menu for settings Setup 7 Channel List Menu Key Stroke...

Page 18: ...esponse New batteries required Replace the batteries The waterproof remote comes with power LED No sound Mute is on Volume is set too low No speaker is connected Press the mute button Press the Vol bu...

Page 19: ...S2 POWER 220V 240V AC requirement 12V 27 or 24V 32 55 to screen Low Power Standby Mode 0 5 Watt 12V Trigger Out optional extra MOVIE avi DivX Xvid MPEG 4 mp4 mpg MPEG 1 MPEG 2 ts dat MPEG 1 dat mov mk...

Page 20: ...otree com Please note your television s serial number and date of purchase below for future reference Serial Number Date of purchase PLEASE NOTE The warranty does NOT cover Parts or accessories leads...

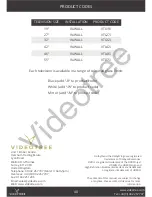
Page 21: ...N WALL VTL32i 42 IN WALL VTL42i 46 IN WALL VTL46i 55 IN WALL VTL55i Each television is available in a range of coloured glass finish Black add B to product code White add W to product code Mirror add...

Reviews: