x
1
x
2
EN
1.2 Das Produkt richtig verwenden
Dieses Produkt ist bestimmt:
- Zur Montage an Turmmasten.
- Zur Aufnahme eines Auslegers.
- Zum Betrieb in trockenen Räumen.
Jeder darüber hinausgehende Gebrauch gilt
als nicht bestimmungsgemäß. Für daraus re-
sultierende Schäden haftet der Hersteller nicht.
1.3 Packungsinhalt überprüfen
Kontrollieren Sie den Verpackungsinhalt auf
Vollständigkeit:
- Universal-Halterung für Ausleger, z. B.
H0 4171 und N 4371
- Anleitung
2. Einbau
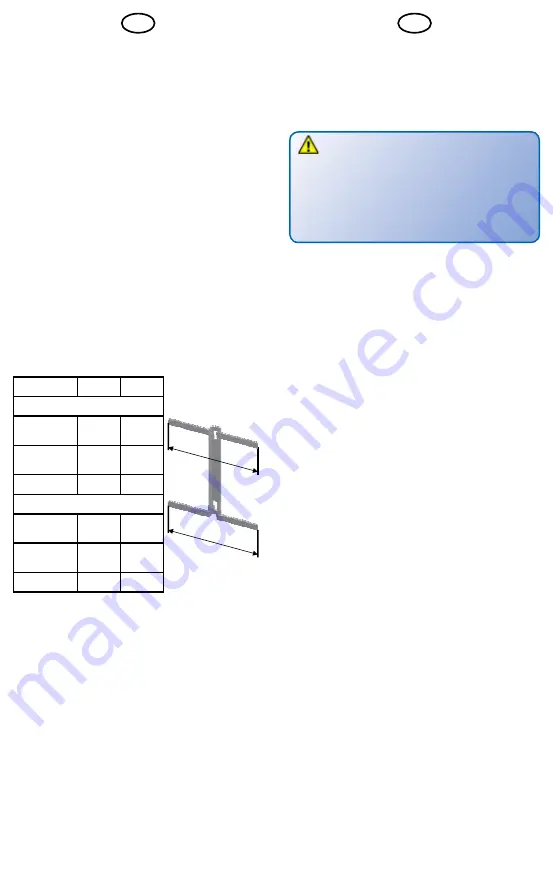
Kürzen Sie die Schenkel der Halterung je nach
verwendetem Turmmast entsprechend der
nachfolgenden Tabelle.
DE
1. Important information
Please read this manual completely and atten-
tively before using the product for the first time.
Keep this manual. It is part of the product.
1.1 Safety instructions
Caution:
Risk of injury!
Due to the detailed reproduction of the ori-
ginal and the intended use, this product can
have peaks, edges and breakable parts. For
installation tools are required.
1.2 Using the product for its correct
purpose
This product is intended:
- For mounting on headspan masts.
- For installation of a beam.
- For use in dry rooms only.
Using the product for any other purpose is
not approved and is considered incorrect.
The manufacturer is not responsible for any
damage resulting from the improper use of
this product.
1.3 Checking the package contents
Check the contents of the package:
- Universal holder for beam, e.g. H0 4171 and
N 4371
- Manual
2. Mounting
Shorten the side pieces of the holder depend-
ing on the required headspan mast according
to the table on page 2.
Bend back the right lower side piece of the
holder according to fig. 1.
Operate both upper side pieces as shown
behind the angle plates of the mast. Please
control that the universal holder is fixed at the
correct height (fig. 2).
Now slide the left lower side piece behind the
angle plate, too (fig. 3).
Press the lower right side piece from behind to
the angle plate by using the tip of a screwdriver
or a ballpen (fig. 4).
The mounting of the universal holder is com-
pleted (fig. 5).
3
2
Mast
X
₁
X
₂
H0
4115, 4160,
4162
4,5 mm
5 mm
4116, 4161,
4163
6,5 mm
8 mm
4117
8,5 mm
10 mm
N
4315,4360
4362
2,3 mm
2,5 mm
4316,4361
4363
3,5 mm
4 mm
4317
4,5 mm
5,2 mm
Biegen Sie den rechten unteren Schenkel der
Halterung entsprechend Abb. 1 zurück.
Führen Sie die oberen beiden Schenkel wie
dargestellt hinter die Winkelbleche des Mastes.
Achten Sie dabei darauf, dass Sie die Univer-
sal-Halterung in der richtigen Höhe anbringen
(Abb. 2).
Schieben Sie nun den linken unteren Schenkel
ebenfalls hinter das Winkelblech (Abb. 3).
Drücken Sie den unteren rechten Schenkel
von hinten mit der Spitze eines Schraubendre-
hers oder eines Kugelschreibers an das Win-
kelblech heran (Abb. 4).
Die Montage der Universal-Halterung ist abge-
schlossen (Abb. 5).


