4
EN
1. Important information
Please read this manual completely and attentively before using the product for the first time. Keep this manual. It is part
of the product.
1.1 Safety instructions
Caution:
Risk of injury!
Tools are required for installation.
Electrical hazard!
Never put the connecting wires into a power socket! Regularly examine the transformer for damage. In case of any
damage, do not use the transformer.
Make sure that the power supply is switched off when you mount the device and connect the cables!
Only use VDE/EN tested special model train transformers for the power supply!
The power sources must be protected to avoid the risk of burning cables.
1.2 Using the product for its correct purpose
This product is intended:
- For installation in model train layouts and dioramas.
- For connection to an authorized model train transformer (e. g. item 5200) or a digital command station.
- For operation in dry rooms only.
Using the product for any other purpose is not approved and is considered inappropriate. The manufacturer is not re-
sponsible for any damage resulting from the improper use of this product.
1.3 Checking the package contents
Check the contents of the package for completeness:
- Sound module with blue plug
- Mounting material (2 screws, 6 plugs)
- Manual
2. Introduction
Get in touch with the model railway with all your senses: Stationary sound module provides the specific sounds to the
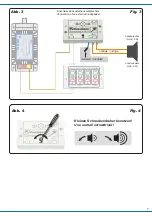
scenes in the animated world. Sound module is equipped with integral loudspeaker and connection for external loud-
speaker. Sound is synchronous to the movement of the figure.
3. Mounting
Fix the module with the enclosed screws. To ensure an optimal sound reproduction of the module, please note the fol-
lowing hints:
1. The loudspeaker is an integral part of the module. The upper surface of the module must always be uncovered in or-
der to enable a good sound dispersion.
2. The sound module must always be geared towards the direction of the spectator, so please no upside down mount-
ing under the layout.
3. The sound module should be installed near to the respective functional model on your layout. You can also install the
module on the layout, e. g. in a building. This way you can even have a better sound and an optimal concordance be-
tween the visible and the audible sound source.
4. Connection
Fitting cables:
Due to the low current consumption thin cables can be used which can easily be hidden. It is recommend-
ed to use a cross section of 0.14 mm² (e. g. Viessmann items 6860 – 6869 or 68603 – 68693).
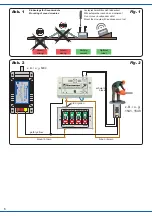
The sound module has no on-off-switch. In case you want to switch off or disconnect the sound module from power sup
-
ply, you can add a switch to one of the two power supply wires (brown or yellow), see fig. 2.
Connect the sound module to the power supply according to fig. 2.
Also connect the moving figure to the sound module as shown in fig. 2. The arrangement of the black cables of the mov
-
ing figure at the synchronous input of the sound module is freely selectable.

