background image

30

1.

2.

3.

Installation sequence

Installing the control unit

5516 344 GB

Summary of Contents for BS2A

Page 1: ...llation and service instructions for contractors VIESMANN Vitosol 222 T Type BS2A Vacuum tube collector and DHW cylinder For applicability see the last page VITOSOL 222 T 5516 344 GB 2 2014 Please keep safe ...

Page 2: ...arding the prevention of accidents Statutory regulations regarding envi ronmental protection Codes of practice of the relevant trade associations All current safety regulations as defined by DIN EN DVGW VDE and all locally applicable standards a ÖNORM EN and ÖVE c SEV SUVA SVTI SWKI and SVGW Working on the system Isolate the system from the power sup ply e g by removing the separate fuse or by mea...

Page 3: ... the system can compromise its function Installing non author ised components and making non approved modifications or conversions can compromise safety and may invalidate our warranty For replacements use only orig inal spare parts supplied or approved by Viessmann Safety instructions Safety instructions cont 5516 344 GB ...

Page 4: ... inclination of the absorbers 22 Installing the DHW cylinder 22 Connecting the solar lines 28 Installing the control unit 30 Electrical connection 31 Service instructions Commissioning inspection maintenance Steps commissioning inspection and maintenance 33 Further details regarding the individual steps 34 Fault Fault messages 37 Specification Vacuum tube collector 38 DHW cylinder 38 Index Index 5...

Page 5: ...g objects and tools can lead to life threatening accidents The installation area must be able to support four times the weight of the filled vacuum tube collector for weight see page 38 Secure the vacuum tube col lector with ropes Secure tools and equipment with safety devices DHW cylinder The installation area must be able to support four times the weight of the fil led DHW cylinder for weight se...

Page 6: ...6 Ensure that the floors below are not damaged in the event of a leak in the DHW cylinder or pipe connections Preparing for installation Observe prior to installation cont 5516 344 GB ...

Page 7: ... higher position Note On balconies with a protruding floor plate observe the following clearances between the floor plate and the lower holes 8 vacuum tubes min 200 mm 12 vacuum tubes min 360 mm A 600 600 B C x 1790 170 A Balcony outside wall B Supplied template C Supplied template moved to the side Vacuum tubes x in mm 8 260 12 420 Installation sequence Installing the collector positioning at 90 ...

Page 8: ...8 2 3 1 Installation sequence Installing the collector positioning at 90 cont 5516 344 GB ...

Page 9: ...justing the angle of inclination of the absorbers Adjust the angle of inclination with the collector still in its packaging Installation sequence Installing the collector positioning at 90 cont 5516 344 GB Installation ...

Page 10: ... adjustment tem plate provided Note The coated blue side of the absorber must be aligned with the sun For the absorber angles of inclination see the table on page 22 5 D 0 5 1 0 1 5 Installation sequence Installing the collector positioning at 90 cont 5516 344 GB ...

Page 11: ...11 7 6 Installation sequence Installing the collector positioning at 90 cont 5516 344 GB Installation ...

Page 12: ...12 8 11 9 10 Installation sequence Installing the collector positioning at 90 cont 5516 344 GB ...

Page 13: ...solar thermal system is not filled with heat transfer medium immediately after installation Protect the vacuum tube collector from insolation with a tarpaulin accessories Installation sequence Installing the collector positioning at 90 cont 5516 344 GB Installation ...

Page 14: ...and do not walk on it Install the collector with a fall min 2 i e the header casing must be in a higher position A 1820 B C 150 130 X 142 A Balcony outside wall B Supplied template C Supplied template moved to the side Vacuum tubes x in mm 8 320 12 480 Installation sequence Installing the collector positioning at 75 5516 344 GB ...

Page 15: ...15 1 2 3 Installation sequence Installing the collector positioning at 75 cont 5516 344 GB Installation ...

Page 16: ...16 5 4 6 8 7 Installation sequence Installing the collector positioning at 75 cont 5516 344 GB ...

Page 17: ...djusting the angle of inclination of the absorbers Adjust the angle of inclination with the collector still in its packaging Installation sequence Installing the collector positioning at 75 cont 5516 344 GB Installation ...

Page 18: ... adjustment tem plate provided Note The coated blue side of the absorber must be aligned with the sun For the absorber angles of inclination see the table on page 22 5 D 0 5 1 0 1 5 Installation sequence Installing the collector positioning at 75 cont 5516 344 GB ...

Page 19: ...19 12 11 Installation sequence Installing the collector positioning at 75 cont 5516 344 GB Installation ...

Page 20: ...20 16 13 14 15 Installation sequence Installing the collector positioning at 75 cont 5516 344 GB ...

Page 21: ...out first ensuring heat transfer or while the system is idle will cause ther mal stress Cover the vacuum tube collector with a tarpaulin accessories and keep it covered until heat transfer has been regulated Installation sequence Installing the collector positioning at 75 cont 5516 344 GB Installation ...

Page 22: ...3 36 20 61 33 22 58 31 24 55 30 26 52 28 28 49 26 30 44 6 25 8 32 40 6 24 9 34 34 6 23 10 36 28 6 22 11 38 25 6 20 12 40 23 6 18 12 42 22 6 16 13 44 21 6 14 14 46 21 6 12 16 48 21 7 10 17 50 21 7 9 19 52 21 8 7 19 Installing the DHW cylinder Do not install the DHW cylinder verti cally Installation sequence Angle of inclination of the absorbers 5516 344 GB ...

Page 23: ...23 Clearance between DHW cylinder and vacuum tube collector 300 B A A DHW cylinder B Vacuum tube collector Installation sequence Installing the DHW cylinder cont 5516 344 GB Installation ...

Page 24: ...tion the side cover with the power cable so that is aligned with the window Any service or maintenance work can then be done through the open window DHW cylinders with different side cover layouts are available Installation sequence Installing the DHW cylinder cont 5516 344 GB ...

Page 25: ...25 4x a b Ø 18 120 Installation sequence Installing the DHW cylinder cont 5516 344 GB Installation ...

Page 26: ...y in li tres 80 120 a in mm 615 975 b in mm 305 305 The connections must face down wards 1 2 A A Safety valve Discharge pipe to drainage system connection Installation sequence Installing the DHW cylinder cont 5516 344 GB ...

Page 27: ...G seal with braided sealing tape WW Domestic hot water G seal with braided sealing tape HVs Heating water flow solar thermal system G HRs Heating water return solar thermal system G Connect the DHW cylinder to the DHW supply pipes on site Thermally insulate the pipes Installation sequence Installing the DHW cylinder cont 5516 344 GB Installation ...

Page 28: ...r 95 C may be discharged from the discharge pipe during heating Arrange the hot water drain so that any discharged hot water or steam cannot represent a risk to individuals or dam age the system and materials in or on the building Please note DHW with temperatures in excess of 60 C can cause scald ing To limit the temperature to 60 C install a mixing device Connecting the solar lines Use stainless...

Page 29: ...29 1 7 3 4 2 6 5 8 Installation sequence Connecting the solar lines cont 5516 344 GB Installation ...

Page 30: ...30 1 2 3 Installation sequence Installing the control unit 5516 344 GB ...

Page 31: ...ection length 2 m 1 5 mm2 Protect exposed parts with insulating sheaths to prevent short circuits and premature ageing of the power cable Install terminal TB 1503 connect the cables in accordance with the following diagram N N L2 L1 L L N A B C E D A Plug with integral residual current device B PCB in the DHW cylinder C Connection electric immersion heater D Temperature sensor connection When clos...

Page 32: ...32 L1 N 1500 W E F E High limit safety cut out triggers at 99 C F Immersion heater Installation sequence Electrical connection cont 5516 344 GB ...

Page 33: ...ylinder 34 4 Filling the solar thermal system and checking for leaks 34 5 Checking the thermal insulation of the cold water and DHW pipes 6 Commissioning the system 35 7 Inspection and maintenance 36 8 Shutting down the system 9 Checking the function of safety valves 10 Checking the plug with integral residual current device 36 Commissioning inspection maintenance Steps commissioning inspection an...

Page 34: ...r from the DHW side Open the DHW draw off point and leave it on under supervision until only water is flowing out of it 2 Check the fittings on the DHW side for tightness and retighten if required 3 If leaks occur drain the DHW cylinder and repeat the process Filling the solar thermal system and checking for leaks Please note Filling and commissioning the solar thermal system without first safegua...

Page 35: ...e fill tap and switch off fill pump 8 Tighten cap on safety valve see pre vious diagram 9 Remove fill hose and screw on lock ing cap 10 If leaks occur drain the solar ther mal system and repeat the proc ess Commissioning the system Please note Do not connect the power supply until the DHW cylinder has been filled Insert the power plug into the socket The socket must comply with the safety standard...

Page 36: ...enance work cover the vacuum tubes to protect the components from thermal loads use a tarpaulin accessories Checking the plug with integral residual current device A B C 1 Insert plug into socket LED A lights up 2 Press button C Button B pops out and LED A goes out The power supply through the plug is interrupted This means that the protective function of the plug is assured 3 Press buttonB If LED...

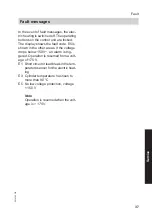
Page 37: ...r areas If the voltage drops below 150 V an alarm is trig gered Operation is resumed from a volt age of 175 V E1 Short circuit or lead break in the tem perature sensor for the electric heat ing E3 Cylinder temperature has risen to more than 90 C E5 No low voltage protection voltage 150 V Note Operation is resumed when the volt age is 175 V Fault Fault messages 5516 344 GB Service ...

Page 38: ...rmiss operating pres sure bar 6 6 Dimensions Length mm 2260 2260 Width mm 750 1070 Height mm 170 170 DHW cylinder Cylinder capacity 80 l 120 l Weight filled kg 128 183 Immersion heater output kW 1 5 1 5 Permiss temperatures C 35 to 75 35 to 75 Permiss operating pres sure Solar side bar 2 2 DHW side bar 6 6 Specification Vacuum tube collector 5516 344 GB ...

Page 39: ...39 5516 344 GB Service ...

Page 40: ...ited Hortonwood 30 Telford Shropshire TF1 7YP GB Telephone 44 1952 675000 Fax 44 1952 675040 E mail info uk viessmann com Viessmann Werke GmbH Co KG D 35107 Allendorf Telephone 49 6452 70 0 Fax 49 6452 70 2780 www viessmann com 5516 344 GB Subject to technical modifications ...

Reviews: