background image

139

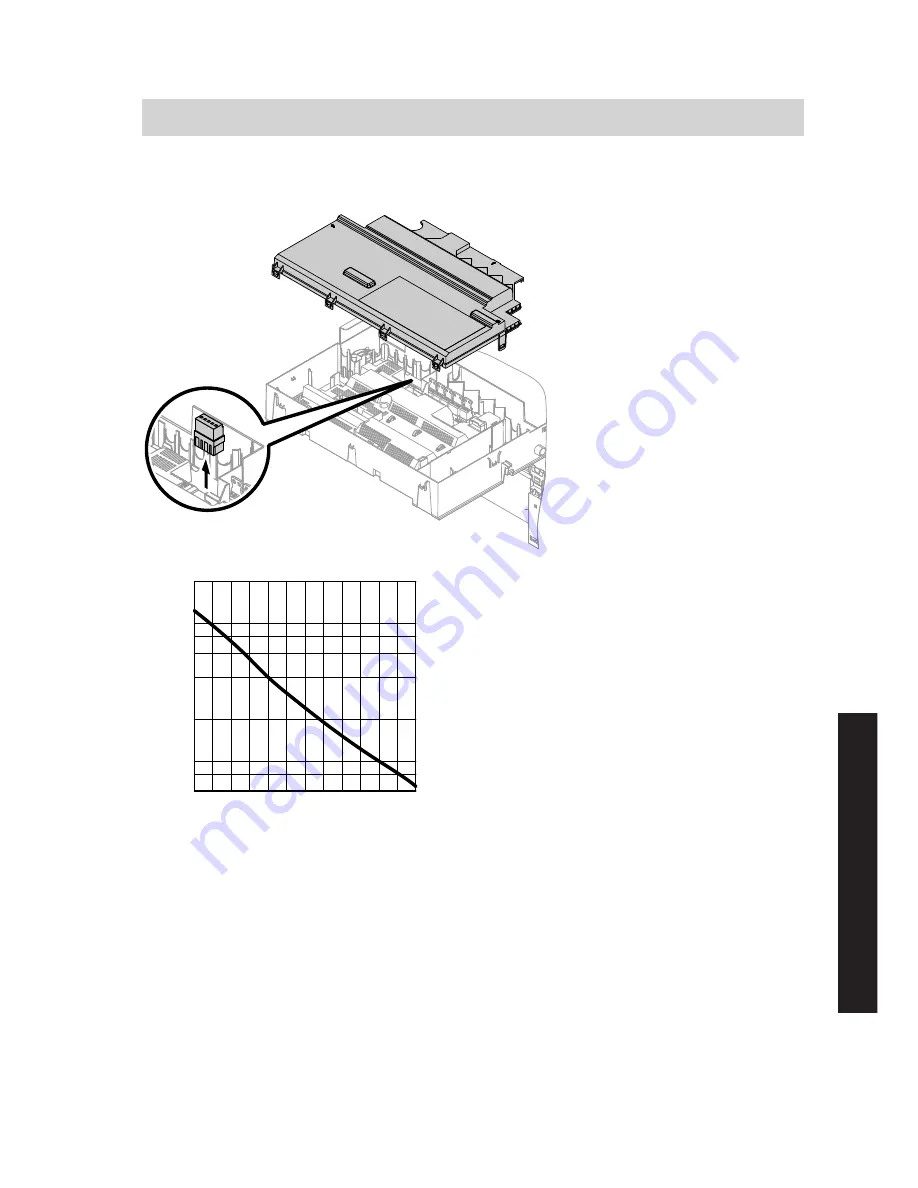
Checking the outside temperature sensor

X3

100

10

-20 -10 0 10 20 30

Temperature in °C

6

8

20

40

60

80

200

Resistance in k

Ω

Sensor type: NTC 10 kΩ

1. 

Pull plug "X3" from the control unit.

2. 

Test the resistance of the outside
temperature sensor across terminals
"X3.1" and "X3.2" on the disconnec-
ted plug and compare it with the
curve.

3. 

Where actual values deviate severely
from the curve values, disconnect the
wires at the sensor and repeat the
test on the sensor itself.

4. 

Depending on the result, replace the
lead or the outside temperature sen-
sor.

Troubleshooting

Repair

 (cont.)

5773 216 GB

Service


Summary of Contents for Vitodens 222-F B2TA series

Page 1: ...ors VIESMANN Vitodens 222 F Type B2TA 3 2 to 35 kW Gas condensing storage combi boiler g Gas council no 41 819 15 41 819 16 41 819 17 Natural gas and LPG version For applicability see the last page VI...

Page 2: ...ollowing when working on this system Statutory regulations regarding the prevention of accidents Statutory regulations regarding envi ronmental protection Codes of practice of the relevant trade assoc...

Page 3: ...can create neg ative pressure If the boiler is operated at the same time this can lead to reverse flow of the flue gas Danger The simultaneous operation of the boiler and appliances that extract air t...

Page 4: ...the system can compromise its function Installing non author ised components and making non approved modifications or conversions can compromise safety and may invalidate our warranty For replacements...

Page 5: ...nections 20 Closing the control unit casing 29 Fitting the front panels 31 Service instructions Commissioning inspection maintenance Steps commissioning inspection and maintenance 32 Further details r...

Page 6: ...166 Electronic combustion control unit 166 Designs Internal connection diagram 168 External connection diagram 169 Parts lists Ordering individual parts 171 Overview of the assemblies 172 Casing 173 H...

Page 7: ...case Incorrect usage or operation of the appli ance e g the appliance being opened by the system user is prohibited and results in an exclusion of liability Incor rect usage also occurs if the compone...

Page 8: ...connections on site Connection set installation instructions Or Assembly kit installation instruc tions Please note Avoid device damage Connect all pipework free of load and torque stress The followi...

Page 9: ...972 1172 d mm 1027 1227 e mm 1082 1302 f mm 1137 1337 g mm 1191 1391 h mm 1247 1447 k mm 1302 1562 l mm 1437 1637 m mm 1466 1666 n mm 1465 1665 p mm 1526 1726 q mm 201 224 Note All height dimensions h...

Page 10: ...owards the back See dimensions for condensate hose M and position G in dia gram on page 8 Drain towards the side aperture See position H in diagram on page 8 4 Prepare the gas connection accord ing to...

Page 11: ...outlet point D Shut off valve E Flow regulating valve installation recommended F Pressure gauge connection G Non return valve H Drain K Cold water L Drinking water filter M Pressure reducer to DIN 198...

Page 12: ...12 2 5 1 4 2x 3 Installing the boiler Removing the front panels 5773 216 GB...

Page 13: ...13 1 2 SW17 Installing the boiler Siting and levelling the boiler 5773 216 GB Installation...

Page 14: ...e accessory D Cold water R E Heating return R Connection on the domestic hot water side The DHW expansion vessel available as an accessory is installed in the cold water supply inside the boiler Separ...

Page 15: ...nect to an on site siphon Ensure this connection is secure Only g The condensate pipe is connected with the discharge pipe of the safety valve The condensate hose supplied meets the temperature requir...

Page 16: ...uc tions Do not carry out commissioning until the following conditions are met Free passage through the flue gas pipes Flue system with positive pressure is gas tight Apertures for ensuring sufficient...

Page 17: ...lve A to the gas connection 2 Carry out a tightness test Note Only use suitable and approved leak detection agents EN 14291 and devices for the tightness test Leak detection agents with unsuitable con...

Page 18: ...est pressure 150 mbar 15 kPa Where higher pres sure is required for tightness tests disconnect the boiler and the gas valves from the gas supply pipe undo the fit ting 3 Vent the gas line Conversion t...

Page 19: ...19 2x 4x 4 3 5 2 1 Installing the boiler Opening the control unit casing 5773 216 GB Installation...

Page 20: ...charge Before beginning work touch earthed objects such as heating or water pipes to discharge static loads L N 230V 230V 96 40 1 L N 2 1 145 2 1 32 1 5 4 145 40 96 20 35 100 21 A B A Radio clock rec...

Page 21: ...speed heating circuit pump if installed aVG KM BUS subscriber accessories To connect several accessories see page 25 Vitotrol 200A or 300A remote control Vitocom 100 type GSM Extension kit for one hea...

Page 22: ...ntact Connection options Extension EA1 accessory see sepa rate installation instructions Plug lH Burner operation is load dependent if the contact is closed The boiler water is heated to the value set...

Page 23: ...ed Coding address 5F in group DHW 3 Codes Set 3A DE1 3b DE2 or 3C DE3 in group General 1 to 2 Effect of the function on the relevant heating circuit pump Coding address d7 in group Heating circuit onl...

Page 24: ...instructions The burner is switched off if this contact is closed The heating circuit pump and if installed the circulation pump for cyl inder heating are switched according to the set code see follo...

Page 25: ...p Heating circuit only with weather compensa ted control units Effect of the function on the circulation pump for cylinder heating if installed Coding address 5E in group DHW 3 Power supply for access...

Page 26: ...rcuit with mixer M2 C Extension kit for heating circuit with mixer M3 D Extensions AM1 or EA1 E ON OFF switch The output concerned should only be used to control an on site relay if the cur rent flowi...

Page 27: ...an isolator in the power cable which simultaneously separates all non earthed conductors from the mains with contact separation of at least 3 mm In addition we recommend the instal lation of an AC DC...

Page 28: ...and securing cables leads on site ensure that the maximum permissible tem peratures for these cables leads are not exceeded A LV connections B 230 V connections C Internal extension D Main PCB E Commu...

Page 29: ...29 5 4 2 6 2x 3 1 Installing the boiler Closing the control unit casing 5773 216 GB Installation...

Page 30: ...nto the control unit support Note The programming unit can also be inser ted into a wall mounting base accesso ries near the boiler Wall mounting base installation instructions Installing the boiler C...

Page 31: ...31 4 1 5 2 2x 3 Installing the boiler Fitting the front panels 5773 216 GB Installation...

Page 32: ...utomatic testing of the flue gas temperature sensor 38 9 Venting the boiler 39 10 Venting the heating system 40 11 Filling the siphon with water 42 12 Checking all connections on the heating water sid...

Page 33: ...Checking and replacing the magnesium anode if required 60 32 Re assembling and filling the primary store 60 33 Checking the expansion vessel and system pressure 61 34 Checking the pre charge pressure...

Page 34: ...42 Connecting the control unit to the LON 73 43 Scanning and resetting the Service display 75 44 Fitting the cover panel and front panels 76 45 Instructing the system user 76 Commissioning inspection...

Page 35: ...its suitability Fill and top up water with a water hardness in excess of the following values must be softened e g with a small soft ening system for heating water Total permissible hardness of the f...

Page 36: ...stem pressure 1 0 bar 0 1 MPa Note If the control unit has not been switched on prior to filling the system then the servomotor of the diverter valve will still be in its central position and the syst...

Page 37: ...shown constantly 4 Ending filling function Press Filling the DHW cylinder on the DHW side 1 Lever on valve B must be in the left position 2 Open on site DHW supply and a DHW draw off point 3 Once air...

Page 38: ...the control unit automatically checks the function of the flue gas temperature sensor The display shows Flue gas temp sen sor test and Active Note If the flue gas temperature sensor is in correctly p...

Page 39: ...in the heating return and vent using mains pressure flush until no more air noise can be heard 5 First close air vent valve B 6 When the required operating pres sure has built up close fill valve C O...

Page 40: ...k action air vent valve A in the heating circuit pump is open 3 Activate venting program see follow ing steps Note For function and sequence of the venting program see page 160 4 Check the system pres...

Page 41: ...nting Venting function is enabled 4 Ending venting function Press OK or Service menu 1 Press OK and simultaneously for approx 4 s 2 Select 5 with and confirm with OK ON flashes 3 Activate the venting...

Page 42: ...hon with water and reassem ble 6 Check that the condensate pipe is connected correctly to the siphon and heat exchanger Note Route the drain hose without any bends and with a constant fall 7 Refit cov...

Page 43: ...usts the burner for optimum combustion in accordance with the prevailing gas qual ity For operation with natural gas no adjustment is therefore required across the entire Wobbe index range The boiler...

Page 44: ...dress 11 and value 9 Confirm with OK The display shows 11 0 End service functions 4 Open the gas shut off valve 5 Affix label G31 supplied with the technical documentation next to the type plate Check...

Page 45: ...k the supply flow pressure Set value Natural gas 20 mbar 2 0 kPa LPG 50 mbar 5 0 kPa Note Use a suitable measuring device with a resolution of at least 0 1 mbar 0 01 kPa to check the supply pres sure...

Page 46: ...e charge pressure to 20 mbar 2 0 kPa for natural gas or 50 mbar 5 0 kPa for LPG Notify your gas supply utility or LPG supplier Function sequence and possible faults Display Action Control unit is sues...

Page 47: ...ionisa tion electrode ad justment and the gas line for air locks Yes Burner in opera tion No Stops below the set boiler water temperature and restarts immedi ately Check the flue sys tem for tightness...

Page 48: ...s train setting Check flue system remedy flue gas re circulation if re quired Press reset button R For further details on faults see page 120 Max heating output setting The maximum output for heating...

Page 49: ...ion air aperture ventilation air For balanced flue systems tested together with the wall mounted gas fired boiler the requirement for a tightness test during commissioning by the flue gas inspector is...

Page 50: ...move cables from fan motor A gas train B ignition and ionisation electrode C ignition unit D and earth tab E 4 Undo gas supply pipe fitting F 5 Undo four screws G and remove the burner Please note Pre...

Page 51: ...electrodes B 2 Undo two retaining clips C on ther mal insulation ring D and then remove thermal insulation ring D 3 Undo two Torx screws and remove burner gauze assembly E with gas ket F 4 Insert new...

Page 52: ...just them as required Tighten the elec trode fixing screws with 4 5 Nm Cleaning the heating surfaces Please note There should be no scratches or other damage on the heat exchanger surface that comes i...

Page 53: ...urfaces A with water 3 Check condensate drain and clean siphon See the following chapter Checking the condensate drain and cleaning the siphon Flue gas cascade Clean the siphon in the flue gas header...

Page 54: ...nsate hose from trap C 6 Clean the siphon 7 Fill siphon with water and reassemble with retaining clip A 8 Check that the condensate pipe is connected correctly to the siphon and heat exchanger Note Ro...

Page 55: ...l the burner and tighten screws G diagonally with 8 5 Nm 2 Fit gas supply pipe F with a new gasket 3 Check the gas connections for tight ness Commissioning inspection maintenance Further details regar...

Page 56: ...e earth cable is connected to the magnesium anode 1 2 A Magnesium anode B Earth cable Checking the anode earth current with an anode tester Note We recommend that the magnesium anode function is check...

Page 57: ...between tab C and earth cable B If the current measures 0 3 mA the anode is OK If the current measures 0 3 mA or if there is no current at all inspect the anode visually see page 60 Commissioning ins...

Page 58: ...ion A operational to lever position B or C as required Lever position B Drain drinking water circuit in appliance exclud ing DHW cylinder via the cold water connection Lever position C Drain drinking...

Page 59: ...revent contamination from entering the pipe system 4 Remove loose deposits with a high pressure cleaner Please note When cleaning the inside only use plastic cleaning uten sils 5 Use a chemical cleani...

Page 60: ...ling and filling the primary store 1 Reconnect the primary store to the pipework 2 Insert new gasket A underneath flange cover B 3 Fit flange cover B and tighten eight screws D with a maximum torque o...

Page 61: ...this test on a cold system 1 Drain the system until the pressure gauge shows 0 2 If the diaphragm expansion vessel pre charge pressure is lower than the static system pressure Top up with nitrogen at...

Page 62: ...bar 0 02 MPa 5 Turn operating lever of valve A back to the left position and open the on site shut off valve in the cold water line Checking all gas equipment for tightness at operating pressure Dange...

Page 63: ...een 4 0 and 7 6 If the actual CO2 or O2 values lie outside their respective ranges proceed with the following steps Carry out a tightness test of the bal anced flue system see page 49 Check the ionisa...

Page 64: ...and simultaneously for approx 4 s 2 Select with and confirm with OK The display shows I and ON flash es 3 Select the lower heating output Press OK ON will be displayed con stantly 4 Select the upper h...

Page 65: ...r constant tem perature control units 4 Heating circuit without mixer A1 heating circuit 1 Function system components Code Adjust Group Operation with LPG 82 1 General 1 System with DHW circulation pu...

Page 66: ...ircuit pump M2 7 Extension kit for one heating circuit with mixer M2 8 Low loss header 9 Flow temperature sensor low loss header Function system components Code Adjust Group Operation with LPG 82 1 Ge...

Page 67: ...circuit 2 5 Temperature limiter to restrict the maximum temperature of underfloor heating systems 6 Flow temperature sensor M2 7 Heating circuit pump M2 8 Extension kit for one heating circuit with mi...

Page 68: ...ircuit without mixer A1 one heating circuit with mixer M2 and system separation 1 2 3 4 5 7 6 9 M 8 qP 1 Vitodens 222 F 2 Outside temperature sensor 3 Heating circuit without mixer A1 heating circuit...

Page 69: ...irculation pump DHW circulation pump connection at internal exten sion H1 or H2 System version 5 One heating circuit without mixer one heating circuit with mixer M2 with extension kit one heating circ...

Page 70: ...l System without DHW circulation pump Heating circuit pump A1 connection at internal exten sion H1 or H2 53 2 System with DHW circulation pump Heating circuit pump A1 connection at extension AM1 termi...

Page 71: ...3 4 90 80 70 60 50 40 30 0 5 10 15 20 5 10 2 0 2 2 Set room temperature in C 35 30 25 20 15 10 5 0 4 0 6 0 8 1 0 1 2 1 4 30 25 1 8 1 6 Slope setting ranges Underfloor heating systems 0 2 to 0 8 Low te...

Page 72: ...nstructions Reduced set room temperature 20 14 5 90 20 D E A C B Example 2 Adjustment of the reduced set room temperature from 5 C to 14 C A Boiler water temperature or flow temperature in C B Outside...

Page 73: ...ON communication module accessories must be plugged in Installation instructions LON communication module Note The data transfer via LON can take sev eral minutes Single boiler system with Vitotronic...

Page 74: ...tempera ture Set code 97 1 Viessmann system number Code 98 1 Viessmann system number Code 98 1 Viessmann system number Code 98 1 LON subscriber fault monitoring Code 9C 20 LON subscriber fault monitor...

Page 75: ...3 have been reached Coding address in group Boiler weather compensated control unit or group 2 constant temperature control unit Weather compensated control unit Constant temperature control unit Disp...

Page 76: ...and interval restart at 0 Fitting the cover panel and front panels Fit the cover panel see position A in diagram on page 39 Fit the front panels see page 31 Instructing the system user The system inst...

Page 77: ...ng 1 General 2 Boiler 3 DHW 5 Heating circuit 1 6 All codes std device In this group all coding addresses are displayed in ascending order 7 Standard setting Call up code 1 Service menu 1 Press OK and...

Page 78: ...circuit without mixer A1 heating circuit 1 code is set au tomatically 4 One heating circuit with mixer M2 heating circuit 2 6 One heating circuit without mixer A1 heating circuit 1 One heating circui...

Page 79: ...is a heat de mand the internal circula tion pump is only started if the burner is operational Circulation pump is switch ed off on expiry of run on time Subscriber no 77 1 LON subscriber number only...

Page 80: ...Set flow temperature for external demand 70 C 9b 0 to 9b 127 Set value adjustable from 0 to 127 C limited by boiler specific parameters Boiler group 2 Select Boiler for weather compensa ted control un...

Page 81: ...enabled DHW group 3 Select DHW for weather compensa ted control units see page 77 Select 3 for constant temperature con trol units see page 77 Coding Coding in the delivered condition Possible change...

Page 82: ...t AT RTset 1 K only for weather compensated control units A5 0 Without heating circuit pump logic function A5 1 to A5 15 With heating circuit pump logic function Heating cir cuit pump OFF see fol lowi...

Page 83: ...tion mixer A7 0 Only for heating circuit with mixer Without mixer economy function only for weath er compensated control units A7 1 With mixer economy func tion extended heating cir cuit pump logic He...

Page 84: ...Only for heating circuit with mixer and remote control No room temperature de pendent heating circuit pump logic function only for weather compensa ted control units b5 1 to b5 8 Heating circuit pump...

Page 85: ...parame ters Heating program changeover d5 0 With external heating pro gram changeover ob serve setting for coding addresses 3A 3b and 3C in group Gener al Heating program switches to Constant central...

Page 86: ...pump speed E7 30 Only for heating systems without a heating circuit with mixer Minimum speed of the in ternal variable speed heating circuit pump 30 of the max speed only for weather com pensated cont...

Page 87: ...units F6 0 In the Only DHW operat ing mode the internal cir culation pump is perma nently off F6 1 to F6 24 In operating mode Only DHW the internal circula tion pump will be started 1 to 24 times per...

Page 88: ...t for rais ing the set room tempera ture to the value selected for standard mode adjusta ble from 10 to 60 C Set flow temperature increase FA 20 Raising the set boiler wa ter or flow temperature by 20...

Page 89: ...ral 2 Boiler 3 DHW 4 Solar 5 Heating circuit 1 6 All codes std device In this group all coding addresses are displayed in ascending order 7 Standard setting Call up code 2 Service menu 1 Press OK and...

Page 90: ...uit with out mixer A1 heating cir cuit 1 00 4 to 00 10 For system schemes see the following table Value ad dress 00 Description 2 One heating circuit without mixer A1 heating circuit 1 code is set au...

Page 91: ...1 Function output A1 at ex tension AM1 Heating circuit pump 33 0 DHW circulation pump 33 2 Circulation pump for cylin der heating 34 0 Function output A2 at ex tension AM1 DHW circulation pump 34 1 He...

Page 92: ...2 External demand with set flow temperature Set value setting Coding address 9b in this group Internal circulation pump function Coding address 3F in this group 3b 3 Function input DE2 Exter nal bloc...

Page 93: ...C 6 Brief operation DHW cir culation pump pushbutton function DHW circulation pump run time adjustment Coding address 3d in this group 3d 5 DHW circulation pump runtime for brief opera tion 5 min 3d 1...

Page 94: ...temperature sen sor for low loss header au tomatic recognition 53 1 Function connection sK of the internal extension DHW circulation pump 53 0 Central fault message 53 2 External heating circuit pump...

Page 95: ...t of holiday program and time program for DHW heating possible 80 6 A fault message is dis played if a fault is active for at least 30s 80 0 Immediate fault message 80 2 to 80 199 The minimum fault du...

Page 96: ...atching of the flow temperature sub ject to the set value when the outside temperature changes 1 step 10 min 94 0 Without OpenTherm ex tension 94 1 With OpenTherm exten sion automatic recogni tion 95...

Page 97: ...for weather com pensated control units 9C 0 No monitoring 9C 5 to 9C 60 Time adjustable from 5 to 60 min 9F 8 Only for heating circuit with mixer Differential temperature 8 K only for weather compensa...

Page 98: ...sting step 100 h 23 0 No interval for burner service 23 1 to 23 24 Interval adjustable from 1 to 24 months 24 0 Service not shown on display 24 1 Service is shown on dis play the address is auto matic...

Page 99: ...Coding in the delivered condition Possible change 56 0 Set DHW temperature adjustable from 10 to 60 C 56 1 Set DHW temperature ad justable from 10 to above 60 C Note Max value subject to boiler codin...

Page 100: ...y the boiler coding card 6C 100 Set speed internal circu lation pump for DHW heating 100 6C 0 to 6C 100 Set speed adjustable from 0 to 100 6F Max heating output for DHW heating in speci fied by the bo...

Page 101: ...gnition A1 0 All possible settings at the remote control can be accessed A1 1 Only party mode can be set at the remote control only for Vitotrol 200 A3 2 Outside temperature be low 1 C Heating circuit...

Page 102: ...portant to ob serve for coding ad dress A3 A5 5 With heating circuit pump logic function economy control heating circuit pump OFF when the outside temperature AT is 1 K higher than the set room temper...

Page 103: ...ue adjustable between 5 and 35 C plus 1 C The base value is the adjusted out side temperature This val ue is based on the actual outside temperature and a time constant which takes the cooling down of...

Page 104: ...Heating mode reduced mode Weather compen sated only for weather compensated control units b0 1 Heating mode weather compensated Reduced mode With room temperature hook up b0 2 Heating mode With room...

Page 105: ...2 K RTactual RTset 3 K Coding in the delivered condition Possible change C5 20 Electronic minimum flow temperature limit 20 C only in operation with standard room tempera ture only for weather compens...

Page 106: ...at signal External block ing d6 1 Heating circuit pump stops at signal External block ing subject to coding ad dresses 3A 3b and 3C d6 2 Heating circuit pump starts at signal External block ing subje...

Page 107: ...n ternal variable speed heating circuit pump in of the max speed in standard mode Value is specified by boiler specif ic parameters only for weather compensated control units E6 0 to E6 100 Maximum sp...

Page 108: ...o 100 of the maximum speed during operation with reduced room temper ature F1 0 Screed drying disabled only for weather com pensated control units F1 1 to F1 6 Only for heating circuit with mixer Scre...

Page 109: ...mode the internal cir culation pump is perma nently off F6 1 to F6 24 In operating mode Only DHW the internal circula tion pump will be started 1 to 24 times per day for 10 minutes each time F7 25 In...

Page 110: ...aising the set boiler wa ter or flow temperature by 20 when changing from operation with re duced room temperature to operation with stand ard room temperature See example on page 164 only for weather...

Page 111: ...rvice level auto matically after 30 min 1 Select Serv 7 with 2 Confirm with OK OFF flashes 3 Confirm with OK Note The system exits the service level auto matically after 30 min Overview of service men...

Page 112: ...he components are installed in the system For further information on operating da ta see chapter Brief scan Operating data can be called up in the i menu For further information on operating da ta see...

Page 113: ...etails Service menu 1 Press OK and simultaneously for approx 4 s 2 Select required information with 3 Confirm with OK flashes 4 Confirm with OK the value is reset Brief scan In the brief scan you can...

Page 114: ...Number of KM BUS subscribers 0 0 4 Software version Burner control unit Type Burner control unit Burner control unit ver sion 5 Internal details for calibration 0 Software version exten sion AM1 Softw...

Page 115: ...ersion remote control Remote control 0 With out 1 Vitotrol 200A 200 RF 2 Vitotrol 300A 300 RF or Vitocom fort Software version re mote con trol 10 only for KM BUS circulation pumps Internal circulatio...

Page 116: ...m ming unit 1 Adjusted outside temperature 3 Set boiler water temperature 4 Common demand temperature 5 Set cylinder temperature 6 Number of KM BUS sub scribers Number of LON subscrib ers 7 SNVT con f...

Page 117: ...tion value cor responds to coding ad dress 34 setting Output A2 switching state 0 OFF 1 ON Extension EA1 F 3 Output 157 configura tion value cor responds to setting of coding ad dress 36 in group 1 G...

Page 118: ...rter valve set to DHW mode Htg circ pump HC2 ON Heating circuit pump output enabled extension to heating circuit with mixer Mixer HC2 Open Mixer open output enabled extension to heating circuit with m...

Page 119: ...rs are off 1 Burner operates at minimum output internal pump starts 2 Burner operates at maximum output internal pump starts 3 Internal output s active internal circulation pump 4 Diverter valve set t...

Page 120: ...connec ted will be switched off If an acknowledged fault is not rem edied the fault message will be re dis played the following day and the fault message facility restarted Calling up acknowledged fau...

Page 121: ...is not remedied the fault message will be re displayed the following day and the fault message facility restarted Calling up acknowledged faults Press OK for approx 4 s The 10 most recent faults incl...

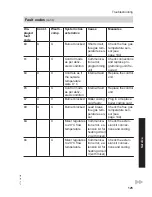
Page 122: ...tem perature sen sor Check outside tem perature sensor see page 139 19 X X Controls as if the outside temperature were 0 C Communica tion error wireless out side tempera ture sensor Check wireless co...

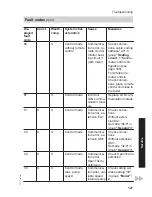
Page 123: ...ler water temperature sensor Check the boiler water temperature sensor see page 140 40 X Mixer closes Short circuit flow tempera ture sensor heating circuit 2 with mixer Check flow temper ature sensor...

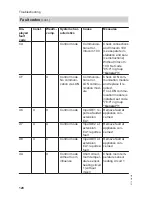
Page 124: ...temper ature sensor Check the outlet temperature sen sor see page 142 A7 X Control mode as per deliv ered condition Programming unit faulty Replace program ming unit A8 X Burner blocked The venting p...

Page 125: ...mode as per deliv ered condition Internal fault Replace the control unit b7 X X Burner blocked Boiler coding card faulty Plug in or replace boiler coding card b8 X X Burner blocked Lead break flue ga...

Page 126: ...n figuration see page 166 For wireless re mote controls Check connec tions place remote control unit close to the boiler bd X Control mode without remote control Communica tion error re mote control V...

Page 127: ...ntrol mode Incorrect LON commu nication mod ule Replace LON com munication module C1 X X Control mode Communica tion error ex tension EA1 Check connec tions Without exten sion EA1 Set code 5b 0 in gro...

Page 128: ...lace if re quired If no LON commu nication module is installed set code 76 0 in group General 1 d6 X X Control mode Input DE1 re ports a fault at extension EA1 Remove fault at appliance con cerned d7...

Page 129: ...ing circuit 1 without mixer Check room tem perature sensor for heating circuit 1 and remote control configuration see page 166 dE X Control mode without room influence Lead break room temper ature sen...

Page 130: ...t high incidence of dust in the combustion air Press reset button R E3 X X Burner in a fault state Heat transfer too low during calibration Temperature limiter has shut down Ensure adequate heat trans...

Page 131: ...n con nections Check flue system remedy flue gas re circulation if re quired Press reset button R E8 X X Burner in a fault state The ionisa tion current lies outside the permissi ble range Check gas s...

Page 132: ...cessful reset attempts replace boiler coding card and press reset button R Eb X X Burner in a fault state Repeated flame loss during cali bration Check gap be tween ionisation electrode and burner gau...

Page 133: ...burner start Check gas supply gas pressure and gas flow switch Check gas train Check ionisation electrode and con necting cable Check ignition Connecting leads to ignition module and igni tion electr...

Page 134: ...assem bly see page 52 Contamination of electrode Press reset button R F0 X X Burner blocked Internal fault Replace control unit F1 X X Burner in a fault state Flue gas tem perature limit er has re spo...

Page 135: ...Check fan fan con necting cables and power supply check fan control Press reset button R FA X X Burner in a fault state Fan not in idle state Check fan fan con necting cables and fan control Press re...

Page 136: ...Burner blocked or in a fault state Boiler coding card or main PCB faulty or incorrect boil er coding card Press reset button R If the fault per sists check the boiler coding card and replace boiler c...

Page 137: ...137 Putting control unit in maintenance position If required for commissioning and serv icing the control unit can be put in a dif ferent position 1 2 3 Troubleshooting Repair 5773 216 GB Service...

Page 138: ...r side 1 Close the shut off valves on the heat ing water side 2 Route hose at drain valve A into a suitable container or drain outlet 3 Open drain valve A and drain the boiler as much as required Trou...

Page 139: ...esistance of the outside temperature sensor across terminals X3 1 and X3 2 on the disconnec ted plug and compare it with the curve 3 Where actual values deviate severely from the curve values disconne...

Page 140: ...140 Checking the boiler temperature sensor cylinder temperature sensor or low loss header flow temperature sensor X3 5 Troubleshooting Repair cont 5773 216 GB...

Page 141: ...the control unit and check the resistance Flow temperature sensor Pull plug X3 from the control unit and check the resistance across terminals X3 4 and X3 5 2 Check the sensor resistance and compare i...

Page 142: ...k 1 Pull leads from outlet temperature sensor A 2 Check the sensor resistance and compare it with the curve 3 Replace the sensor in the case of severe deviation Danger The outlet temperature sen sor...

Page 143: ...rom the plate heat exchanger 1 Shut off and drain the boiler on the heating water and DHW sides 2 Release the side closures and pivot the control unit forward 3 Remove the siphon see page 54 4 Push th...

Page 144: ...110 Temperature in C 0 4 0 6 0 8 2 4 6 8 20 Resistance in k Sensor type NTC 10 k 1 Pull leads from flue gas temperature sensor A 2 Check the sensor resistance and compare it with the curve 3 Replace t...

Page 145: ...rol unit cannot be reset after a fault shutdown although the boiler water temperature is below approx 75 C check the following 1 Pull the leads from temperature lim iter A 2 Check the continuity of th...

Page 146: ...ing circuit with mixer Checking the setting of rotary selec tor S1 The rotary selector on the PCB of the extension kit defines the assignment to the relevant heating circuit Heating circuit Rotary se...

Page 147: ...e sensor must now capture a higher temperature If the tem perature drops either the motor is turn ing in the wrong direction or the mixer insert is incorrectly fitted Mixer installation instructions C...

Page 148: ...w temperature sensor 2 Check the sensor resistance and compare it with the curve Replace the sensor in the case of severe deviation Checking the Vitotronic 200 H accessory The Vitotronic 200 H is conn...

Page 149: ...temperature Flow temperature setting range 20 to 74 C DHW heating The burner the circulation pump and the 3 way valve are started or changed over if the cylinder temperature lies 2 5 K below the set...

Page 150: ...DHW primary store from cold The heating circuit pump is switched ON and the 3 way diverter valve will be changed over if the cylinder tempera ture sensor captures a temperature lower than the default...

Page 151: ...the required boiler water temperature is reached DHW is regulated to the set temperature via the outlet temperature sensor The primary store continues to be heated up after the draw off process has t...

Page 152: ...s assigned via coding address 53 in group General Central fault message code 53 0 DHW circulation pump code 53 1 only for weather compensated oper ation Heating circuit pump for heating circuit withou...

Page 153: ...oding address 53 in group General Central fault message code 53 0 DHW circulation pump code 53 1 only for weather compensated oper ation Heating circuit pump for heating circuit without mixer code 53...

Page 154: ...154 Extension AM1 A1 Circulation pump A2 Circulation pump f Power supply f A Power supply for additional accessories aVG KM BUS Function description External extensions accessories 5773 216 GB...

Page 155: ...DHW circulation pump Select the output functions by means of the codes on the boiler control unit Function assignment Function Code General group Output A1 Output A2 DHW circulation pump sK 33 0 34 0...

Page 156: ...ital input 2 DE3 Digital input 3 0 10 V 0 10 V input f Power supply f A Power supply for additional accessories aBJ Central fault message feed pump DHW circulation pump potential free aVG KM BUS Funct...

Page 157: ...e d8 3 The effect of the operating program changeover is selected via coding address d5 in the Heating circuit group The duration of the changeover is set via coding address F2 in the Heating cir cuit...

Page 158: ...group at the boiler control unit Control functions External heating program changeover The External heating program change over function is connected via extension EA1 There are 3 inputs available at...

Page 159: ...g program changeover F2 0 Duration of the operating program changeover 1 to 12 hours F2 1 to F2 12 The operating program changeover stays enabled for as long as the contact remains closed but at least...

Page 160: ...t DE2 3b 2 Input DE3 3C 2 The effect on the internal circulation pump is selected in coding address 3F in group General The effect on the relevant heating circuit pump is selected in coding address d7...

Page 161: ...ion provided by the screed manufacturer When the screed drying function is acti vated the heating circuit pump in the heating circuit with mixer is switched on and the flow temperature is held in acco...

Page 162: ...0 Temperature profile 3 Code F1 3 Flow temperature C Days 50 40 30 20 10 1 5 10 15 20 25 30 Temperature profile 4 Code F1 4 Flow temperature C Days 50 40 30 20 10 1 5 10 15 20 25 30 Temperature profil...

Page 163: ...ed room temperature the reduced set room tem perature can be automatically raised subject to the outside temperature The temperature is raised in accordance with the selected heating curve but no high...

Page 164: ...e Reducing the heat up time During the transition from operation with reduced room temperature to operation with standard room temperature the boiler water or flow temperature will be raised in accord...

Page 165: ...standard room temperature B Set boiler water or flow temperature in accordance with the selected heating curve C Set boiler water or flow temperature in accordance with coding address FA 50 C 20 60 C...

Page 166: ...bd bE Electronic combustion control unit The electronic combustion controller uti lises the physical correlation between the level of the ionisation current and the air ratio The maximum ionisation cu...

Page 167: ...7 7 9 3 1 48 7 3 7 6 7 5 9 0 For optimum combustion control the system regularly carries out an auto matic self calibration also after a power failure shutdown For this the combus tion is briefly regu...

Page 168: ...sensor Outlet temperature sensor aA Ionisation electrode aG Flue gas temperature sensor d Stepper motor for diverter valve fJ Temperature limiter gF Ignition unit a Fan motor a A Fan motor control a...

Page 169: ...169 A1 Main PCB A2 Power supply unit A3 Optolink A4 Burner control unit A5 Programming unit A6 Coding card Designs External connection diagram 5773 216 GB Service...

Page 170: ...temperature sensor Flow temperature sensor low loss header Cylinder temperature sensor plug on the cable harness s Internal circulation pump sK Cylinder primary pump dG Gas solenoid valve f Power supp...

Page 171: ...rial no see type plate A Assembly from this parts list Position number of the individual part within the assembly from this parts list Standard parts are available from your local dealer Parts lists O...

Page 172: ...172 A B C D E F G A Type plate B Casing assembly C Hydraulic assembly with hydraulic block D Primary store assembly Parts lists Overview of the assemblies 5773 216 GB...

Page 173: ...e fastener set 0004 Cover panel with profiled seal 0005 Profiled seal 0006 Adjustable foot 0007 Control unit support 0008 Side panel right 0009 Side panel left 0010 Primary store mounting bracket 0011...

Page 174: ...174 0003 0006 0005 0005 0013 0014 0014 0004 0010 0014 0002 0014 0001 0005 0014 0002 0014 0007 0009 0008 0012 0011 Parts lists Casing cont 5773 216 GB...

Page 175: ...idge non return valve 0025 Shut off valve cold water cylin der 0026 Round sealing ring 8 x 2 5 pce 0027 Connection line DHW charging 0028 Shut off valve DHW cylinder 0029 Flow pipe 0030 Expansion vess...

Page 176: ...7 0047 0042 0049 0049 0048 0041 0007 0042 0046 0042 0007 0015 0042 0046 0002 0041 0047 0004 0007 0027 0041 0013 0028 0045 0041 0042 0021 0046 0007 0015 0023 0024 0031 0002 0047 0044 0016 0044 0041 002...

Page 177: ...bracket 0008 Plate heat exchanger insulation board 0009 Plate heat exchanger insulation shell 0010 Overflow pipe 0011 Flow unit 0012 Valve insert 0013 Overflow valve 0014 O ring 17 86 x 2 62 5 pce 001...

Page 178: ...010 0015 0013 0001 0016 0005 0005 0003 0016 0003 0005 0011 0012 0002 0016 0003 0016 0018 0007 Primary store 0001 Primary store 0002 Strain relief 0003 Magnesium anode 0004 Gasket 0005 Flange with gask...

Page 179: ...179 0009 Flange insulation 0010 Cylinder temperature sensor NTC 10k 0002 0010 0004 0001 0003 0004 0005 0009 0006 0007 0008 0007 Parts lists Primary store cont 5773 216 GB Service...

Page 180: ...ion 0011 Heat exchanger 0012 Gas pipe 0013 Condensate hose 0014 O rings 35 4 x 3 59 5 pce 0015 Gasket A 17 x 24 x 2 5 pce 0016 Hose 19 x 600 corrugated 0017 Spring clip DN 25 5 pce 0018 Hose 19 x 270...

Page 181: ...0022 0015 0017 0025 0005 0024 0025 0002 0014 0017 0015 0008 0022 0010 0020 0020 0009 0021 0005 0024 0001 0007 0006 0019 0002 0018 0013 0017 0017 0017 0004 0008 0017 0016 0017 0003 0017 0023 0025 Part...

Page 182: ...007 Gasket burner door flange wear ing part 0008 Radial fan 0009 Gas train 0010 Burner door 0011 Ignition unit 0012 Ionisation electrode gasket 5 pce 0013 Ignition electrode gasket 5 pce 0014 Blade te...

Page 183: ...0008 0010 0015 0004 0003 0002 0001 0019 0019 0018 0018 0018 0004 Control unit 0001 Control unit 0002 Control unit casing back panel 0003 Coding card 0004 Fuse 6 3 A slow 10 pce 0005 Fuse holder 0006...

Page 184: ...able harness 100 35 54 PE 0012 Power cable stepper motor 0013 Mating plug set 0014 Cable fixing 0015 Locking bolts left and right 0017 Wireless outside temperature sensor 0018 Outside temperature sens...

Page 185: ...5 0006 0007 0010 0011 0012 0019 0015 0004 0005 0013 0015 0009 0005 Miscellaneous 0001 Special grease 0002 Spray paint Vitowhite 0003 Touch up paint stick Vitowhite 0004 Installation and service instru...

Page 186: ...186 0005 Operating instructions for con stant temperature mode 0006 Operating instructions for weath er compensated mode 0004 0002 0005 0006 0001 0003 Parts lists Miscellaneous cont 5773 216 GB...

Page 187: ...gas type Carbon dioxide content CO2 For natural gas At lower heating output by vol 7 5 9 5 At upper heating output by vol 7 5 9 5 For LPG At lower heating output by vol 8 8 11 1 At upper heating outp...

Page 188: ...5 2 8 8 2 26 5 2 8 8 2 35 at TV TR 80 60 C kW 2 9 4 3 2 11 8 2 9 4 3 2 17 2 4 7 8 0 2 23 7 4 7 8 0 2 31 7 for DHW heating kW 2 9 4 3 2 17 2 2 9 4 3 2 17 2 4 7 8 0 2 29 3 4 7 8 0 2 33 5 Rated heat inpu...

Page 189: ...s e g in the gas contract application or to estimate a supplementary volumetric settings check Due to the factory settings the gas pressure must not be altered from these values Reference 15 C 1013 mb...

Page 190: ...77 EN 61 000 3 2 EN 806 EN 61 000 3 3 EN 12897 EN 62 233 In accordance with the following Directives this product is designated with _ 0085 97 23 EC 2006 95 EC 92 42 EEC 2009 142 EC 2004 108 EC This p...

Page 191: ...ens 222 F type B2TA complies with the NOx limits specified by the 1st BImSchV Paragraph 6 Germany Allendorf 1 January 2013 Viessmann Werke GmbH Co KG Authorised signatory Manfred Sommer Certificates M...

Page 192: ...9 Control unit maintenance position 137 Cylinder cleaning 59 Cylinder temperature sensor 140 D Date setting 38 Diaphragm expansion vessel 36 E Electronic combustion controller 166 Extension AM1 154 EA...

Page 193: ...educed set room temperature 72 Reducing the heat up output 163 Reducing the heat up time 164 Relay test 118 Remote control 166 Removing a fault display 120 Report 187 Rotational direction of mixer mot...

Page 194: ...194 5773 216 GB...

Page 195: ...195 5773 216 GB...

Page 196: ...ted Hortonwood 30 Telford Shropshire TF1 7YP GB Telephone 44 1952 675000 Fax 44 1952 675040 E mail info uk viessmann com Viessmann Werke GmbH Co KG D 35107 Allendorf Telephone 49 6452 70 0 Fax 49 6452...

Reviews: