


9
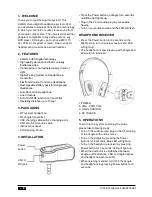
Pairing:
If the headphone remains not working after
following the operation processes above, start
pairing process by pressing the power button for
12 seconds in the dongle in shutdown state. After
that, pressing the headphone pair button until the
blue LEDs flash. The LEDs will change to solid
blue when pairing process is finished.
Note:
In order to protect the dongle and save power,
the dongle will automatically switch to stand-by
mode (LED will turn off) after approximately 2
minutes if there is no audio signal, or the signal
that it receives from the audio source is too weak
for proper reception. If however the signal returns
to an acceptable level, then the transmitter will
automatically switch back on. The dongle will
automatically shut off if stand-by mode last for
more than 15 minutes.
The headphone receiver will automatically shut off
if getting no signal from transmitter in 15 minutes.
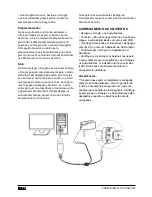
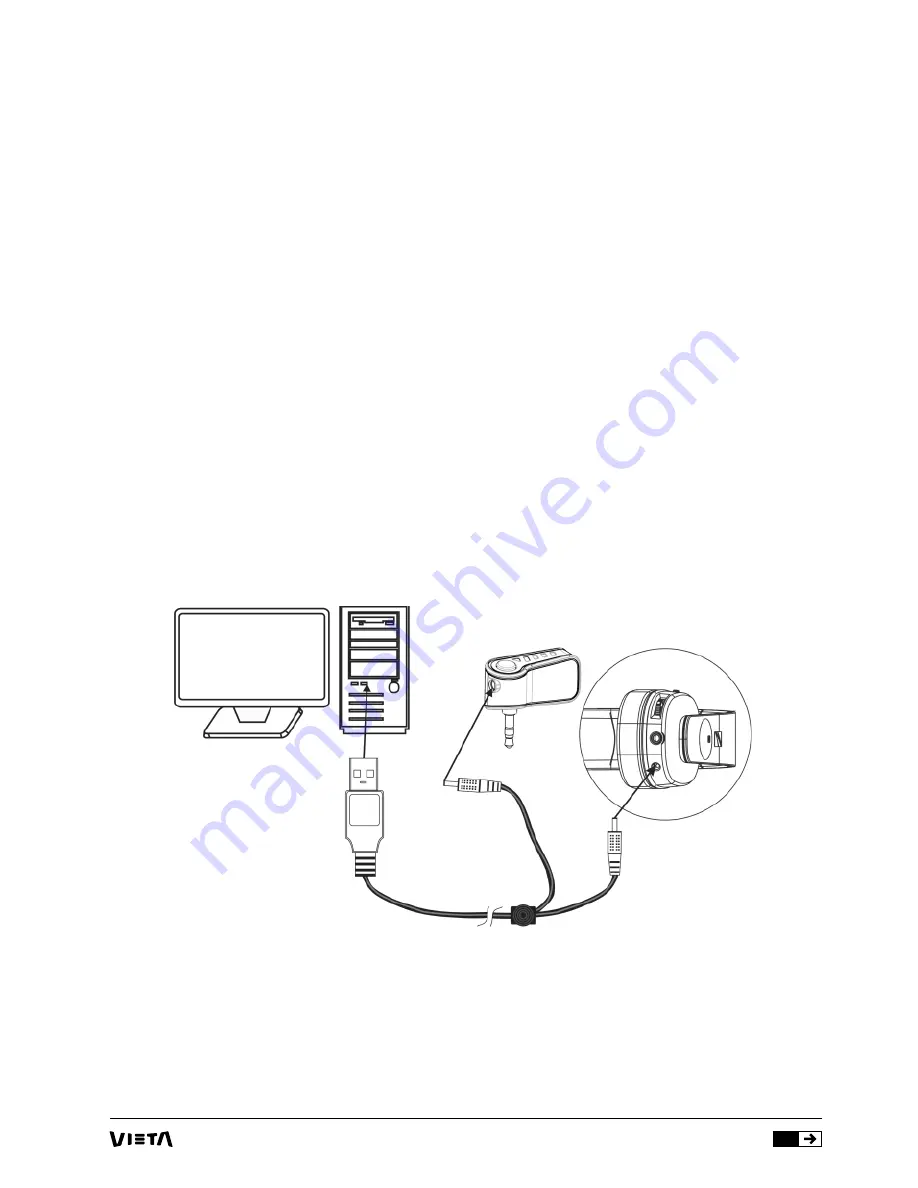
CHARGING THE BATTERIES
• Switch OFF both the dongle and headphone.
• Apply the charging cable one end with 2 charging
ports and the other with USB.
• Charging can be processed by connecting with
PC or with power adapter.
• Charging dongle and headphone can be
processed simultaneously.
• Be sure to charge new batteries for 5 hours
before using them for the first time in the dongle
and headphone. The red indicator light (LED) will
be on continuously during battery charging.
Warnings:
** The battery pack must be fully charged before
first use. An initial 5 hours charge is required
to guarantee an acceptable service life for the
rechargeable batteries. Always ensure that the
dongle and the headphones are switched to the Off
position while the batteries are charging.
Summary of Contents for VHP-WJ500
Page 16: ...www vieta es ...