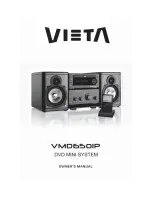
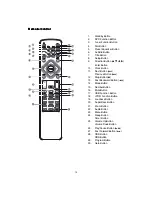
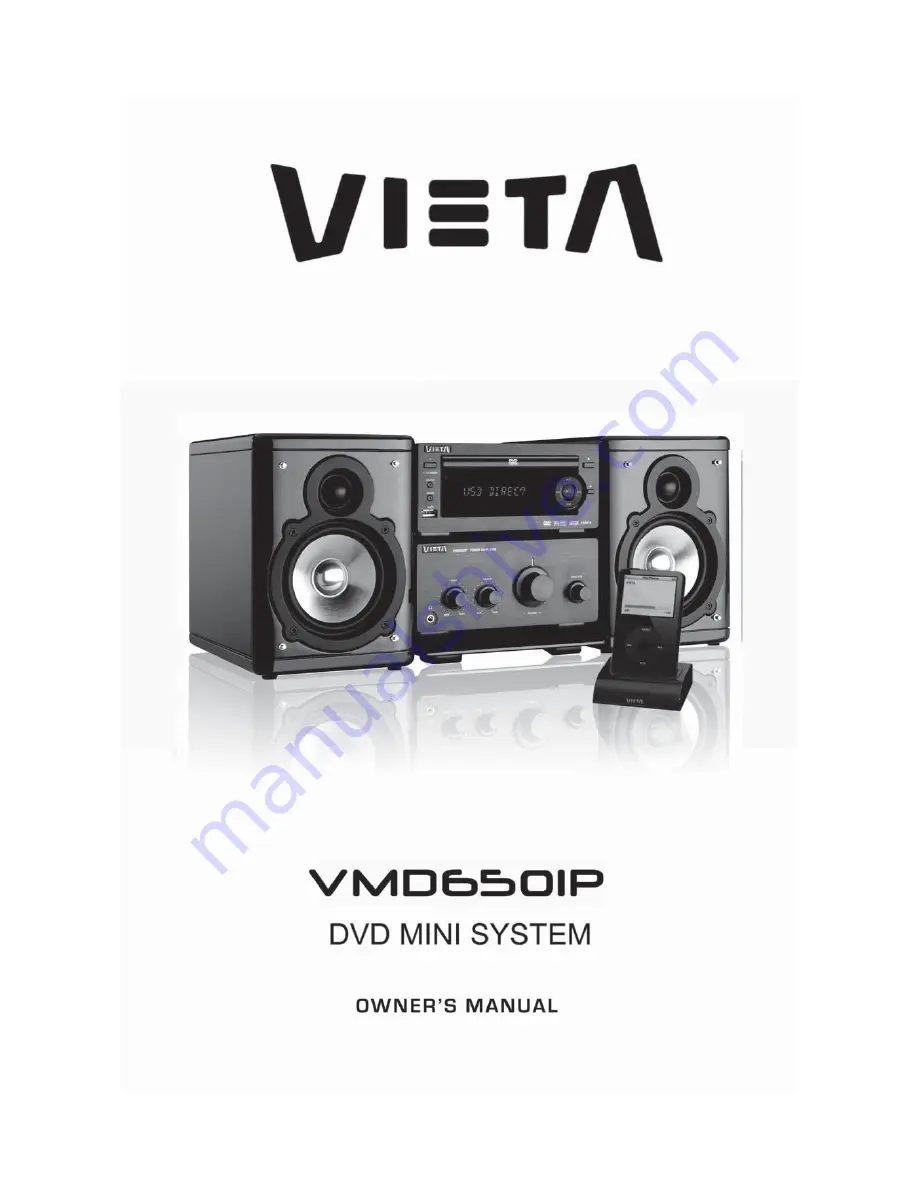
background image

Summary of Contents for VMD650IP

Page 1: ......

Page 2: ...emote Control 8 Control Section 9 DVD Player 9 Amplifier 9 Remote Control 10 Normal playing 11 Use the Discs 11 Playing Picture CD disc 16 Use the USB 17 Playing an iPod portable player 17 Listening to Radio Broadcasts 18 RDS Radio Data System Reception 19 Clock Timer Functions 19 Setting the Clock 19 Setting the Daily Timer 20 Setting the Sleep Timer 21 DVD Menu Options 22 Menu function setup 22 ...

Page 3: ...lectrical products is different in various places before you use this product make sure that the power requirement of the product matches your household power CAUTION TO REDUCE THE RISK OF ELECTRIC SHOCK DO NOT REMOVE COVER NO USER SERVICEABLE PARTS INSIDE REFER SERVICING TO QUALIFIED SERVICE PERSONNEL CAUTION RISK OF ELECTRIC SHOCK DO NOT OPEN Precautions Precautions Precautions Precautions Preca...

Page 4: ...ation or is placed in a very damp room moisture may condense on the lens inside the player Should this occur the unit will not operate properly Remove the disc and leave the unit turned on for about an hour until the moisture evaporates 12 Should any solid object or liquid fall into the unit unplug the system and have it checked by qualified personnel before operating it again 13 Unplug this produ...

Page 5: ... has component input terminal then you can use the signal connecting cable to connect with the DVD player s component output terminal By doing so the picture will be more clear 3 Use a S Video cable to connect the unit to the S Video input of a suitably equipped television Use this connection in preference to a composite 4 Use a SCART cable to connect the unit to a SCART compatible television Caut...

Page 6: ...te Note Note Note Before attaching a 75 ohm coaxial lead the kind with a round wire going to an outside antenna disconnect the supplied FM wire antenna Caution Caution Caution Caution Caution To avoid noise keep antennas away from the system the connecting cord and the AC cord Connecting Control Cable Connecting Control Cable Connecting Control Cable Connecting Control Cable Connecting Control Cab...

Page 7: ...r than those supplied are used they must be chosen according to speaker specification or the speakers can be damaged 2 Before connecting or removing mains power please turn off the power on the unit and turn the volume to minimum or it may damage the speakers Connecting Assistance Equipment Connecting Assistance Equipment Connecting Assistance Equipment Connecting Assistance Equipment Connecting A...

Page 8: ...ecting AUX audio terminals please press this function button Connecting Coaxial Connecting Coaxial Connecting Coaxial Connecting Coaxial Connecting Coaxial Use coaxial fibre cable to connect the DVD player s coaxial fibre output jack with other amplifier s coaxial fibre input jack for superior digital sound effects Connecting the iPod Dock Connecting the iPod Dock Connecting the iPod Dock Connecti...

Page 9: ...ended period of time Installation of Batteries in the Remote Control Installation of Batteries in the Remote Control Installation of Batteries in the Remote Control Installation of Batteries in the Remote Control Installation of Batteries in the Remote Control 1 Remove the battery compartment cover 2 Insert two batteries size AAA correctly so that the and polarities match the polarity diagrams in ...

Page 10: ...e Button BF 8 Eject Button K 9 Stop Button L L L L L 10 Power Control Cable Socket 11 SCART Output Terminal 12 Coaxial Fibre Output Terminal 13 Component Output Terminal 14 Video Output Terminal 15 Audio Output Terminal 16 S Video Output Terminal 17 AUX Input Terminal 18 FM Antenna 19 i POD Socket Amplifier Amplifier Amplifier Amplifier Amplifier 1 Headphone Terminal 2 Bass Control Knob 3 Treble C...

Page 11: ...er Button 10 Clock Button 11 Next Button G Previous Button H 12 Stop Button L 13 Fast Backward Button D 14 Mode Button 15 Number Button 16 Mute Button 17 USB Function Button 18 i POD Function Button 19 Loudness Button 20 Super Bass Button 21 Zoom Button 22 Audio Button 23 Menu Button 24 Sleep Button Timer Button 25 Volume Up Button Volume Down Button 26 Play Pause Button BF 27 Fast Forward Button ...

Page 12: ...ANDBY ANDBY ANDBY to turn the system on from standby mode Caution Caution Caution Caution Caution When turning the system on the system will continue in the mode it was in when it was turned off last time T T T T Turning the System Of urning the System Of urning the System Of urning the System Of urning the System Off f f f f Press the standby button ST ST ST ST STANDBY ANDBY ANDBY ANDBY ANDBY aga...

Page 13: ...of the DVD Player 11 When playing a DVD disc press the next button G to skip to the next chapter or title When playing a Video CD disc press the next button G to skip to the next track You can also operate the key G on the panel of the DVD Player When playing DVD disc press the previous button H to skip to the previous chapter or title When playing Video CD disc press the previous button H to skip...

Page 14: ...track or folder repeatedly Repeatedly press the mode button the screen shows orderly 15 Load a Video CD disc in PBC ON mode the MENU button turns the PBC function ON OFF You can select tracks or chapters with the number buttons 0 9 10 If the track or chapter number is less than 10 press the number buttons 0 9 If the track or chapter number is over 10 press 10 button and press the one of the number...

Page 15: ...select one of languages to play 23 If the Video CD has a menu you can set the playback control function to PBC ON mode by pressing the menu button MENU MENU MENU MENU MENU The unit reads the disc and the menu will display on the TV screen then use the number buttons to select the desired track When playing DVD disc press the root button MENU MENU MENU MENU MENU to return to the root menu for previ...

Page 16: ...f you are playing the CD disc the TV display is as follows Note Note Note Note Note Use the 1 9 10 buttons to input the sequence number you want to program playing After the program has been entered Press the S T W X buttons to select Start then press the ENTER ENTER ENTER ENTER ENTER button to start programmed play or select EXIT to exit the program If you setup a disc playing order over 10 press...

Page 17: ...the MENU MENU MENU MENU MENU button or L button to select different play mode These play modes list as the following Note Note Note Note Note When playing a picture CD press the L button to enter the THUMBNAIL MODE use the S T W X buttons to move the cursor to illuminate the MENU then press the ENTER ENTER ENTER ENTER ENTER button to enter the REMODE KEY FUNCTION list PROGRAM Transition Effect STO...

Page 18: ......

Page 19: ...second or more the frequency will change down automatically until a right station is found You can also operate the key D on the panel of the DVD Player You can store the well tuned station by pressing the program button PROGRAM PROGRAM PROGRAM PROGRAM PROGRAM on the remote You can preset up to 16 FM stations Tune in the desired station then press the program button PROGRAM PROGRAM PROGRAM PROGRAM...

Page 20: ...lock T Clock T Clock Time System ime System ime System ime System ime System The CT system may not properly operate in areas where RDS CT service is not available Once CT service is received the CT system keeps operating RDS CLOCK is displayed in areas where no CT services are available Changing Display Changing Display Changing Display Changing Display Changing Display During PS display press the...

Page 21: ...te indicator will blink Set the minute with the button or button Press the timer button TIMER TIMER TIMER TIMER TIMER the selected time is set Then set the daily timer to ON daily timer set is in effect or OFF daily timer set is to cancel by pressing the button or button Note Note Note Note Note You can only set the daily timer only in standby mode and the clock timer had been set The operating ti...

Page 22: ...ence After setting the number of minutes for the sleep timer the display will return to the display as before setting the sleep timer The system is now set to turn off after the number of minutes you set T T T T To confirm the sleep time o confirm the sleep time o confirm the sleep time o confirm the sleep time o confirm the sleep time When pressing the sleep button SLEEP SLEEP SLEEP SLEEP SLEEP t...

Page 23: ...ENTER button 5 Move the cursor by pressing S T button to highlight the selected item Note In cases of value setting press W X to adjust values 6 Press ENTER ENTER ENTER ENTER ENTER button to confirm Note Note Note Note Note Press W button to return to the upper level menu When in cases of value setting please press ENTER ENTER ENTER ENTER ENTER button Press SETUP SETUP SETUP SETUP SETUP button to ...

Page 24: ...aker and right channel is output from the right speaker L MONO Left channel is output from the front left and right speakers R MONO Right channel is output from the front left and right speakers 3D Processing 3D Processing 3D Processing 3D Processing 3D Processing This setting provides following sound effects Off Concert Living Room Hall Bathroom Cave Arena and Church HDCD HDCD HDCD HDCD HDCD When...

Page 25: ... on the TV Quality Quality Quality Quality Quality This menu helps you to set the video quality Sharpness Sharpness Sharpness Sharpness Sharpness Adjusts the sharpness level High Medium and Low Brightness Brightness Brightness Brightness Brightness Adjusts the brightness level Range 20 20 Contrast Contrast Contrast Contrast Contrast Adjusts the contrast level Range 16 16 Gamma Gamma Gamma Gamma Ga...

Page 26: ...at function Audio disc s sound track Subtitle disc s subtitles Disc Menu disc s menu Parental Parental Parental Parental Parental Some DVDs may have a parental level assigned to the complete disc or to certain scenes on the disc This feature lets you set a playback limitation level The rating levels are from 1 to 8 and are country dependent You can prohibit the playing of certain discs that are no...

Page 27: ...tory defaults and all your personal settings will be erased Caution Caution Caution Caution Caution When this function is activated all settings will be reset to factory defaults Password Setup Page Password Setup Page Password Setup Page Password Setup Page Password Setup Page Password Mode Password Mode Password Mode Password Mode Password Mode Select this item to set new password for this unit ...

Page 28: ... with the printed side up Clean or replace the disc Take out the disc turn on the unit for about an hour Reconnect the antenna securely Remove the obstruction Replace the batteries Unplug the system then plug it back in Protect the Disc Protect the Disc Protect the Disc Protect the Disc Protect the Disc 1 To keep the disc clean please do not touch the disc s surface when you are holding it You sho...

Page 29: ...onse 20Hz 20kHz 3dB Video output 1 VP P Horizontal definition 500 TV Amplifier Amplifier Amplifier Amplifier Amplifier Rated output power THD 10 45W x 2 Frequency response 20Hz 20kHz 3dB S N Ratio 65dB Loaded impedance 4Ω F M F M F M F M F M FM Frequency range 87 5 108 MHz FM Noise limit sensitivity 20μV FM S N 46dB Speaker Speaker Speaker Speaker Speaker Impedance 4Ω Input power 50W Dimensions 13...

Page 30: ...ive owners All rights reserved Manufactured under the license of Dolby Laboratories Dolby Pro Logic and the double D symbol are registered trademarks of Dolby Laboratories This symbol on the product or in the instructions means that your electrical and electronic equipment should be disposed at the end of life separately from your household waste There are separate collection systems for recycling...

Page 31: ......

Page 32: ......

Reviews: