Niagara 2200 User Guide
ViewCast
103
Configure ViewCast SNMP Agent Service
Complete the steps in the following tables to configure ViewCast SNMP Agent service. When the
configuration is complete, restart the system.
Configuring community names
To configure community names:
1.
Run Windows service management tool services.msc
2.
Right click on
SNMP Service
then click
Properties
.
3.
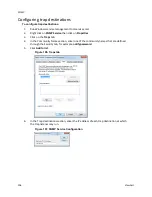
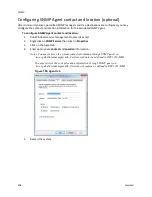
Click on the Security tab.
Figure 101. Security tab
4.
Click
Add
to add community names. For SNMP v1/v2c versions, treat each community
name as a password for access control of the SNMP-enabled systems.
Figure 102. Community Name field
You can define multiple community names with different community rights such as
NOTIFY, READ ONLY, READ WRITE and READ CREATE.
You can use these community names to access objects as defined in the standard
MIBs (such as RFC1213-MIB) and ViewCast private MIBs (such as VIEWCAST-
AVENCODER-MIB and VIEWCAST-AVENCODER-TRAP-MIB).
READ CREATE has the maximum access right while the NOTIFY has the minimum
Summary of Contents for Nagara 2200
Page 1: ...Niagara 2200 User Guide...
Page 42: ...Advanced Operations 36 ViewCast Figure 26 Flash Encoder properties...
Page 55: ...Niagara 2200 User Guide ViewCast 49 9 Click Save Settings...
Page 74: ......
Page 80: ......
Page 98: ......
Page 102: ...SNMP 96 ViewCast Figure 91 Installation Folder 4 Click Next Figure 92 Confirm Installation...
Page 111: ...Niagara 2200 User Guide ViewCast 105 Figure 105 IP Addresses...
Page 126: ......
Page 149: ......


