background image

Before You Begin 


ViewCast 

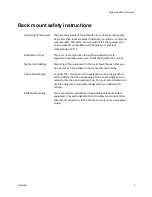
Refer all servicing to authorized service personnel. You must have authorized personnel only service any 
damaged appliance. Relevant damage may occur with but is not limited to the following: 


An unplugged or damaged power supply cord 


Spilled liquid on the appliance 


Fallen objects on the appliance 


Appliance exposure to rain or other moisture or liquid 


Failure to perform functions as described in the User Guide 


A dropped appliance 

ViewCast assumes no liability or responsibility for any damaged appliance that clients continue using. 

Use only attachments, accessories, or equipment specified by the manufacturer with the appliance. 
Using accessories or attachments not recommended by the encoder manufacturer voids the Limited 
Warranty. 

Do not attempt to service the appliance yourself. If you open or remove covers, you may expose 
yourself to dangerous voltage. Such action voids the Limited Warranty. Refer all servicing issues to 
authorized service personnel only. 

The plug-socket combination that serves as the main disconnecting device must be accessible at all 
times. 

Protect the power cord from anyone walking on it and being strained or pinched particularly at plugs, 
electrical receptacles, and the point where the power cord exits the appliance. 

Do not use adapter plugs or remove the grounding prong from the power cable. 

Use only the type of power source indicated on the marking label on the back panel of the unit to 
operate the appliance. Unplug the appliance power cord by gripping the plug and removing it from the 
power source. Do not pull the cord to remove the power source from the appliance.  

Do not plug the appliance into a wall outlet that contains an overload of electrical cords or power 
strips/extension cords. This type of overload may result in fire or electrical shock risks. 

Always handle the appliance carefully. Always avoid excessive shock and vibration to the appliance. 
Excessive shock or vibration can damage the appliance. 

WARNING!  Excessive shock or vibration to the appliance may result in electrical shock and 

personal injury or death. 


Summary of Contents for Nagara 2200

Page 1: ...Niagara 2200 User Guide...

Page 2: ...arty license fees that may occur with the use of our products by an end user including but not limited to creating or distributing content The user is responsible for any fees that Multimedia Patent T...

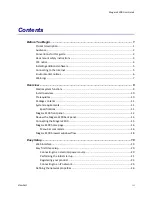
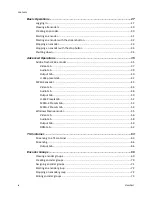
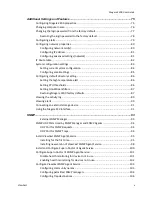
Page 3: ...Install overview 10 Prerequisites 10 Package contents 11 System requirements 11 Specifications 11 Niagara 2200 front panel 12 Review the Niagara 2200 back panel 14 Connecting the Niagara 2200 15 Niaga...

Page 4: ...o tab 37 Audio tab 39 Output tab 40 H 264 presets tab 42 MPEG4 encoder 43 Video tab 44 Audio tab 48 Output tab 50 H 264 Presets tab 52 MPEG 4 Presets tab 53 MPEG 2 Presets tab 54 Windows Media encoder...

Page 5: ...ing SimulStream filters 87 Restoring Niagara 2200 factory defaults 87 Viewing the activity log 89 Viewing alerts 90 Connecting an external storage device 91 Using the Niagara SCX interface 91 SNMP 93...

Page 6: ...stem 112 SNMP Examples 112 Query of system information SNMP GET Example 112 Start stop an encoder through SNMP 113 Start stop all encoders per group through SNMP 113 Start stop all encoders in the sys...

Page 7: ...mplifies system set up and operation allowing complete system control from anywhere on the network The ViewCast SimulStream driver enhancement software technology comes standard with the Niagara 2200...

Page 8: ...when referenced in a procedure The names of keys or keys to press In the example enter DTMF as the group type Press Enter to save your changes Note Provides supplemental information Note The prompt ma...

Page 9: ...l the equipment in a rack Mechanical Loading Mounting of the equipment in the rack should be such that you do not cause a hazard due to uneven mechanical loading Circuit Overloading Consider the conne...

Page 10: ...cial environment This equipment generates uses and may radiate radio frequency energy and if not installed and used in accordance with the instruction manual may cause harmful interference to radio co...

Page 11: ...y save the current encoder profiles and reload them when the Factory Restore is complete You can perform a Factory Restore at any time This process returns the appliance to the software load that came...

Page 12: ...the European Union does comply with the RoHS directive ViewCast certifies that this equipment shipped to the European Union conforms to the 2002 95 EC directive For current RoHS statement see www vie...

Page 13: ...amage the appliance thereby voiding the limited warranty You may stack multiple Niagara 2200 units as these appliances accommodate stacking Do not install the appliance in any area where the temperatu...

Page 14: ...g issues to authorized service personnel only The plug socket combination that serves as the main disconnecting device must be accessible at all times Protect the power cord from anyone walking on it...

Page 15: ...ocol domain name server DHCP DNS network Configure and connect your audio and video source to the Niagara 2200 Select your output formats and streaming settings Enter your streaming server information...

Page 16: ...iance using its power source 3 Connect the video source camera or video recorder to the system 4 Connect the Niagara 2200 to an IP network 5 Configure the Niagara 2200 system Prerequisites Before inst...

Page 17: ...t Guide Software Niagara 2200 CD If any components are missing or damaged do not continue with the installation Contact the ViewCast reseller from which you purchased your Niagara 2200 streaming media...

Page 18: ...button has three different options o Press and release after the first set of 10 LEDs start to light approximately one to three seconds to reboot the Niagara 2200 Note The lights on the volume indica...

Page 19: ...nnel input G Allows for connection of headphones to the Niagara 2200 for audio monitoring H Audio level headphone control This control changes the volume on the headset output only I This indicator il...

Page 20: ...input allows professional grade video connections E Connects USB control devices such as a memory card USB memory device keyboard and mouse F Standard video port that provides Y connection in S video...

Page 21: ...onnect the composite video CVBS Pb item D on Figure 3 Ensure you have a tight connection by rotating the cuff to connect 2 Connect the right and left audio Refer to Figure 3 item I for left and right...

Page 22: ...groups and encoders to that group Configuration Machine Properties View details on the Machine Properties of the Niagara 2200 including the Network Name Serial Number and all software versions install...

Page 23: ...ara 2200 User Guide ViewCast 17 and date for each alert Maintenance Product Registration Register your Niagara system to protect your investment Log Out Allows users to log off the system s web interf...

Page 24: ...8 ViewCast Niagara 2200 browser windows flow Figure 5 shows the interrelationship and flow of the available configuration windows you may use to configure the Niagara 2200 Figure 5 Niagara 2200 browse...

Page 25: ...ties Machine properties System System alerts Web interface The Niagara 2200 web interface presents a logical flow of configuration information for the encoding system Refer to Figure 5 for a diagram a...

Page 26: ...assistance in obtaining any missing or replacement parts Connecting to an electrical power source Niagara 2200 ships with one of the following power cables North America power cable International pow...

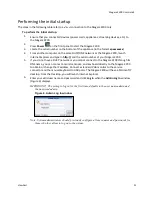
Page 27: ...a 2200 5 If you do not have a DHCP network or you cannot connect to the Niagara 2200 through its DNS name you can connect a monitor mouse and keyboard directly to the Niagara 2200 to obtain or change...

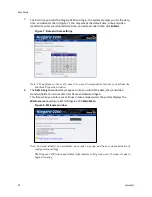
Page 28: ...ly reboot the system from the Machine Properties window 8 The Admin Log In window may reappear once you submit the date time and video standard fields You must enter User Name and Password again This...

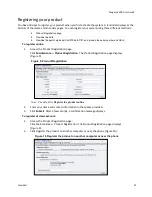
Page 29: ...roduct Registration page Click Maintenance Product Registration The Product Registration page displays Figure 9 Figure 9 Product Registration Note The default is Register the product online 2 Enter yo...

Page 30: ...e URL into the address bar 5 Enter your name and contact information in the spaces provided Figure 11 Contact Information 6 Select the type of product The serial number and SKU are automatically popul...

Page 31: ...t your network administrator for assistance If you are not able to browse to the unit with a DHCP network you may connect a monitor keyboard and mouse to the Niagara 2200 to determine and set the netw...

Page 32: ...et Mask Input or accept the default Press Enter to accept your selection Default Gateway Input or accept the Default Gateway Press Enter to accept your selection Preferred DNS Server Input or accept t...

Page 33: ...f the appliance in the format vp11xxxxxx 2 Open the web browser on your computer 3 You can either Type the Niagara 2200 serial number in the Address bar Figure 14 and press Enter Figure 14 Address bar...

Page 34: ...d admin System administrators should previously configure all user names and passwords for those who they allow to log on to the system 5 Press Login The Niagara 2200 Welcome window and Menu Bar appea...

Page 35: ...the name you assigned to the encoder Click this link to sort the encoders by name E Displays the status of the encoders F Displays the status of the last action G Click this link to create a new enco...

Page 36: ...te New Encoder window displays Figure 19 Figure 19 Create New Encoder window 2 Select the Encoder Type from the drop down list 3 Enter the name of the encoder Note Valid characters are alphanumeric sp...

Page 37: ...pped icon Figure 20 in the Streaming column for the encoder you want to start streaming Figure 20 Stopped Icon Messages appear detailing the encoder start progress Figure 21 Figure 21 Encoder Start St...

Page 38: ...a positive video stream and the audio meters display to indicate positive audio tracking WARNING Limitations exist for the number of streams you can encode simultaneously If you attempt to encode more...

Page 39: ...icon of the encoder you wish to stop streaming Figure 23 Figure 23 Started Icon 2 Messages appear detailing the encoder stop progress Figure 24 Figure 24 Encoder Stop Status The Encoders window appear...

Page 40: ...own To shut down 1 Briefly press Power on the front panel The Niagara 2200 front panel status light starts blinking and turns off once it is ready to stop streaming The Niagara 2200 powers off after a...

Page 41: ...video and audio settings then the streaming properties The streaming properties and advanced streaming settings are different for each type of encoder From the Flash Encoder Properties window Figure 2...

Page 42: ...Advanced Operations 36 ViewCast Figure 26 Flash Encoder properties...

Page 43: ...rop down list You can also specify a custom size for your video This customization is useful when you are capturing video to be played on a mobile video device that requires a non standard size for co...

Page 44: ...reassembles the video in a 24 fps progressive format Applies inverse telecine de interlacing to all telecine video Performs no de interlacing of video that is not telecine Available for NTSC video onl...

Page 45: ...of the system and your audio source 2 Select the Overlay Closed Caption check box to enable overlay closed captions Field 1 CC 1 is the default setting 3 Click the Audio Format from the drop down list...

Page 46: ...ave the encoded content to a file Each time you start this encoder the system overwrites the previous file Note You must Enable Streaming or Save to File If both Enable Streaming or Save to File are d...

Page 47: ...properties for available free space to determine your storage capacity A better practice would be to use the Flash media server to save a file or to save it to a remote drive If you inadvertently fill...

Page 48: ...ick Edit next to the setting you want to modify IMPORTANT These advanced settings affect the way the Encoder performs and if set incorrectly may lead to abnormal encoder operations Refer to Error Not...

Page 49: ...ings Begin with configuring the video and audio settings then the server and destination settings The server and destination settings are different for each type of encoder From the Encoder Properties...

Page 50: ...n you click Custom two additional fields Figure 37 appear so you can enter the exact size you want the resulting video to be Note The size in the Width and Height fields must be divisible by 2 Figure...

Page 51: ...Figure 38 Video filter settings Note Click Restore to the right of the filter to reset the settings to the default 9 Click the De Interlace setting you want to apply Figure 39 Options include None Pe...

Page 52: ...n such as cell phones to high resolution such as broadcast MPEG2 TS MPEG transport stream is a standard format for transmission and storage of audio video and Program and System Information Protocol P...

Page 53: ...Niagara 2200 User Guide ViewCast 47 Table 2 Valid output container selections for video encoder types Container H 263 Video MPEG 4 Video H 264 Video MPEG 2 MP4 3GP 3G2 TS...

Page 54: ...mpression efficiency in the frequency domain HE AAC V2 Enhances the compression efficiency of stereo signals Note Depending on the player on which the resulting stream will be heard either choice will...

Page 55: ...Niagara 2200 User Guide ViewCast 49 9 Click Save Settings...

Page 56: ...ou start the stream If you are streaming to a Helix a QuickTime or a Darwin server refer to its respective documentation or online message boards for setup details specific for the individual streamin...

Page 57: ...the File Name field and display the options Note By default the system sets this folder to D AVFiles with a default file name of capture mp4 Figure 42 Select a folder WARNING You can only media files...

Page 58: ...y you want to modify IMPORTANT These advanced presets affect the way the encoder performs and if set incorrectly may lead to abnormal encoder operations Refer to the H 264 Presets section for suggeste...

Page 59: ...the encoder performs and if set incorrectly may lead to abnormal encoder operations Refer to the H 264 Presets section for suggested values for the type of video you are streaming 2 Change the Value 3...

Page 60: ...rty you want to modify IMPORTANT These advanced presets affect the way the encoder performs and if set incorrectly may lead to abnormal encoder operations Refer to the H 264 Presets section for sugges...

Page 61: ...ettings Begin with configuring the video and audio settings then the server and destination settings The server and destination settings are different for each type of encoder From the Encoder Propert...

Page 62: ...or your video This customization is useful when you are capturing video to be played on a mobile video device that requires a non standard size for compatibility When you click Custom two additional f...

Page 63: ...reassembles the video in a 24 fps progressive format Applies inverse telecine de interlacing to all telecine video Performs no de interlacing of video that is not telecine Available for NTSC video onl...

Page 64: ...from the drop down list 2 Select the Overlay Closed Caption check box to enable overlay closed captions Field 1 CC 1 is the default setting 3 Select the Embedded Closed Caption to embed the closed cap...

Page 65: ...the encoder and server reside within the same network firewall To enable clients to pull the stream from the Niagara system set up a session and begin broadcasting directly from the system Clients Win...

Page 66: ...the Publishing Point Note This field is optional 8 Enter the User Name 9 Enter the Password 10 Select Enable Scripting to embed closed captions Note If closed captions is enabled through the Osprey dr...

Page 67: ...a folder WARNING You can only save media files to drive D Check drive properties for available free space to determine your storage capacity A better practice would be to use the streaming server to s...

Page 68: ...play to content This license contains the key to unlock the content and the rights that govern its use Figure 54 Refer to Appendix A on how to set up and import a DRM profile Figure 54 DRM tab To con...

Page 69: ...to create either a new MPEG4 encoder or edit an existing MPEG4 encoder Note The Type on the Encoders page Encoders All Encoders displays as 264 Streaming to a TS container Figure 55 MPEG4 encoder To c...

Page 70: ...and Mux Bitrate 4 Select either Video Bitrate and enter how much bandwidth to use for the video in the Bitrate field Mux Bitrate and enter the total bitrate the stream will consume video and audio in...

Page 71: ...ViewCast 65 7 View all the bitrates on the Output tab in the MPEGTS Muxer Settings Figure 59 MPEGTS Muxer Settings Note The total isn t simply Audio Bitrate Video Bitrate A small amount of overhead is...

Page 72: ...t tab Figure 60 Output tab Enable Streaming To configure streaming 1 Select Enable Streaming on the Output tab 2 Select the protocol Currently only UDP and RTP are supported Figure 61 Server Settings...

Page 73: ...t be an IPv4 address If you select Unicast then the IP address can not be in the 224 0 0 0 239 255 255 range If you select Multicast then the IP address must be in the 224 0 0 0 239 255 255 255 range...

Page 74: ......

Page 75: ...3 Encoder Groups window A Displays the CPU usage Click the link to open the System Configuration window to adjust the CPU threshold B Click this link to create a new group C Click this link to edit a...

Page 76: ...ields display Figure 64 Figure 64 Encoder Groups window To create encoder groups 1 Enter the name of the group 2 Click on the preset button you want to assign to this encoder group 3 Click on the enco...

Page 77: ...ow Figure 65 Click Encoders Active Group Figure 65 Active Encoder Group window To assign encoder groups 1 Click on the encoder group from the Select a Group drop down list Note Click on the Create New...

Page 78: ...rs on the Starting window while the group starts Note With each encoder started more system resources CPU cycles are consumed ViewCast recommends the total CPU threshold not exceed 80 Stopping an enco...

Page 79: ...lick the Edit link on the Encoder window The Encoder Groups window displays Figure 66 Figure 66 Encoder Groups window To edit encoder groups 1 Enter the name of the group 2 Click Yes or No 3 Click on...

Page 80: ......

Page 81: ...67 provides details on software versions network name serial number and hard drive configurations Click Configuration Niagara 2200 Properties from the menu bar on the home page Figure 67 Machine Prop...

Page 82: ...ame for the Niagara 2200 3 Click Submit at the bottom of the page Note The page refreshes and the system prompts you to reboot the Niagara 2200 Your changes do not take effect until the system restart...

Page 83: ...me field Note The system displays a new window Figure 70 that allows you to change your login password for the web interface Figure 70 Password change window Note You cannot change the User Name for t...

Page 84: ...tory default If you forget or lose your password you can restore the default password by running the Restore Niagara 2200 Factory Defaults option For more information see Restore Niagara 2200 Factory...

Page 85: ...able the Send Email check box to send an email to multiple recipients should an alarm occur Note You can optionally send an email alert to specific email address in the event of an application alarm Y...

Page 86: ...guration Network Properties from the menu bar on the home page Figure 72 Network Properties Configuring network card s The Niagara 2200 has two Gigabit network connections available on the Network Pro...

Page 87: ...bmit Configuring advanced settings network Advanced network settings provides the Niagara 2200 network name MAC Address and server IP address settings Figure 75 Figure 75 Advanced Settings The Niagara...

Page 88: ...Encoder Groups 82 ViewCast IP Route table This window enables you to change the IP destination Only experienced professionals should adjust these settings Figure 76 IP Route table...

Page 89: ...alert condition You can also customize the information the Niagara 2200 displays on its front panel when the system exists in idle mode This window also allows you to restore your Niagara 2200 to its...

Page 90: ...78 Figure 78 Current System Configuration To set current system configuration 1 Click the Hour in the drop down list 2 Click the Minutes in the drop down list 3 Click AM and PM in the drop down list 4...

Page 91: ...rator for assistance 5 Enter the password if required Note For security purposes the password for your account does not display once the system enters it into the Niagara 2200 settings Although this f...

Page 92: ...our files This drive has approximately 100 Gigabytes of storage capacity Use drives C E and F strictly for the Niagara 2200 operational programs Any modifications to these drives can permanently damag...

Page 93: ...m to its factory defaults Selecting this option erases all data currently stored on drive C and stops all currently running programs Remove any USB memory device before performing a Factory Restore Th...

Page 94: ...ore process completes Use the default directory D AV Files for saving your audio and video files The system only re images drive C when you use the Restore to Factory Defaults option It preserves all...

Page 95: ...this link to sort the activities by date B Indicates the type of activity Click this link to sort the activities by type C Select the types of activity you wish to view Options include Show All Gener...

Page 96: ...very alert event on the Niagara 2200 The alerts include any specific alert events for the encoder Figure 88 Alerts window A Displays the date and time that the alert occurred B Displays the message ID...

Page 97: ...one of the USB ports on the Niagara 2200 the Niagara 2200 automatically detects the removable storage device and assigns a drive letter to the device Use standard Windows methods to transfer AV files...

Page 98: ......

Page 99: ...in the system It will not only implement ViewCast private MIBs as listed below but also provide proxy functions to relay SNMP requests responses associated with those objects managed by other SNMP su...

Page 100: ...n the ViewCast SNMP agent is started Because the ViewCast SNMP agent acts as the master agent and talks to the external SNMP manager it is not necessary to enable the firewall setting on the same UDP...

Page 101: ...P agent installation file e g ViewCast SNMP Agent Installer_1 0 4 0 msi to install the ViewCast SNMP agent service Note If a previous version of ViewCast SNMP agent has ever been installed see Install...

Page 102: ...SNMP 96 ViewCast Figure 91 Installation Folder 4 Click Next Figure 92 Confirm Installation...

Page 103: ...he ViewCast SNMP agent service you need to install and configure the other two services Native Windows SNMP service and SuperMicro Health Assistant service see Install and Configure Supero Doctor III...

Page 104: ...st SNMP agent is installed then the following window appears and you need to uninstall the previous version before continuing Figure 95 Windows Installer To uninstall a previous version of ViewCast SN...

Page 105: ...SNMP agent service is currently running the following window displays Figure 98 ViewCast SNMP Agent dialog box 4 Select to automatically close the application and click OK The ViewCast SNMP agent wil...

Page 106: ...em temperature To install the Supero Doctor III client and Supero Doctor III SNMPAgent Service 1 Download the Supero Doctor III client installation package from ftp ftp supermicro com utility SuperDoc...

Page 107: ...not installed To determine and disable devices not in use 1 Run Supero Doctor III client by clicking Start All Programs SUPERMICRO Supero Doctor III client 2 In Supero Doctor III client click on the I...

Page 108: ...e health monitoring for devices not in use 1 Run Supero Doctor III client by clicking Start All Programs SUPERMICRO Supero Doctor III client 2 In the Supero Doctor III client click Item The following...

Page 109: ...tab Figure 101 Security tab 4 Click Add to add community names For SNMP v1 v2c versions treat each community name as a password for access control of the SNMP enabled systems Figure 102 Community Name...

Page 110: ...ervice management tool services msc right click on SNMP Service 2 Click on Properties 3 Click the Security tab Figure 103 SNMP Service Properties Security tab 4 Select Accept SNMP packets from these h...

Page 111: ...Niagara 2200 User Guide ViewCast 105 Figure 105 IP Addresses...

Page 112: ...k on Properties 3 Click on the Traps tab 4 In the Community Name section enter one of the community names that are defined through the Security tab for example notifypassword 5 Click Add to list Figur...

Page 113: ...Niagara 2200 User Guide ViewCast 107 7 After all the IP addresses under the trap destination section are added click Apply Figure 108 Trap destinations...

Page 114: ...management tool services msc 2 Right click on SNMP Service then click on Properties 3 Click on the Agent tab 4 Enter appropriate Contact and Location information Notes You may retrieve the system con...

Page 115: ...se_win_snmp_settings true valid_communities_option use_win_snmp_settings true trap_configuration_option use_win_snmp_settings true snmp_setting_flags 4 In vcst_snmp_agent_cfg xml for element udp_port_...

Page 116: ...hile the ViewCast SNMP agent is running disable the IIS Internet Information Services logging for ViewCast Encoders Web Service This step avoids the 10 G free hard disk space disk space from being fil...

Page 117: ...gure 111 Feature 7 On the right side under Actions click Disable Note After IIS is restarted the IIS logging for the EncodersWebService would remain disabled 8 Repeat steps 1 through 7 to enable the I...

Page 118: ...ive Windows SNMP service The IP address per interface or NIC can be retrieved through iso org dod internet mgmt mib 2 ip ipAddrTable as defined in RFC1213 MIB The MAC address per interface or NIC can...

Page 119: ...rMIB avencoderObjects avencod erGroupTable avencoderGroupEntry groupCommand 1 Set object ID to something like iso org dod internet private enterprises viewcast avencoder avencoderMIB avencoderO bjects...

Page 120: ...1 Locate the VIEWCAST AVENCODER TRAP MIB txt under C Program Files x86 ViewCast ViewCast SNMP Agent 2 Load the VIEWCAST AVENCODER TRAP MIB txt into the SNMP manager 3 Verify the Port field is set to...

Page 121: ...t the DRM profile using the Microsoft Windows Media Encoder application included with Niagara streaming media systems or available as a free download from Microsoft Corporation http www microsoft com...

Page 122: ...en the Remote Desktop Connection Figure 112 Figure 112 Remote Desktop Connection 2 Click Options The setting tabs display 3 Click the Local Resources tab 4 Under Remote computer sound click Leave at r...

Page 123: ...it close the session from the system This step allows its internal programs to continue running 8 Go into Windows Explorer and change the folder settings to show all files and show protected files 9 C...

Page 124: ...116 Starting Windows Media Encoder 11 When the New Session Wizard displays click Cancel Figure 117 Figure 117 New Session Wizard 12 Click Properties under the top menu bar Figure 118 Figure 118 Prope...

Page 125: ...his process for each DRM profile you wish to import 17 Exit from the Windows Media Encoder application when finished Note If the system prompts if you want to save your encoding session click No optio...

Page 126: ......

Page 127: ...BFramesMax 0 to 4 GOPSize 1 to 4000 GOPSizeMin 1 to 4000 InLoopDeblockingFilterAlpha 6 to 6 InLoopDeblockingFilterBeta 6 to 6 LookaheadFrames 0 to 200 NoiseReduction 0 to 1500 QuantizerMax 1 to 51 Qua...

Page 128: ...eference frames This setting limits the minimum length after each I frame before another can be placed The suggested default is 1 x the frame rate InLoopDeblockingFilterAlpha This value affects the ov...

Page 129: ...so this value affects the bit rate with 51 keeping closer to a constant bit rate while lower values cause the bit rate to vary QuantizerMin This value sets the minimum quantizer ever used in the encod...

Page 130: ...elp you select those Advanced Encoder Settings These examples are suggestions and you should understand and select the appropriate values for your streaming application See Settings for explanations o...

Page 131: ...unt of frames the encoder keeps in its buffers to perform various calculations The higher this value the better the quality and the closer to a constant bit rate the encoded video will be however the...

Page 132: ...o will be preserved For lower bit rate encoding using 0 smooths out the video appearance QuantizerMax This value sets the maximum for the quantizer in use The range is 1 to 51 with 51 being the highes...

Page 133: ...2200 User Guide ViewCast 127 Setting Explanation optimal encoding the higher the value the better the video quality but the higher the CPU usage This value can also improve visual quality at lower bi...

Page 134: ...elp you select those Advanced Encoder Settings These examples are suggestions and you should understand and select the appropriate values for your streaming application See Settings for explanations o...

Page 135: ...rm various calculations The higher this value the better the quality and the closer to a constant bit rate the encoded video will be however the CPU load is higher and the latency from the source thro...

Page 136: ...the quantizer in use The range is 1 to 51 with 51 being the highest and least complex quantizer available The value 31 is a good default However lowering this value increases the CPU load in some case...

Page 137: ...lder is created on the remote PC with full access for both Niagara 2200 and SCXUser On the Niagara 2200 the mapped network drive is created to reconnect at logon using the SCXUser username To set up u...

Page 138: ...ange password at next logon 11 Enable User cannot change password 12 Enable Password never expires Figure 122 New User window 13 Click Create 14 Repeat steps 5 through 13 to create the user SCXUser us...

Page 139: ...nagement click Groups Figure 124 Groups 18 Double click on Administrators 19 Click Add Figure 125 Administrators Properties window 20 Click Add The Select Users window displays 21 Click Locations 22 S...

Page 140: ...34 ViewCast 23 Enter niagara2200 for the object name and then click OK 24 The user niagara2200 appears in the list of Administrators Figure 127 Administrator Properties 25 Repeat steps 19 through 22 t...

Page 141: ...te The shared folder s must be created on the remote PC 1 Open Computer 2 Open the drive where the shared folder will be created 3 Right click select New then Folder Figure 128 Create new folder 4 Ent...

Page 142: ...click on the folder and then select Properties Figure 130 Folder Properties window 6 Click on the Sharing tab 7 Click Share The File Sharing window displays 8 Type a name and then click Add or click...

Page 143: ...der permission level for this user and select Read Write Figure 131 Read Write permissions 10 Click Share 11 Repeat steps 2 through 9 to add SCXUser to the Share Permissions 12 Click Done Figure 132 F...

Page 144: ...Network Drive 3 Select a drive 4 In the text box for folder enter the network path to the shared folder on the remote PC for example DDSP052206 N2Share 5 Make sure Reconnect at logon is enabled 6 Enab...

Page 145: ...presets 42 Output settings 40 Video settings 37 IP address 81 MPEG4 Audio settings 48 H 264 Presets tab 52 MPEG 2 Presets tab 54 MPEG 4 Presets tab 53 Output tab 50 Video settings 44 TS container Stre...

Page 146: ...edia Encoder 118 Drop Down Temperature Setting Options 86 E Easy First Time Set Up 20 Easy Set Up 19 Editing Encoder groups 73 Email Alert 79 Email SMTP Setting fields 85 Enabling DRM function in Niag...

Page 147: ...ets 124 N Network card options 80 Network Card s 80 Network Card s field 80 Network Cards 80 Network Properties 80 Network Properties window 80 New User window 132 Niagara 2200 Back panel 14 Browser W...

Page 148: ...ice Configuration 104 106 SNMP Service Properties Security tab 104 Supero Doctor III Client 101 Trap destinations 107 Traps tab 106 ViewCast SNMP Agent 97 ViewCast SNMP Agent dialog box 99 ViewCast SN...

Page 149: ......

Page 150: ...wCast Niagara and design TM are registered trademarks of ViewCast Corporation or its subsidiaries All other trademarks are the property of their respective owners Product specifications and availabili...

Reviews: