Niagara 2200 User Guide
ViewCast
25
Connecting to an IP network
The Niagara 2200 network settings for its network interface defaults to obtain an IP address from a
DHCP server on the network. If a DHCP server is not available or is not on the network, Niagara 2200
assigns its own IP address.
Note: If you are not familiar with network protocols, contact your network administrator for
assistance. If you are not able to browse to the unit with a DHCP network, you may connect a
monitor, keyboard, and mouse to the Niagara 2200 to determine and set the network
connections.
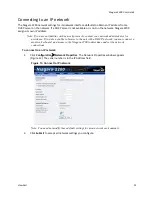
To connect to an IP network:
1.
Click
Configuration
Network Properties
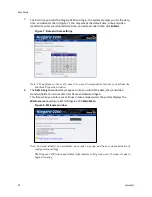
. The Network Properties window appears
(Figure 13). The serial number is in the IP Address field.
Figure 13. Connect to IP network
Note: You need not modify these default settings for most network environments.
2.
Click
Submit
to accept all network settings you configure.
Summary of Contents for Nagara 2200
Page 1: ...Niagara 2200 User Guide...
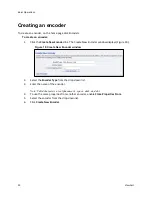
Page 42: ...Advanced Operations 36 ViewCast Figure 26 Flash Encoder properties...
Page 55: ...Niagara 2200 User Guide ViewCast 49 9 Click Save Settings...
Page 74: ......
Page 80: ......
Page 98: ......
Page 102: ...SNMP 96 ViewCast Figure 91 Installation Folder 4 Click Next Figure 92 Confirm Installation...
Page 111: ...Niagara 2200 User Guide ViewCast 105 Figure 105 IP Addresses...
Page 126: ......
Page 149: ......


