Niagara Pro II User Guide
ViewCast
133
Appendix A: DRM for Windows Media
You can protect your content using a technology called Digital Rights Management (DRM). Niagara
SCX allows you to encrypt your content with DRM technology while you are encoding. You can apply
DRM while encoding to a file and when broadcasting a stream. Users will be required to obtain a
license to play the content. This license contains the key to unlock the content and the rights that
govern its use.
Note: Licenses are issued by a third-party license provider, so you must set up an account with a
third-party license provider to protect your content.
Niagara SCX automatically detects any available DRM profiles imported on the encoding system. If
no DRM profiles are installed, the DRM functions in Niagara SCX are disabled. To enable the DRM
function in Niagara SCX, you must do the following:
1.
Set up an account with a third-party license provider and create a DRM profile.
2.
Import the DRM profile using the Windows Media Encoder application included with
Niagara streaming media appliances or available as a free download from Microsoft
Corporation (
http://www.microsoft.com
).
3.
Restart the unit on which Niagara SCX is installed, allowing the software to auto-detect and
enable its DRM functions.
Importing a DRM profile
If you have not already done so, set up an account with a licensed provider and create a DRM
profile. Once you create the DRM profile, you must use Windows Media Encoder to import the
profile on the encoding system.
Windows Media Encoder is included in Niagara streaming media appliances that have Niagara SCX
version 5.0 or later installed. To access the desktop of the Niagara system, attach a keyboard, a
mouse, and a monitor to the system. If the system is installed in a location that does not provide
physical access, you can use Windows Remote Desktop Connection to access the desktop.
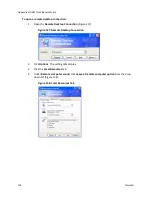
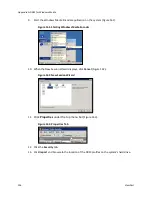
IMPORTANT! When connecting to a Niagara system using a remote desktop connection, it is
extremely important you set the Local Resources to
Leave at remote computer
before
connecting to the system.
Summary of Contents for Niagara Pro II
Page 1: ......
Page 26: ......
Page 62: ...Advanced Operations 56 ViewCast...
Page 144: ......
Page 163: ...Niagara Pro II User Guide ViewCast 157 Access health menu CPU status Memory available...
Page 165: ...Niagara Pro II User Guide ViewCast 159 View network settings Enable DHCP...
Page 166: ...Appendix D System Menu LCD Display 160 ViewCast Set static IP addresses...
Page 167: ...Niagara Pro II User Guide ViewCast 161 Set gateway address...
Page 168: ...Appendix D System Menu LCD Display 162 ViewCast Set date and time Set video standard x3...


