Niagara Pro II User Guide
ViewCast
135
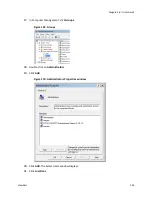
5.
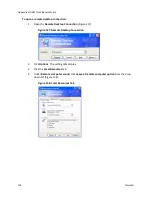
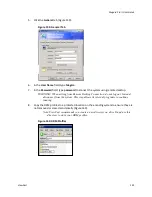
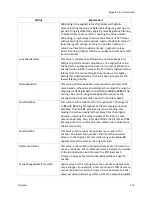
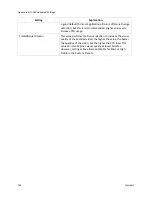
Click the
General
tab (Figure 159).
Figure 159. General Tab
6.
In the
User Name
field, type
Niagara
.
7.
In the
Password
field, type
password
to connect the system using remote desktop.
WARNING! When exiting from Remote Desktop Connection, do not log out. Instead,
disconnect from the system. This step allows its internal programs to continue
running.
8.
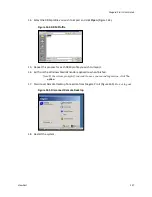
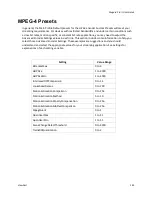
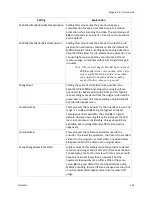
Copy the DRM profiles to a protected location on the encoding system to ensure they are
not removed or erased accidentally (Figure 160).
Note: ViewCast recommends you create a new directory on drive D and use this
directory to store your DRM profiles.
Figure 160. DRM Profiles
Summary of Contents for Niagara Pro II
Page 1: ......
Page 26: ......
Page 62: ...Advanced Operations 56 ViewCast...
Page 144: ......
Page 163: ...Niagara Pro II User Guide ViewCast 157 Access health menu CPU status Memory available...
Page 165: ...Niagara Pro II User Guide ViewCast 159 View network settings Enable DHCP...
Page 166: ...Appendix D System Menu LCD Display 160 ViewCast Set static IP addresses...
Page 167: ...Niagara Pro II User Guide ViewCast 161 Set gateway address...
Page 168: ...Appendix D System Menu LCD Display 162 ViewCast Set date and time Set video standard x3...

