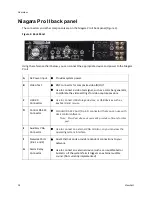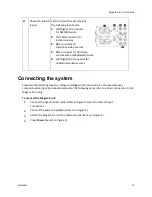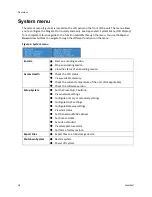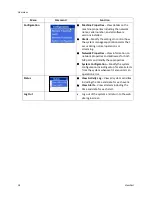
Overview
10
ViewCast
Install overview
This section addresses the high-level actions you must perform to physically connect and set up your
system.
You must complete the following primary tasks to install the Niagara Pro II:
1.
Address and comply with all prerequisites.
2.
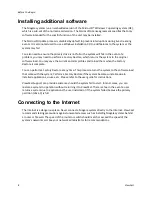
Connect the Niagara Pro II streaming media system using its power source.
3.
Connect the video source (camera or video recorder) to the system.
4.
Connect the Niagara Pro II to an IP network.
5.
Configure the Niagara Pro II system.
Prerequisites
Before installing and connecting the system, ensure you comply with the following prerequisites:
All packaged items are undamaged and in working order.
Your environment meets all system requirements.
Safety instructions, notices, and warnings detailed in
Before You Begin
including:
o
Rack Mount Safety Instructions
o
FCC Notice
o
Environmental Notices
o
Warnings
Package contents
Completely unpack all contents from the box and inspect each item for damage. Ensure that you
have all the components listed below:
System
Niagara streaming media system
Power Cables
One of the following:
o
North America power cable (110 vac)
o
International power cable (220 vac)
o
UK power cable (220 vac)
Adapters
BNC-to-RCA, male-to-female (8)
Hardware
75 OHM BNC terminator
1 pair rack slide rails
2 rack handles
3 pin plug
Rubber feet (4)
Summary of Contents for Niagara Pro II
Page 1: ......
Page 26: ......
Page 62: ...Advanced Operations 56 ViewCast...
Page 144: ......
Page 163: ...Niagara Pro II User Guide ViewCast 157 Access health menu CPU status Memory available...
Page 165: ...Niagara Pro II User Guide ViewCast 159 View network settings Enable DHCP...
Page 166: ...Appendix D System Menu LCD Display 160 ViewCast Set static IP addresses...
Page 167: ...Niagara Pro II User Guide ViewCast 161 Set gateway address...
Page 168: ...Appendix D System Menu LCD Display 162 ViewCast Set date and time Set video standard x3...

