Niagara Pro II User Guide
ViewCast
25
9.
Use the
Up
and
Down
arrow buttons to increment the numerical value of the minute.
10. Press
Enter
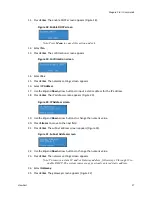
. The select video format screen appears.
Figure 10. Select video format screen
11. Press
Enter
. The Video Format screen appears.
Figure 11. Video format screen
12. Use the
Up
and
Down
arrow buttons to select the format.
13. Press
Enter
. The confirmation screen appears (Figure 12) confirming you have successfully setup
the Niagara Pro II.
Figure 12. Confirmation screen
14. Press
Enter
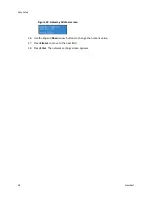
to exit the setup menu and reboot the system. The booting screen appears (Figure
13).
Figure 13. Booting screen
Connecting to an IP network
The Niagara Pro II network settings for its two 1,000 megabit network interfaces default to
dynamically obtain an IP address from a DHCP server on the network.
Note: If you are not familiar with network protocols, contact your network administrator for
assistance. If you are not able to browse to the unit with a DHCP network, you may connect a
monitor, keyboard, and mouse to the system to determine and set the network connections.
Summary of Contents for Niagara Pro II
Page 1: ......
Page 26: ......
Page 62: ...Advanced Operations 56 ViewCast...
Page 144: ......
Page 163: ...Niagara Pro II User Guide ViewCast 157 Access health menu CPU status Memory available...
Page 165: ...Niagara Pro II User Guide ViewCast 159 View network settings Enable DHCP...
Page 166: ...Appendix D System Menu LCD Display 160 ViewCast Set static IP addresses...
Page 167: ...Niagara Pro II User Guide ViewCast 161 Set gateway address...
Page 168: ...Appendix D System Menu LCD Display 162 ViewCast Set date and time Set video standard x3...


