Niagara Pro II User Guide
ViewCast
31
Starting an encoder
Niagara Pro II is a two-channel encoder, which means you can connect and stream up to two audio
and video sources at any given time. However, you can stream the same audio and video at multiple
data rates and multiple formats to provide the best user experience for different viewing audiences.
For example, you can stream Windows Media at full resolution (1 Mbps) and at the same time
stream video at CIF resolution (300 kbps).
The Niagara Pro II LCD displays a list of available encoder profiles you can use and the status of each.
To start an encoder:
1.
Press
Menu
. The system menu appears.
2.
Press
Enter
. The encoder screen appears.
3.
Use the
Up
and
Down
arrow buttons to select the encoder profile you want to use for this
encoding session.
4.
Press
Stream
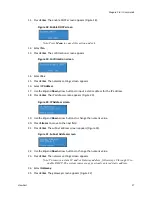
to start the encoder. The starting screen appears (Figure 29).
Figure 29. Starting screen
5.
The system menu appears with Encode selected. Press
Enter
.
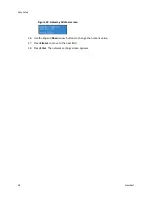
The encoder screen appears indicating that the encoder you selected has begun streaming
(Figure 30).
Figure 30. Encoder Screen
Note: If the encoder you started is assigned to one of the
Preset A,B,C
buttons, the
corresponding button illuminates during and after the starting process.
6.
Repeat this method to start streaming multiple encoders at the same time.
WARNING! There is a limit to how many encoders the system can stream at one time. If
you exceed this limit, the streams will drop frames lose audio and video
synchronization, and the video will appear to stutter resulting in a poor viewer
experience. If you do not reduce the number of streams to lessen the CPU load, all
encoders could self-terminate without warning. Refer to the
Checking CPU usage
section to understand the limitations.
Summary of Contents for Niagara Pro II
Page 1: ......
Page 26: ......
Page 62: ...Advanced Operations 56 ViewCast...
Page 144: ......
Page 163: ...Niagara Pro II User Guide ViewCast 157 Access health menu CPU status Memory available...
Page 165: ...Niagara Pro II User Guide ViewCast 159 View network settings Enable DHCP...
Page 166: ...Appendix D System Menu LCD Display 160 ViewCast Set static IP addresses...
Page 167: ...Niagara Pro II User Guide ViewCast 161 Set gateway address...
Page 168: ...Appendix D System Menu LCD Display 162 ViewCast Set date and time Set video standard x3...


