Advanced Operations
90
ViewCast
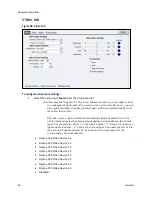
2.
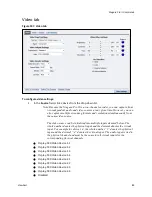
In the
Input
field, select the video input from the drop-down list.
Composite
SVideo
SerialDigital
1394
IMPORTANT! The video input must match the connectors on the back of the system and
your video source.
3.
The
Proportions
field has two settings:
Standard
– Square pixels for a VGA monitor
CCIR601
– Elongated pixels for a TV monitor
Click the setting that reflects the type of display on which your viewers will view your
content. For example, if you want to stream your video on the Internet for the user to view
on a computer monitor, select
Standard
. If you select an inaccurate setting, your video will
be distorted.
Note: Selecting proportions and video standard settings may change video size
selections.
4.
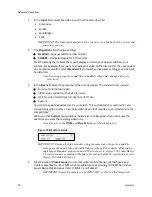
In the
Size
field, select the pixel size of the encoded video. The standard sizes include:
Full-size for full screen video
CIF for video scaled from full-size to ¼ size
QCIF for video scaled from full-size to ¼ of CIF size
Custom
You can also specify a custom size for your video. This customization is useful when you
are capturing video to play on a mobile video-device that requires a non-standard size for
compatibility.
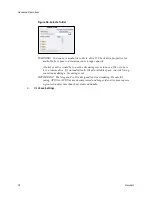
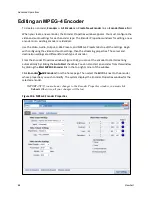
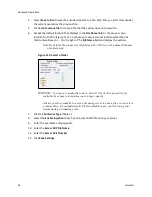
When you click
Custom
, two additional fields (Figure 108) appear so you can enter the
exact size you want the resulting video to be.
Note: The size in the
Width
and
Height
fields must be divisible by 2.
Figure 108. Custom Fields
IMPORTANT! Ensure all of the encoders using the same video Proportion and Size
settings use the same Video and Audio Source settings. For example, all encoders
capturing at Standard proportion and CIF size are set to Osprey-5X0 Video Device
1.1 while encoders capturing at Standard proportion but QCIF resolution are set to
Osprey-5X0 Video Device 1.2.
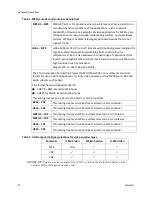
5.
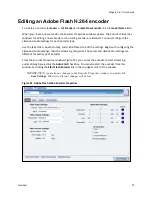
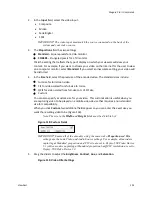
Click the type of
Video Encoder
for Internet video, mobile phones, set top boxes, and
create media files for other MPEG-4 compatible devices according to the Motion Picture
Expert Group (MPEG) types (refer to Table 1 and Table 2).
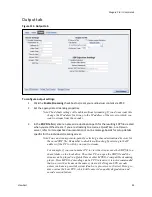
IMPORTANT! Select the container type (MP4, 3GP, or 3G2) on the Output tab.
Summary of Contents for Niagara Pro II
Page 1: ......
Page 26: ......
Page 62: ...Advanced Operations 56 ViewCast...
Page 144: ......
Page 163: ...Niagara Pro II User Guide ViewCast 157 Access health menu CPU status Memory available...
Page 165: ...Niagara Pro II User Guide ViewCast 159 View network settings Enable DHCP...
Page 166: ...Appendix D System Menu LCD Display 160 ViewCast Set static IP addresses...
Page 167: ...Niagara Pro II User Guide ViewCast 161 Set gateway address...
Page 168: ...Appendix D System Menu LCD Display 162 ViewCast Set date and time Set video standard x3...


