8
Installation
(Continued)
NOTE:
Only use the USB cable and the power adapter
supplied with scanner. Use of other cables may lead to a
malfunction.
Connecting the Scanner:
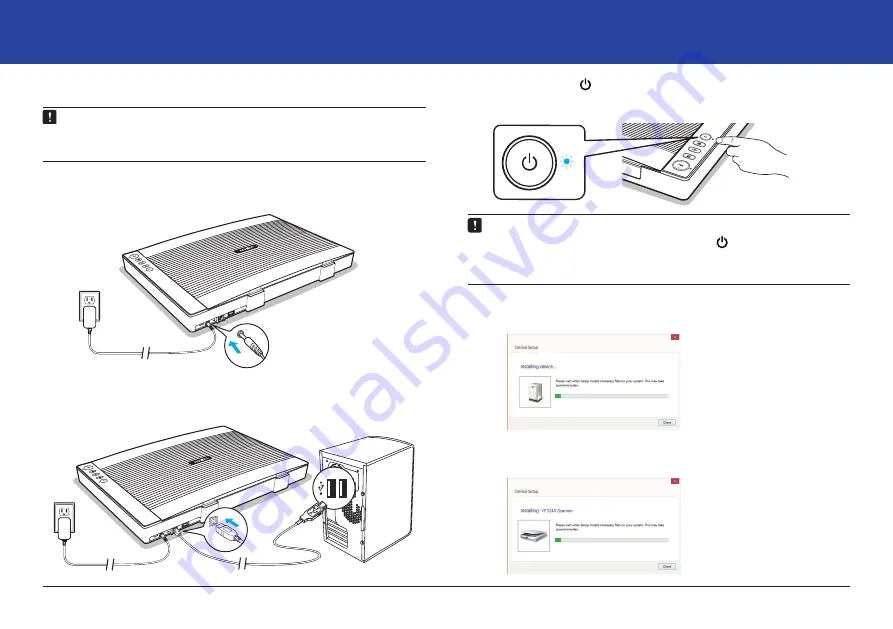
1. Connect supplied Power Adapter to the scanner’s DC IN port,
and plug the other end to a power outlet.
2. Connect supplied USB Cable to the scanner’s USB Port and
the other end to the computer.
3. Press and hold
[POWER]
to turn on the scanner until the
Power LED lights up in blue.
4. The
[Installing Device]
window will appear when the scanner
is turned on for the first time.
5. Please wait until the driver is finished being configured and
the
[Installing Device]
window disappears.
NOTE:
•
To turn off the power, press and hold
[POWER]
for a
while until the Power LED turns off.
•
The scanner will auto power off after no operation for 15min.


