background image

TOPSIDE CONTROL INSTRUCTIONS

(Royale ETS, Legacy, Legend & Heritage)

INITIAL START-UP

When your spa is first activated, it will go into a Priming mode, indi-
cated by “Pr”. The Priming mode will last for less than 5 minutes.
Then, the spa will begin to heat and maintain the water temperature in
the Standard mode indicated by “St”.

TEMPERATURE (80°F – 104°F / 26°C – 40°C)

The start up temperature is set at 100°F/37°C. The last temperature is
constantly displayed on the LCD.

Note: The last spa temperature displayed is current only
when the pump has been running for at least 2 minutes.

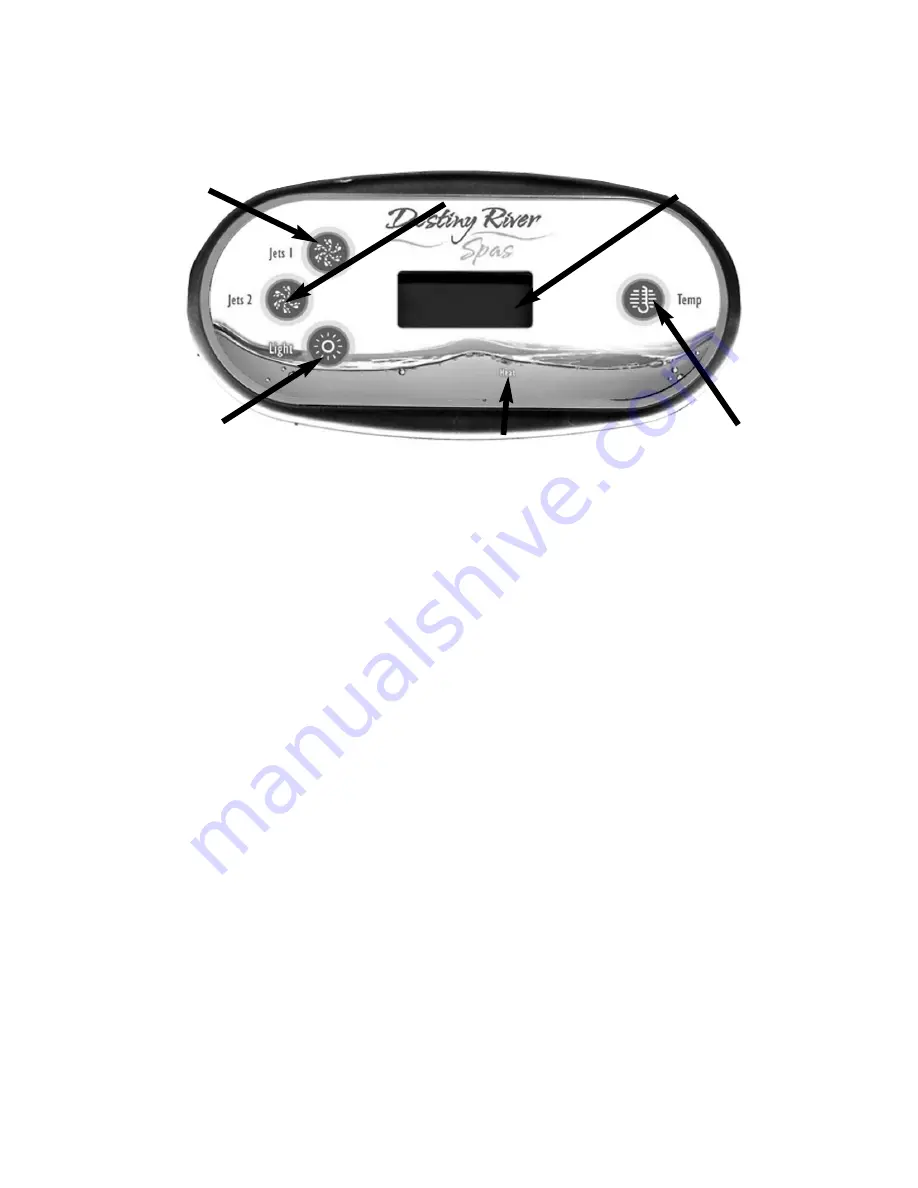
Press the “Temp” button to display the temperature previously set. The
set temperature flashes on the display. Pressing the “Temp” button a
second time, while it is still flashing, will cause the set temperature to
increase or decrease depending on what direction was last chosen.
Each press to follow will change the set temperature in the same direc-
tion. If the opposite direction is desired, release the pad and let the
display revert to the actual water temperature. Press the button to dis-
play the set temperature, and press again to make the temperature
change in the desired direction. After 

three seconds

, the LCD will

stop flashing and display the current spa temperature.

15

Heat On

Indicator Light

Turns Light

On/Off

Controls Low

Speed/High Speed

Pump

Displays Temperature and

Diagnostic Messages

Sets Water

Temperature

Pump 2 Controls Secondary

Pump, On and Off

Summary of Contents for Destiny River 2011

Page 1: ...2 20 01 11 1 O Ow wn ne er r s s M Ma an nu ua al l 2 20 01 11 1 O Ow wn ne er r s s M Ma an nu ua al l ...

Page 2: ...ctions 11 Diagnostic Messages 12 Aurora III Royale Legacy Legend Heritage Features 14 Topside Control Instructions Royale ETS Legacy Legend Heritage 15 Spa Jets and Air Controls 18 Spa Startup Directions 21 Fill the Spa With Water 21 Skimmer Side Filter 21 Add Start Up Chemicals 21 Maintenance 22 Spa Draining 22 Spa Surface Care 23 Long Term Storage 23 Pillow Maintenance 23 Filter Cleaning 24 Spa ...

Page 3: ...ter flow created by the pump Should the need arise to replace the suction fittings or the pump be sure that the flow rates are compatible Never operate the spa if the suction fittings are broken or missing Never replace a suction fitting with one rated less than the flow rate marked on the original fitting 4 DANGER Risk of Accidental Drowning Extreme Caution must be exercised to prevent unauthoriz...

Page 4: ...lcohol drugs or medication before or during spa use may lead to unconsciousness with the possibility of drowning d Persons suffering from obesity or with a medical history of heart disease low or high blood pressure circulatory system problems or diabetes should consult a physician before using a spa e Persons using medication should consult a physician before using a spa since some medication may...

Page 5: ...urn off ALL power to the system at the main power source breaker NOTE A READILY ACCESSIBLE DISCONNECTING MEANS SHALL BE PROVIDED DURING INSTALLATION SAVE THESE INSTRUCTIONS PERSONAL SAFETY PRECAUTIONS 1 Please use the spa when others are present 2 Children should have spa access only with the permission and supervision of an adult 3 To reduce the risk of child drowning keep the spa filter clean an...

Page 6: ...e constructed to meet current state and local codes Gates must be self closing and self latching Name badge on rub rail indicates equipment location ELECTRICAL REQUIREMENTS VS 500 501 Breaker 220v Destiny River Royale ETS Aurora III 220v 110v CAPACITY 60 amps 50 amps 40 amps 20 amps POLES 2 2 2 1 WIRES 4 4 4 3 Never tie ground and neutral together Your 110 volt or 220 volt spa pack is designed to ...

Page 7: ...220 VOLT 6 Green ground connection located on left side of control panel WHITE BLACK RED GREEN ...

Page 8: ...GFCI WIRING INSTALLATION 220V 7 ...

Page 9: ...ed and voids the warranty 3 Do not use aluminum wiring Use only copper conductive wiring 4 Wire gauge must be in accordance with NEC requirements for the distance from current source to spa and the current rating as stated on the ID label that is attached to the equipment control enclosure 5 All wiring installed in conduit must be approved for usage by state and local codes The conduit must termin...

Page 10: ...he spa is filled at least 3 4 way up the skimmer opening Make sure the gate valves are in the open or up position WARNING Do not run spa with gate valves closed or run pump with no water circulating in spa for long periods Damage could occur to the spa equipment 9 ...

Page 11: ... ni in ng g f fo or r a at t l le ea as st t 2 2 m mi in nu ut te es s Press the Temp button to display the temperature previously set The set temperature flashes on the display Pressing the Temp button a second time while it is still flashing will cause the set temperature to increase or decrease depending on what direction was last chosen Each press to follow will change the set temperature in t...

Page 12: ...emperature displayed is current only when the pump has been running for at least 2 minutes St will be displayed momentarily when you switch into Standard mode Economy Mode heats the spa to the set temperature only during filter cycles Ec will display solid when temperature is not current and will alternate with temperature when temperature is current Sleep Mode heats the spa to within 20 F 10 C of...

Page 13: ...F 43 C automatically reset If it does not shut off the power to the spa and call your dealer or service organization IC Ice Potential freeze No action required The pump s condition detected will automatically activate regardless of spa status SA The spa has shut down If the problem persists contact The sensor that is your dealer or service organ plugged into the ization May appear temporari Sensor...

Page 14: ... shut down but other spa functions continue to run normally dr Possible inadequate Check water level in spa If water poor flow or water level is okay make sure air bubbles detected pump s have been primed in the heater Spa Press any button to reset or this is shut down for 15 message will automatically reset minutes within 15 minutes dy Inadequate water Follow action required for dr detected in he...

Page 15: ...tem This lighting which encompasses the interior of the spa is also incor porated into the light in the foot well of these models The LED Lighting system consists of a 9 position controller The first time the light is turned on it will begin to display all 9 colors available in an automat ic rotating sequence Each time you sequence the light on off all col ors will be displayed individually The la...

Page 16: ... previously set The set temperature flashes on the display Pressing the Temp button a second time while it is still flashing will cause the set temperature to increase or decrease depending on what direction was last chosen Each press to follow will change the set temperature in the same direc tion If the opposite direction is desired release the pad and let the display revert to the actual water ...

Page 17: ...ton to turn the light on and off If left on the light automatically turns off after 4 hours In spas equipped with LED light press the light button consecutively to change the color sequenc ing MODE The mode is changed by pressing the Temp button then pressing the Light button Standard Mode is programmed to maintain the desired temperature Note that the last measured spa temperature displayed is cu...

Page 18: ...ges for 30 seconds at the beginning of each filter cycle The low speed of the primary pump runs during fil tration and the ozonator if installed will be enabled FREEZE PROTECTION Note For all other diagnostic messages please refer to the Balboa Operation Guide that came with your spa Warning Shock Hazard No User Serviceable Parts Do not attempt service of this control system Contact your dealer or...

Page 19: ...ert turn jet face counter clockwise to the shut off point Continue turning until the jet insert releases from body To reinstall the jet locate the tab on the jet insert and line up with the groove of the jet body Insert and aggressively push on jet face until it locks 18 Single Twin Adjustable Roto Power Storm Directional Roto Adjustable Poly Directional Mini Roto Storm 3 port Roto Mini Destiny Ri...

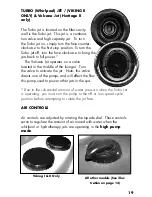
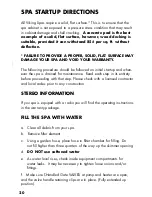
Page 20: ...dle of the lounger Turn the valve to activate the jet Note this valve directs one of the pumps and will effect the flow this pump used to power other jets in the spa Due to the substantial amount of water pressure when the Turbo Jet is operating you must turn the pump to the off or low speed cycle position before attempting to rotate the jet face AIR CONTROLS Air controls are adjusted by rotating ...

Page 21: ... in its entirety before proceeding with that step Please check with a licensed contractor and local codes prior to any construction STEREO INFORMATION If you spa is equiped with a radio you will find the operating instructions in the warranty package FILL THE SPA WITH WATER a Clear all debris from your spa b Remove filter element c Using a garden hose place hose in filter chamber for filling Do no...

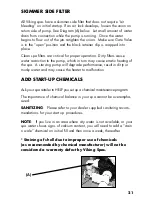
Page 22: ...ratic heating of the spa A starving pump will degrade performance result in dirty or murky water and may cause the heater to malfunction ADD START UP CHEMICALS Ask your spa retailer to HELP you set up a chemical maintenance program The importance of chemical balance in your spa cannot be overempha sized SANITIZING Please refer to your dealer supplied sanitizing recom mendations for your start up p...

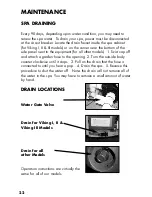
Page 23: ...odels 1 Twist cap off and attach a garden hose to the opening 2 Turn the outside body counter clockwise until it stops 3 Pull on the drain that the hose is connected to until you hear a pop 4 Drain the spa 5 Reverse this procedure to shut the water off Note the drain will not remove all of the water in the spa You may have to remove a small amount of water by hand DRAIN LOCATIONS Water Gate Valve ...

Page 24: ... the piping is removed use a wet dry shop vac to vacuum water from both the pump side and the heater side openings Once all water is removed from these lines we also recommend that you place the vacuum over each jet and the suction fittings and vacuum any remaining water that may be trapped in these lines You may now reinstall the piping assembly that was removed earlier and reinstall the pump plu...

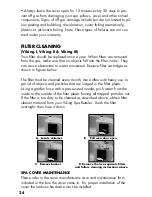
Page 25: ...tridges as shown in figures below The filter must be cleaned every month more often with heavy use to get rid of objects and particles that are lodged in the filter pleats Using a garden hose with a pressurized nozzle push water from the inside to the outside of the filter pleats forcing all trapped particles out If the filter is too dirty to be cleaned as described above obtain filter cleaner mat...

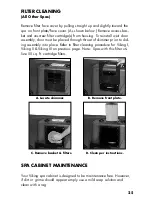
Page 26: ...gh throat of skimmer prior to slid ing assembly into place Refer to filter cleaning procedure for Viking I Viking II Viking III on previous page Note Spas with this filter uti lize 50 sq ft cartridge filters SPA CABINET MAINTENANCE Your Viking spa cabinet is designed to be maintenance free However if dirt or grime should appear simply use a mild soap solution and clean with a rag 25 A Locate skimm...

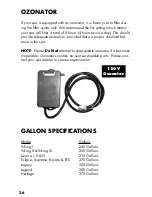
Page 27: ...d there is proper chemical bal ance in the spa NOTE Please Do Not attempt to disassemble ozonator if it becomes inoperable Ozonators contain no user serviceable parts Please con tact your spa retailer or service organization GALLON SPECIFICATIONS Model Gallons Viking I 240 Gallons Viking II Viking III 250 Gallons Aurora I II III 210 Gallons Eclipse Supreme Royale ETS 270 Gallons Legacy 320 Gallons...

Page 28: ...ance needs pH Up Test water add pH Up pH irritation rashes to be corrected pH pH Down Down or Total A as needed allergies total alkalinity Total A Excessive chlorine or Add fresh water and or wait bromine a day re test sanitizer level Excessive foam Build up of body oils Spa Foam Away Add Spa Foam Away to cosmetics and Spa See Clear foamy area then add 1oz contaminants Spa See Clear pH Total Alkal...

Page 29: ...tion with trapped air Solution Open bleed plug on face of pump and cycle pump to high speed for approximately 30 seconds If not has the spa been drained and refilled Solution Make sure water level three quarters of the way on the skimmer opening Is there proper water flow Solution Make sure both Gate Valves are open and filter is clean Pump Will Not Prime or Function Solution Gate Valves Closed Im...

Page 30: ...r hot tub and Avertissement Pour eviter des blessures user de prudence en entrant dans une cuve de relaxation et en sortant Warning Do not use drugs or alcohol before or during the use of a spa or hot tub to avoid unconsciousness and possible drowning and Avertissement Pour eviter l evanouissement et la noyade eventuelle ne prendre ni drogue ni alcool avant d utiliser une cuve de relaxation ni qua...

Page 31: ...2725 Prairie St SW Wyoming MI 49519 www vikingspas com Email info vikingspas com 2011 Viking Spas Inc ...

Reviews: