background image

Service & Registration

19

• New units are cleaned at the factory

to remove any visible signs of dirt, oil,
grease, etc. remaining from the
manufacturing process. Some stainless
steel parts may have a plastic protective
wrapper which must be peeled off. The
cooktop should be washed thoroughly
with hot, soapy water and then rinsed and
wiped dry to remove these film residues
and any installation dust or debris before
being used for food preparation.

18

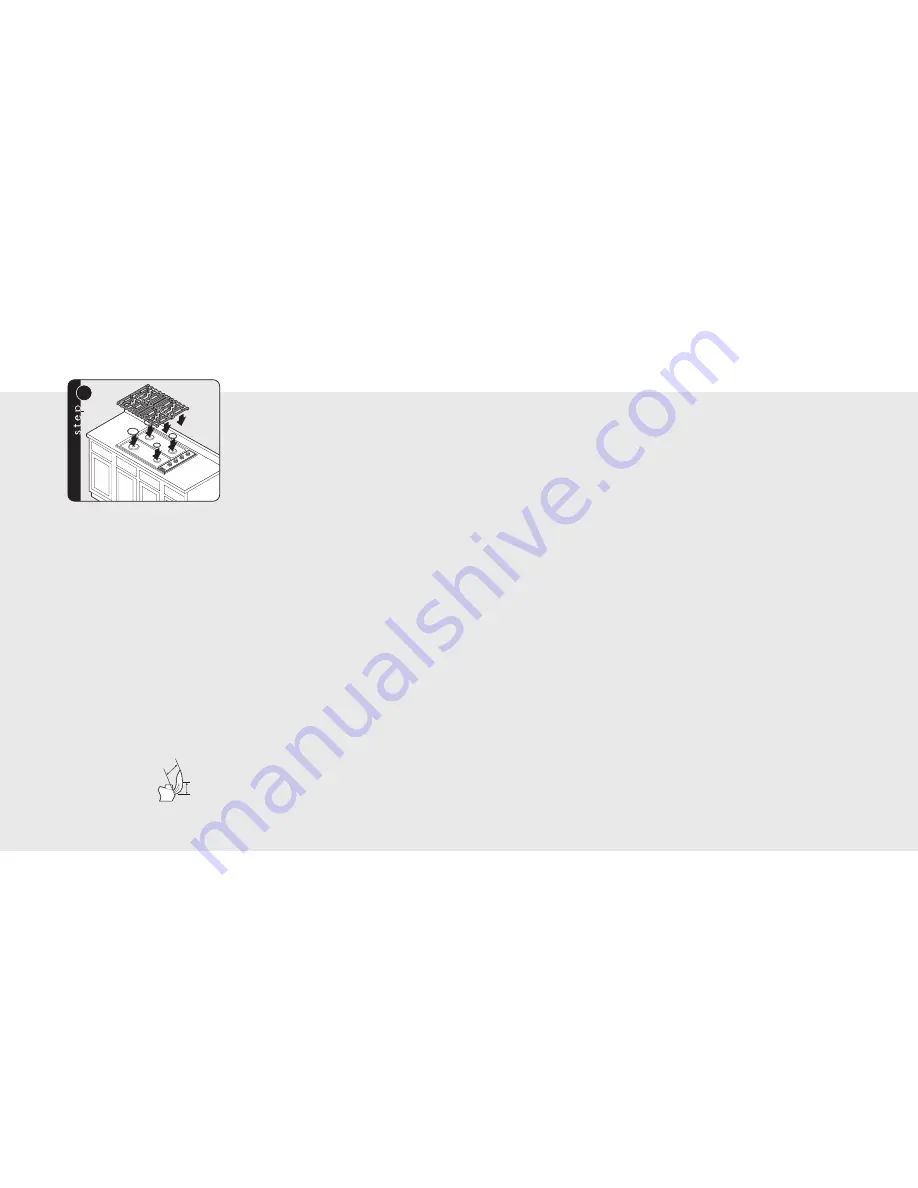
A qualified installer should carry out the
following checks:

h

Check top burner
ignition. The low
flame should light at
every port.

h

Starting with the left
front burner, turn the
corresponding knob to the HI position –
see drawing for proper flame height.

h

Repeat steps for other burners.

3.8 cm

0.95 cm

Performance Checklist

Final Preparation

1

1

1

1

2

2

1

Replace the burner caps and grates.

Note:

The narrow edge of grate goes toward center of unit.

• All stainless steel body parts should be

wiped regularly with hot, soapy water
and with a liquid cleanser designed for
this material if build-up occurs.

DO NOT

USE

steel wool, abrasive cloths, cleansers,

or powders. If it is necessary to scrape
stainless steel to remove encrusted
material, soak with hot, wet cloths to
loosen the material, then use a wood
or nylon scraper.

DO NOT USE

a metal

knife, spatula, or any other metal tool
to scrape stainless steel. Scratches are
almost impossible to remove.

Final Installation

If service is required, call your dealer or authorized service agency. The name of the authorized
service agency can be obtained from the dealer or distributor in your area.

Have the following information readily available.
• Model number
• Serial number
• Date purchased
• Name of dealer from whom purchased

Clearly describe the problem that you are having. If you are unable to obtain the name of an
authorized service agency, or if you continue to have service problems, contact the Viking
distributor for your area or visit vikingrange.com.

The model and serial number for your cooktop can be found by looking under the unit.

If service requires installation of parts, use only authorized parts to insure protection under the
warranty.

Keep this manual for future reference.

Replacement Parts

Only authorized replacement parts may be
used in performing service on the cooktop.
Do not repair or replace any part of the
appliance unless specifically recommended
in the manual. All other servicing should be
referred to a qualified tecnician.

Summary of Contents for CNVGSU104

Page 1: ... Guide Professional Built In Gas Cooktops F20930 EN China 062212 Viking Range Corporation 111 Front Street Greenwood Mississippi 38930 USA 662 455 1200 For product information visit the Viking Web site at vikingrange com ...

Page 2: ...onal ____________________________________________________6 Specifications CNVGSU Professional __________________________________________________7 Cutout Dimensions __________________________________________________________________8 Cutout Dimensions CNVGSU Cooktop over Single Electric Oven _________________________9 Downdraft Dimensions _____________________________________________________________...

Page 3: ...g from the plug For personal safety this appliance must be properly grounded DO NOT under any circumstances cut or remove the third ground prong from the power plug WARNING BURN HAZARD The use of cabinets for storage above the appliance may result in a potential burn hazard Combustible items may ignite metallic items may become hot and cause burns If a cabinet storage is to be provided the risk ca...

Page 4: ...trical installations 220 240V 50 60 Hz 3 core cable with plug type 1 attached to the unit length 122 cm Gas manifold pressure 2000 Pa NAT 2800 Pa LP Maximum amperage 0 28A 0 32A Power of burners of the cooking surface Front left 4 35 kW NAT 3 85 kW LP Rear left 2 8 kW NAT 2 05 kW LP Rear right 1 87 kW NAT 1 61 kW LP Front right 1 61 kW NAT 1 16 kW LP Front left 4 35 kW NAT 3 85 kW LP Rear left fro...

Page 5: ...GSU164 A 68 3 cm min to 75 9 cm max 87 3 cm min to 91 1 cm max B 47 3 cm min to 51 1 cm max C 6 4 cm 91 4 cm min 71 4 cm 12 7 cm max toe kick 72 4 cm 7 3 3 c m 6 4 c m m i n 3 1 1 c m 3 7 2 c m 36 2 cm 4 7 3 c m 36 2 cm 80 cm Cooktop CNVGSU104 over 80 cm Electric Oven CNVESO130 530 Note Refer to the oven installation instructions for undercounter dimensions ...

Page 6: ...ve the cooktop must be a minimum of 91 4 cm above the countertop for the complete width of the cooktop This minimum height requirement does not apply if a rangehood is installed over the cooking surface A 220 240 Volt wall receptacle should be located approximately 15 2 cm below the countertop cutout and 30 5 cm from the right side of the cutout Minimum Clearances from Adjacent Combustible Constru...

Page 7: ...upplied valve must be installed in the gas service line before the appliance in the gas stream and in a location where it can be reached quickly in the event of an emergency Any opening behind the cooktop shall be sealed The appliance must be disconnected from the gas supply piping system during any pressure testing of the system The CNVGSU model is field convertible to LP Propane gas or natural g...

Page 8: ... for the desired cooking process and selected utensil will result in superior cooking performance while also saving time and energy Within a few moments enough gas will have traveled to the burner to light When the burner lights turn the burner control to any position to adjust the flame size Setting the proper flame height for the desired cooking process and selecting the correct cooking vessel w...

Page 9: ...nd burner caps Turn the cooktop upside down and place on a non scratch surface Note Make sure there are no loose objects on the cooktop before turning upside down 3 Optional Gasket 4 Note Refer to Electrical Gas Requirements section for proper installation information 1 Installation Peel away the plastic covering and place the gasket material all the way around the burner flange IMPORTANT Make sur...

Page 10: ...cessary to scrape stainless steel to remove encrusted material soak with hot wet cloths to loosen the material then use a wood or nylon scraper DO NOT USE a metal knife spatula or any other metal tool to scrape stainless steel Scratches are almost impossible to remove Final Installation If service is required call your dealer or authorized service agency The name of the authorized service agency c...

Reviews: