EN - 29
Engl
ish
Deutsch
F
rançais
Regular Maintenance
LUBRICATE REAR AXLE SHAFTS
Service Interval: Yearly
We recommend removing the rear wheels and lubricat-
ing the axle shafts yearly. This prevents the wheel from
seizing onto the axle shaft and makes future service
easier.
1. Remove the key and disconnect the spark plug wire
while working on the unit.
2. Engage the parking brake and block the front wheels.
3. Using a jack or chain hoist positioned at the center of
the rear frame, carefully jack the unit up until the rear
tires are approximately 2,5 cm - 5 cm off the ground.
Note:
For overall unit stability during service, do not jack
rear end higher than required for wheel removal.
4. Support the rear of the unit on jackstands positioned
under the rear frame.
5. Remove the plastic hub cap (G, Figure 22).
6. Remove e-ring (F) using a screwdriver.
7. Remove the large washer (B), small washer (E), and
wheel assembly (D).
8. Lubricate the axle shaft with anti-seize compound or
lithium grease.
9. Reinstall components in reverse order of disassembly
and lower the unit.
Note:
Gear drive models also have grease fittings locat-
ed in the transmission casing beneath the axle bearings.
Lubricate the grease fittings once a year.
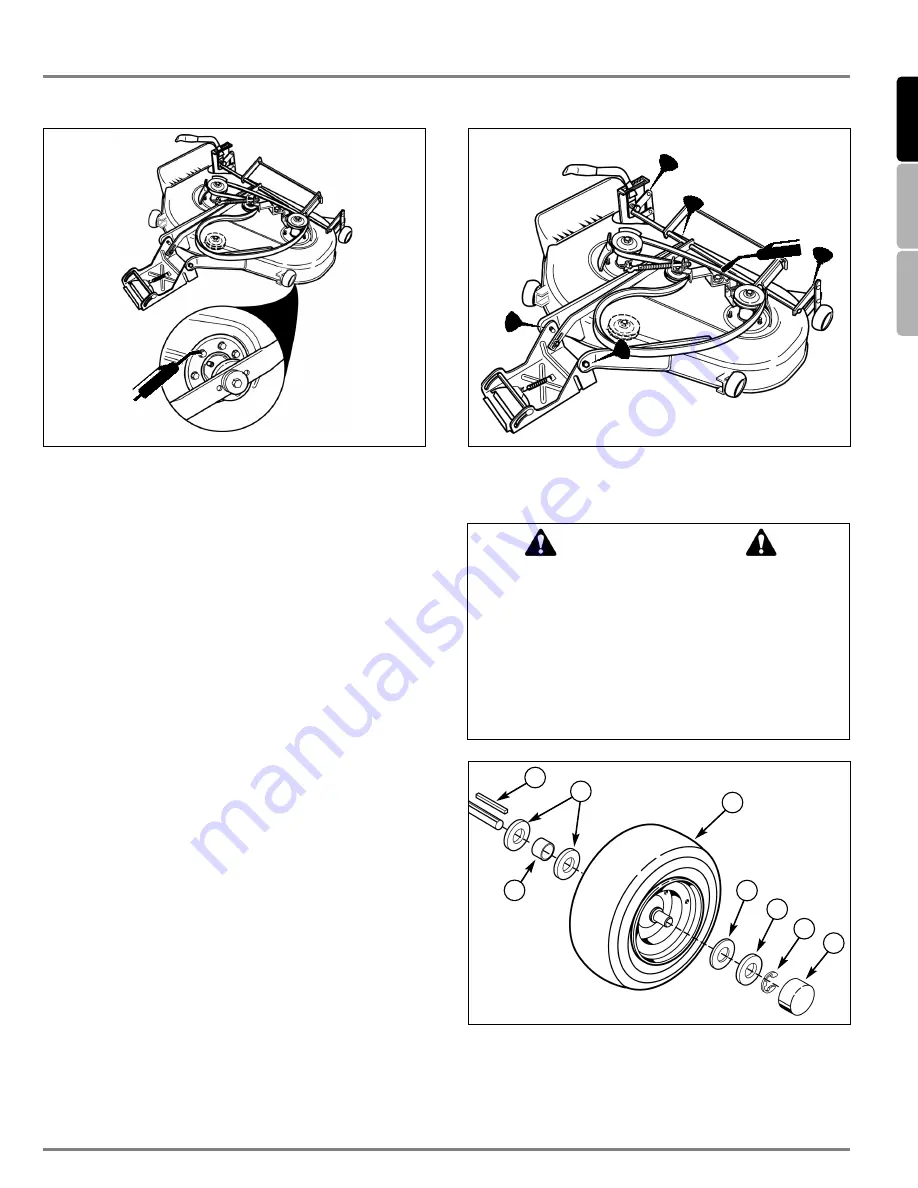
Figure 20. Arbor Lubrication Points (38” shown)
Figure 21. Lubricate Deck Linkage (38” shown)
Figure 22. Lubricate the Rear Axle Shafts
A. Key
E. Small Washer (As Required)
B. Large Washers
F. E-Ring
C. Spacer
G. Hub Cap
D. Wheel Assembly.
Always use a properly working lifting device with a
capacity suitable for the weight of the unit being ser-
viced.
Always use a jack stand to support the unit while per-
forming service, and chock remaining wheels to pre-
vent the unit from rolling off the supports.
Never work under or around an elevated unit that is
not properly supported and secured in position with
wheel chocks.
WARNING
A
C
B
D
E
B
F
G
Summary of Contents for MT 830
Page 2: ...THIS PAGE INTENTIONALLY BLANK...
Page 4: ...R 1720558 06 2001 VIKING Umwelttechnik A 6330 Kufstein...
Page 6: ......
Page 14: ...Assembly EN 8 1 2 C D FITTING THE WHEELS Rear wheels A B...
Page 60: ...DE 8 Zusammenbau 1 2 C D ANBAU DER R DER Hinterr der A B...
Page 106: ...FR 8 Assemblage 1 2 C D MONTAGE DES ROUES Roues arri re A B...


