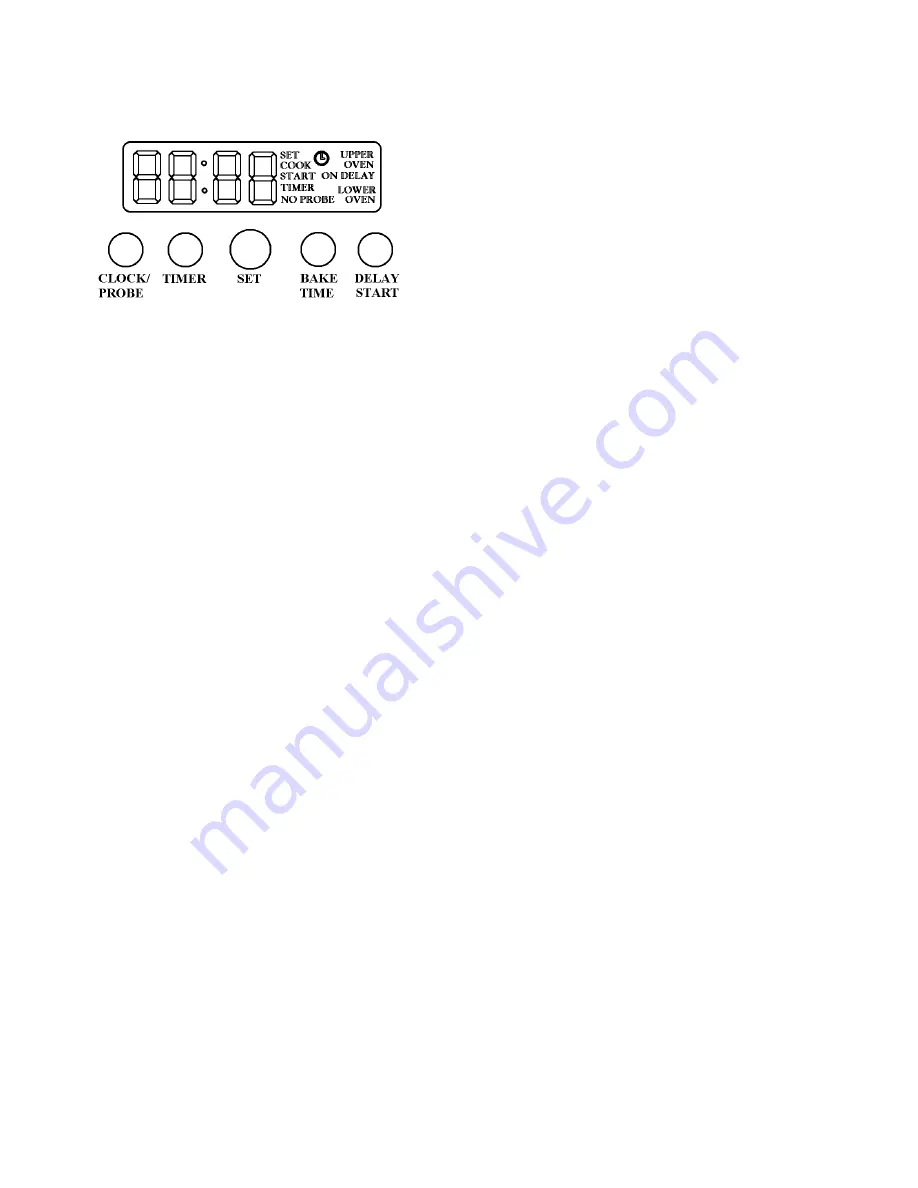
Electronic Timing Center
The Electronic Timing Center is used to
program and control all timing functions. It has
five display and progra
ng modes that are
activated by the four p sh buttons and the Set
Knob. Both the cook mode and the minute
timer mode can be used to time cooking periods.
These features can even be used at the same
when both ovens are in use. However only cook
time, probe, delay start and self-cleaning mode
. Press the CLOCK/PROBE button until
T” and clock symbol
K/PROBE button is not pressed
again, the new setting will automatically be
accepted after a 30 second timeout.
g set. However, the delay start
button.
o program the Timer
s after setting the Set
knob, the timer will start counting
has
min
cle,
afte
kno
the
the timer. After a 5 second
meout, the timer will self-start again at
er will cancel or if the
mer setting is turned to :00 the timer
The minute timer, cook time, and probe
functions may be used without the clock
bein
feature relates to the time-of-day and can
not be used without a valid time of day
entry.
Setting the Timer
The timer function can be selected at any
time by pressing the TIMER
This enters the SET TIME mode and the
display indicators show “SET TIMER”.
The timer setting is in hours/minutes
only. One (1) minute is the minimum
enterable time.
mmi
u
T
1. Press the TIMER button. The timer
will display :00 and the display
indicators show “SET TIMER”.
2. Turn the SET knob in minute
intervals until the desired duration
time is displayed.
3. Five second
shut the oven off automatically when the timed
program is over or internal temperature has been
reached. For example, you can time bake a
casserole in the upper oven using the cook time
mode, while broiling in the lower oven using the
minute timer. One oven can also be cleaned
while timing foods in the other using the minute
timer or cook time.
Setting the Time-of Day
The time-0f-day must be set before any other
timed programs can be used. When your oven
is first connected to the power in your home, the
timer display will show-- -- --along with the
“SET” icon and clock symbol icon. To set the
time-of-day.
down.
The alarm will beep once when the timer
reached a remaining time of one (1)
ute. At the end of the timer cy
the alarm will beep three (3) times again
r 10 seconds
While the timer is displayed, the Set
b can be turned at any time to change
time on
ti
1
the new setting.
If the TIMER button is pressed while the
timer is counting down and is active in
the display, the tim
display shows the “SE
icons.
2. Turn the SET knob until the correct time-of-
day is displayed, AM and PM are not
indicated.
3. Press the CLOCK/PROBE button again. If
the CLOC
ti
will be canceled.
7
Summary of Contents for veso165
Page 1: ...VIKING RANGE CORPORATION P O DRAWER 956 GREENWOOD MS 38930 USA 9 25 03 F90596...
Page 5: ...Built in Electric Oven Features 6...
Page 10: ...NEW VIKING MODEL NUMBERS 11...
Page 11: ...12...
Page 13: ...SINGLE OVEN CUTOUT DIMENSIONNS 14...
Page 14: ...DOUBLE OVEN CUTOUT DIMENSIONS 15...
Page 15: ...SINGLE OVEN DIMENSIONS 16...
Page 16: ...DOUBLE OVEN DIMENSIONS 17...
Page 18: ...COMPONENT LAYOUT VESO165 VEDO265 19...
Page 19: ...COMPONENT LOCATION VEDO265 Rear View 20...
Page 23: ...36 W Built Electric Oven Components Schematics 24...
Page 24: ...VESO165 RELAY DIAGRAMS VEDO265 RELAY DIAGRAMS 25...
Page 26: ...27...
Page 27: ...28...
Page 28: ...29 29...
Page 29: ...30...
Page 30: ...31...
Page 31: ...32...
Page 32: ...33 33...
Page 33: ...VESO165 WIRING DIAGRAM BAKE INITIAL CYCLE with PRE HEAT 34...
Page 34: ...VESO165 WIRING DIAGRAM BAKE after FIRST CYCLE 35...
Page 35: ...VESO165 WIRING DIAGRAM CONVECTION BAKE INITIAL CYCLE with PRE HEAT 36...
Page 36: ...VESO165 WIRING DIAGRAM CONVECTION BAKE 37...
Page 37: ...VESO 165 WIRING DIAGRAM CONVECTION COOK 38...
Page 38: ...VGSO 165 WIRING DIAGRAM BROIL 39...
Page 39: ...VESO165 WIRING DIAGRAM MAXI BROIL 40...
Page 40: ...VESO165 WIRING DIAGRAM CONVECTION BROIL 41...
Page 42: ...SELF CLEAN DOOR LOCK ABOVE 575 F 25 F 43...
Page 45: ...46 46...
Page 57: ...COOKING APPLIANCE CONTROL MODULE...
Page 58: ......
Page 59: ......
Page 60: ......
Page 61: ......
Page 62: ......
Page 63: ......
Page 64: ......


