background image

   6

EN

1. Connections

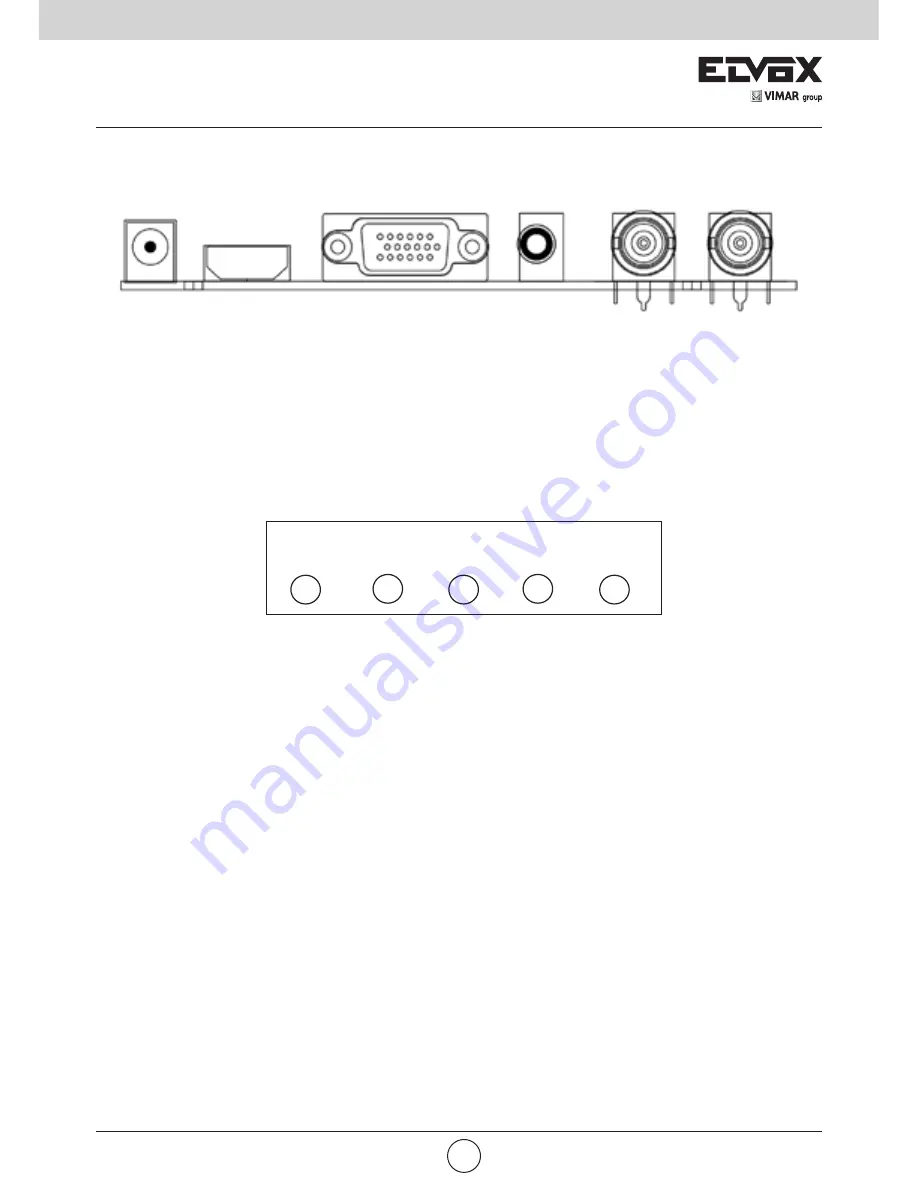
Rear Interface

DC

HDMI

VGA

AUDIO IN

VIDEO IN

VIDEO OUT

DC:

 Only use the 12V DC power supply included with the monitor.

HDMI: 

(High-Definition Multimedia Interface) Supports digital video and audio connections.

VGA:

 15 pin D-sub cable for standard VGA connection.

Audio IN: 

3.5 mm stereo jack connection for audio input when using VGA /AV connector.

VIDEO/AV  IN:

 BNC connections supporting composite video inputs from equipment such as Cameras or DVR’s.

VIDEO/AV OUT: 

Composite video loop though output – connect a second monitor.

2. Control layout

Source     Menu

-               +    

Power     

Source: 

Selects input mode – AV,HDMI , VGA.

Menu:

 Access to the On Screen Display (OSD) menu.

+ and -: 

Volume controls up/down, confirm input source selecton and navigation in the OSD.

Power: 

Turns the monitor on or off.

3. Basic on-screen display setup

1- To access the OSD Menu press ‘MENU’.

2- Use the ‘+’ or  ‘-’ buttons to select the required menu item, then press the ‘SOURCE’ button to select the Sub menu.

3- Continue to use the ‘SOURCE’ button to highlight the required field, then press ‘+’ or  ‘-’’ to adjust the setting.

4- Press the ‘MENU’ button  to return to  previous menu.

5- Press the ‘MENU’ button again to exit the OSD Menu completely.

6- N.B. To Lock or Unlock OSD settings after set up. Press and hold "menu" button for 5 seconds.

The layout of the OSD will change depending on the input that is selected

Summary of Contents for 46910.H10A

Page 1: ...Manuale per il collegamento e l uso Installation and operation manual 46910 H10A 46910 H20A 46910 H24A 46910 H32A Monitor LCD LCD Monitor ...

Page 2: ...mpo scollegare la spina dalla presa Non installare il dispositivo vicino a fonti di calore quali radiatori bocchette di aria calda stufe o altri dispositivi che producono calore Non installare il dispositivo vicino all acqua Pulire esclusivamente con un panno asciutto Collocare il dispositivo in un area ben ventilata Questo dispositivo è un apparecchiatura per utilizzo in ambienti chiusi Non espor...

Page 3: ...nare il tipo di segnale di ingresso AV HDMI VGA Menu consente di accedere al menu visualizzato sullo schermo OSD On Screen Display e comandi per alzare abbassare il volume confermare la selezione del segnale in ingresso e navigare nell OSD Alimentazione consente di accendere o spegnere il monitor 3 Configurazione di base con OSD 1 Per accedere al menu OSD premere MENU 2 Usare i tasti o per selezio...

Page 4: ...tedesco francese spagnolo italiano portoghese polacco russo H POSITION Posizione h 0 100 posiziona orizzontalmente l OSD V POSITION Posizione v 0 100 posiziona verticalmente l OSD DURATION Durata 5 60 specifica dopo quanti secondi l OSD si chiude automaticamente MEM RECALL Richiama memoria ripristina tutte le impostazioni predefinite di fabbrica 4 3 Funzione HSTART imposta il punto di allineamento...

Page 5: ...0 specifica dopo quanti secondi l OSD si chiude automaticamente MEM RECALL Richiama memoria ripristina tutte le impostazioni predefinite di fabbrica H POSITION Posizione h imposta la posizione orizzontale dell immagine V POSITION Posizione v imposta la posizione verticale dell immagine CLOCK consente di regolare manualmente la sincronizzazione del clock Se l impostazione del clock dell immagine no...

Page 6: ...i esercizio Da 10 C a 50 C Interfaccia IN OUT Interfaccia video HDMI x1 VGA x 1 BNC In x1 BNC Out x1 Interfaccia audio Audio in x 1 Interfaccia alimentazione DC In x 1 AC In x 1 Certificazione Energy Star CE FCC ROHS Tipo supporto Tavolo Colore Nero Posizione tasti Lato anteriore Lato posteriore Dimensioni mm LxAxP 250x175x35 485x300x50 570x355x50 745x440x55 Dim mm LxAxP Staffa 250x175x35 485x375x...

Page 7: ...fore using If the device doesn t work for a long time pull out the plug from the socket Do not install this device near any heat sources such as radiators heat registers stoves or other device that produce heat Do not install this device near water Clean only with a dry cloth Place the device in a well ventilated area This machine is indoor using equipment Do not expose the machine in rain or mois...

Page 8: ...Power Source Selects input mode AV HDMI VGA Menu Access to the On Screen Display OSD menu and Volume controls up down confirm input source selecton and navigation in the OSD Power Turns the monitor on or off 3 Basic on screen display setup 1 To access the OSD Menu press MENU 2 Use the or buttons to select the required menu item then press the SOURCE button to select the Sub menu 3 Continue to use ...

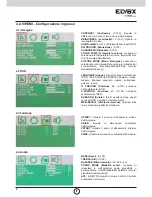
Page 9: ... Select preferred language for OSD En Ch Ger Fr Sp It Pt Pl Ru H POSITION 0 100 Set the horizontal position of the OSD V POSITION 0 100 Set the vertical position of the OSD DURATION 5 60 Set seconds for the OSD to automatically close MEM RECALL Restore all factory defaults 4 3 Function HSTART Set left alignment point of image HSIZE Set horizontal size of image VSTART Set lower alignment point of i...

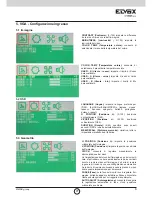
Page 10: ...RECALL Restore all factory defaults 5 VGA Input Configuration 5 1 Picture 5 2 OSD H POSITION Set horizontal image position V POSITION Set vertical image position CLOCK Manually adjust clock synchronisation If the clock setting of your image is not fine tuned you may observe periodic vertical bars of video noise on your image These bars of noise are usually adjusted out when an Auto Configuration i...

Page 11: ...1 Brightness 330 Cd m2 250 Cd m2 400 Cd m2 Response Time 12 ms 5 ms Viewing Angle 160 160 80 80 178 178 Video Compatiblity Multi Standard for NTSC PAL Aspect Ratio 16 9 Speakers 1 x 2 5 W 2 x 2 5 W Mute Yes Work Humidity 20 70 Work Temperature 10 to 50 C IN OUT Interface Video Interface HDMI x1 VGA x 1 BNC In x1 BNC Out x1 Audio Interface Audio In x 1 Power Interface DC In x 1 AC In x 1 Certificat...

Page 12: ...Viale Vicenza 14 36063 Marostica VI Italy www vimar com 49401115A0 00 1610 ...

Reviews: