13
46910.H10A.01
EN
1
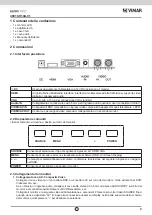
In the box
-
1 x LCD Monitor,
- 1 x AC adapter,
- 1 x VGA cable,
- 1 x Audio cable,
- 1 x User Manual
- 1 x IR control
2 Connections
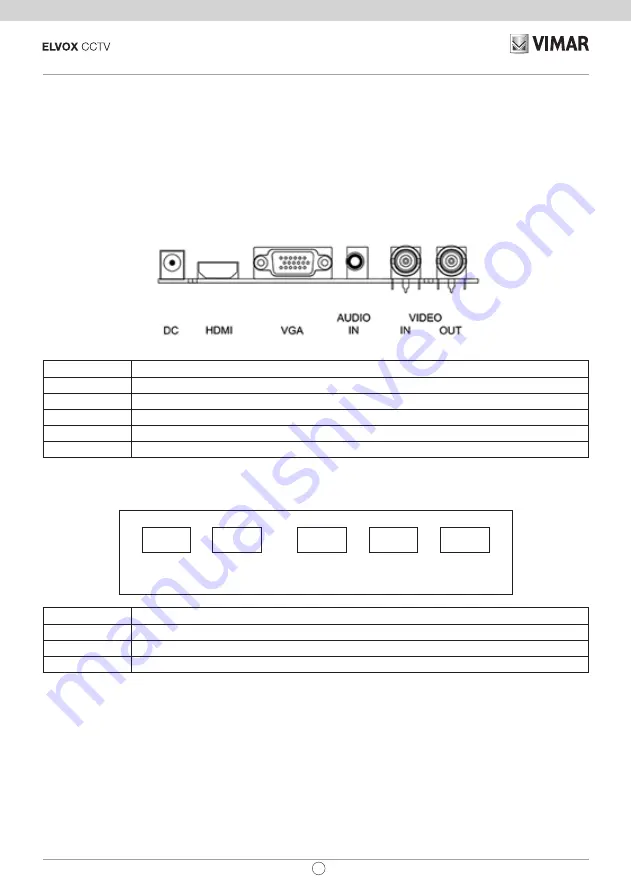
2.1 Rear interface
※
DC
Only use the 12v DC power supply included with the monitor
HDMI
(High-Definition Multimedia Interface) Supports digital video and audio connections
VGA
15 pin D-sub cable for standard VGA connection
Audio IN
3.5 mm stereo jack connection for audio input when using VGA /AV connector
VIDEO/AV IN
BNC connections supporting composite video inputs from equipment such as Cameras or DVR’s
VIDEO/AV OUT
Composite video loop though output – connect a second monitor
2.2 Control layout
The control buttons are located on the right hand rear side of the monitor.
SOURCE
MENU
-
+
POWER
SOURCE
Selects input mode – AV, HDMI , VGA.
MENU
Access to the On Screen Display (OSD) menu.
+
and
-
Volume controls up/down, confirm input source selection and navigation in the OSD.
POWER
Turns the monitor on or off.
2.3 How to connect your monitor
1. Connecting using AV - Composite Video
Connect your video cable with BNC connector to the AV connector on the rear of the monitor, and the other end
to your DVR/Camera etc.
If audio input is required, connect the 3.5 mm stereo audio cable to the AUDIO INPUT on the rear of the monitor
and to the Audio Output connector on the DVR/Camera etc.
Connect power to the monitor and video source, and switch on. Using the SOURCE button, press repeatedly until
either ‘AV’ (depending on the connection used) is highlighted on the display at the top of the monitor's screen, and
press ‘+’ to select.

