background image

Vimar SpA: Viale Vicenza, 14

36063 Marostica VI - Italy

Tel. +39 0424 488 600 - Fax (Italia) 0424 488 188

Fax (Export) 0424 488 709

www.vimar.com

49400694A0   00  14 05

VIMAR - Marostica - Italy

Summary of Contents for ELVOX 46910.H22

Page 1: ...46910 H22 Monitor a led professionale HDMI VGA BNC Professional led monitor HDMI VGA BNC Manuale per il collegamento e l uso Installation and operation manual ...

Page 2: ...materiale a corredo 1 1 2 Caratteristiche tecniche 1 1 3 Controllo 2 1 4 Connettori 2 1 5 Telecomando 3 1 6 Collegamenti delle apparecchiature esterne 3 2 Nessuna sincronizzazione 4 3 Selezione dell ingresso 4 4 Menù OSD selezione lingua impostazioni 4 IT ...

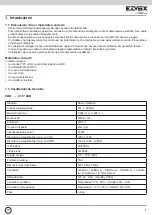
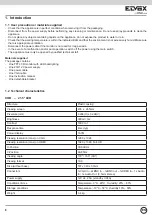
Page 3: ...ispositivo deve essere aperto soltanto da personale tecnico qualificato Materiale a corredo L imballo contiene Un monitor TFT LCD con retroilluminazione a LED Un alimentatore 230 12 V Un cavo di alimentazione Un cavo VGA Un manuale istruzioni Una staffa removibile Struttura Case in plastica Area di visualizzazione 474 x 265mm Misura Pixel mm 0 294 H x 0 294 V Luminosità 300cd m2 Contrasto 1000 1 T...

Page 4: ... relative a ogni icona In menù ingressi premere per selezionare la sorgente 6 7 VOL Premere per aumentare diminuire il volume audio Premere per spostarsi tra le icone del menù o per aumentare diminuire i valori 1 4 Connettori N Nome Funzione 1 POWER Presa di alimentazione DC 2 HDMI INPUT Ingresso HDMI 3 VGA INPUT Ingresso VGA 4 AV1 INPUT Ingresso BNC1 5 AV2 INPUT Ingresso BNC2 6 AV OUT Uscita BNC ...

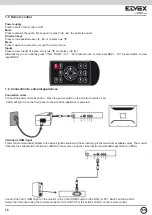
Page 5: ...ollegamenti delle apparecchiature esterne Cavo di connessione Collegare il cavo di alimentazione come mostrato Premere l interruttore di alimentazione del monitor per accenderlo L accensione di un LED nel pannello frontale indicherà la presenza di alimentazione Ingresso VGA ingresso HDMI Questo monitor si adatta automaticamente alla risoluzione del segnale video presente su questi ingressi sino al...

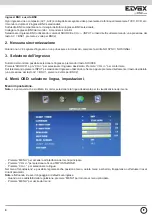
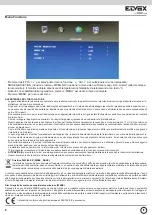
Page 6: ...o SOURCE Premere SOURCE e poi CH per selezionare l ingresso desiderato Premere VOL per confermare Sul telecomando premere INPUT e selezionare l ingresso utilizzando le frecce oppure premere direttamente il tasto desiderato una pressione del tasto AV BNC1 premere 2 volte per BNC2 4 Menù OSD selezione lingua impostazioni Menù impostazione Nota La prima volta che si utilizza il monitor selezionare la...

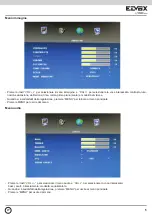
Page 7: ...i visione Quando si è soddisfatti della regolazione premere MENU per tornare al menù principale Premere MENU per uscire dal menù Menù audio IT Premere i tasti VOL per selezionare il menù audio e CH per selezionare la voce interessata bassi acuti bilanciamento modalità equalizzatore Quando si è soddisfatti della regolazione premere MENU per uscire al menù principale Premere MENU per uscire dal menù...

Page 8: ...rez za del l ap pa rec chio Non ostru i re le aperture o fessure di ven ti la zio ne o di smaltimento calore e non esporre l apparecchio a stillicidio o spruzzi d acqua Nessun oggetto pieno di liquido quali vasi deve essere posto sull apparecchio L installatore deve as si cu rar si che le in for ma zio ni per l uten te siano pre sen ti sugli ap pa rec chi derivati Tutti gli apparecchi costituenti ...

Page 9: ...s materials supplied 8 1 2 Technical characteristics 8 1 3 Control Rear panel 9 1 4 Connectors 9 1 5 Remote control 10 1 6 Connection to external appliances 10 2 Nessuna sincronizzazione 11 3 Selezione dell ingresso 11 4 OSD menu language settings settings 11 EN ...

Page 10: ...nce must only be opened by qualified technical staff Materials supplied The package contains One TFT LCD monitor with LED backlighting One 230 12 V power supply One power cable One VGA cable One Instruction manual One detachable bracket Structure Plastic casing Viewing screen 474 x 265mm Pixel size mm 0 294 H x 0 294 V Brightness 300cd m2 Contrast 1000 to 1 Response time 4ms typ Colour display 16 ...

Page 11: ... the items for each icon In inputs menu press to select the source 6 7 VOL Press to increase decrease the audio volume Press to scroll through the menu icons or increase decrease the values 1 4 Connectors No Name Function 1 POWER DC power socket 2 HDMI INPUT HDMI input 3 VGA INPUT VGA input 4 AV1 INPUT BNC1 input 5 AV2 INPUT BNC2 input 6 AV OUT BNC output 7 AUDIO IN OUT Audio input output 3 5mm st...

Page 12: ...iances Connection cable Connect the power cable as shown Press the power switch on the monitor to switch it on A LED will light up on the front panel to show that the appliance is powered VGA input HDMI input This monitor automatically adapts to the video signal resolution on these inputs up to the maximum available value The monitor transmits the configuration information EDID to the source using...

Page 13: ...onitor you can select the input by pressing SOURCE Press SOURCE and then CH to select the required input Press VOL to confirm On the remote control press INPUT and select the input using the arrow keys or directly press the required button press AV once BNC1 twice for BNC2 4 OSD menu language settings settings Settings menu Note When you use the monitor for the first time select the required menu ...

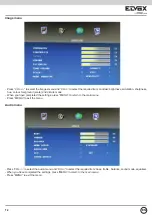
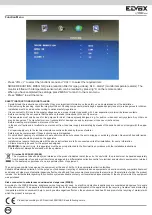
Page 14: ...ale and picture mode When you have completed the settings press MENU to return to the main menu Press MENU to exit the menu Audio menu EN Press VOL to select the audio menu and CH to select the required item bass treble balance sound mode equaliser When you have completed the settings press MENU to return to the main menu Press MENU to exit the menu ...

Page 15: ...es should be placed on the apparatus Installers must ensure that manuals with the above instructions are left on connected units after installation for users information All items must only be used for the purposes designed WARNING to prevent injury this apparatus must be securely attached to the floor wall in accordance with the installation instructions This leaflet must always be enclosed with ...

Page 16: ...Vimar SpA Viale Vicenza 14 36063 Marostica VI Italy Tel 39 0424 488 600 Fax Italia 0424 488 188 Fax Export 0424 488 709 www vimar com 49400694A0 00 14 05 VIMAR Marostica Italy ...

Reviews: