62
Step 5:
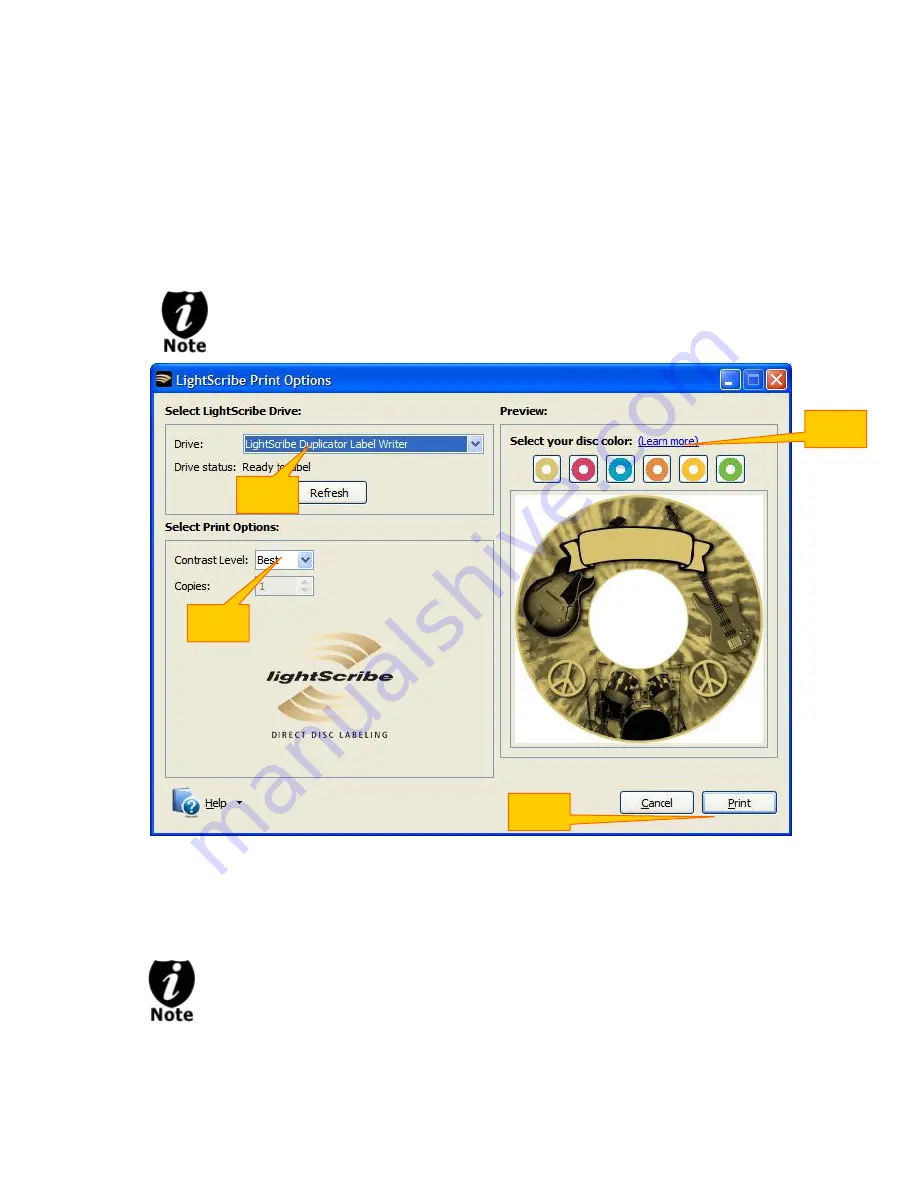
Click on "Preview and Print" to bring up the print window.
Select the “LightScribe Duplicator Label Writer” as the LightScribe Drive. (7)
Select the "Best" contrast mode for the darkest print. (8)
Select the label surface color of the disc you wish to label onto. (9)
If you are satisfied with the preview, click "Print" to begin generating the Duplicator Label
file (.lsi files). (10).
You will be asked for the location & the name of the label file(s) you wish to
generate. In addition, due to the system display limitation, make sure the file name
does not contain any foreign characters other than those in the 26 Greek alphabets,
numerical digits, and/or some basic symbols like “-“, etc.
Step 6:
Create a Label CD
Locate the label file(s) (.lsi files) on your PC.
Create a Data CD with the label file(s) via a CD/DVD Creating Software; like Nero
Burning-ROM or Roxio Classic CD Creator
Do NOT place the label file(s) under any directory/folder of the Label CD. Failure to
do so will result in the label file(s) not being recognized by your system.
(7)
(8)
(9)
(10)
Summary of Contents for ROBOTIC AUTOLOADER 3.6.0
Page 1: ...User s Manual v3 6 0...


