13
www.vintageair.com
900194 REV B 09/16/19, PG 13 OF 42
NOTE: For proper operation of the evaporator unit, Vintage Air recommends using heat-blocking
insulation in the area around the subcase (firewall, inner cowl and kick panel). Due to tight clearance
for the evaporator unit between the firewall and dash, Vintage Air recommends an insulation thickness
of no more than 1/4”.
Firewall Insulation
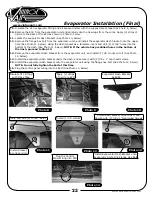
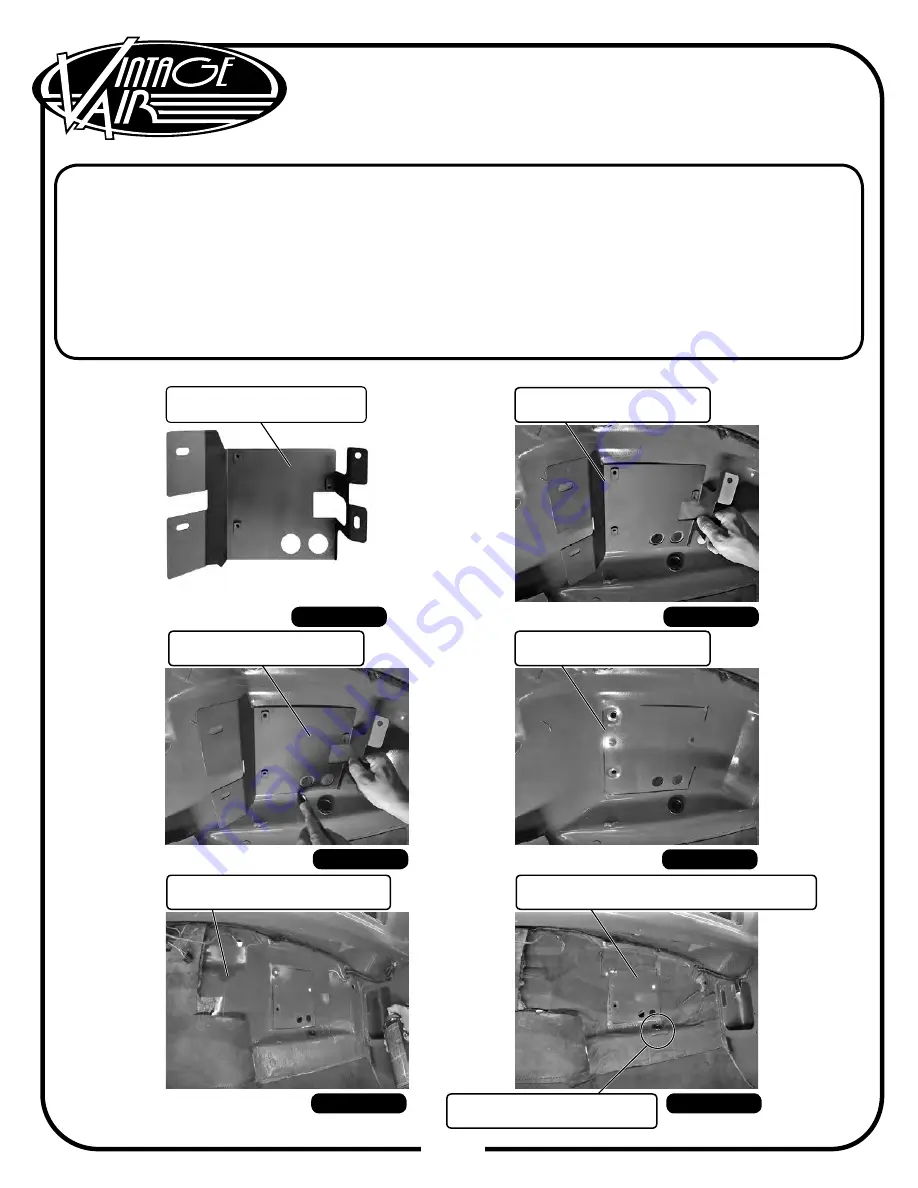
Locate the evaporator firewall bracket as shown in Photo 1, below. Place the evaporator firewall bracket onto
the firewall, and trace around the base of the bracket as shown in Photos 2, 3, and 4, below.
Using spray adhesive, install the new heat-blocking insulation in the area of the firewall that was removed,
being careful not to cover the marked area from the evaporator bracket base and the 1/2” ID x 1 ¼” OD
grommet (See Photos 5 & 6, below). NOTE: During the evaporator installation, if the evaporator unit
does not fit properly, look for places where the insulation may be interfering with the evaporator
clearance. Trim the insulation as needed.
1.
2.
Photo 1
Photo 2
Photo 3
Temporarily Install
Evaporator Firewall Bracket
Trace Around Base of
Evaporator Firewall Bracket
Do Not Install Insulation Inside Evaporator
Firewall Bracket Tracing Marks
Evaporator Firewall Bracket
646953
Do Not Install Insulation over
1/2” ID x 1 ¼” OD Grommet
Trace Around Base of
Evaporator Firewall Bracket
Photo 4
Photo 5
Photo 6
Apply Spray Adhesive on Area
Where Insulation was Removed


