6
Working with Presets
6
Before Getting Started
BOX CONTENT
The following items should be included in your Acoustic Box live package:
• The Acoustic Box II preamp
• Power supply
SHIPPING, STORING AND TRANSPORTING
Great care was taken in the manufacturing and packaging of your Acoustic
Box II preamp. Everything should be included and in perfect working order.
Damaged units should never be sent directly to us. Please inform the dealer
from whom you acquired your Acoustic Box II of the damage, as well as the
transportation company that delivered it to you. You must follow the steps
above in order to retain the validity of your warranty. Please register your
product via our web site
here.
GETTING STARTED
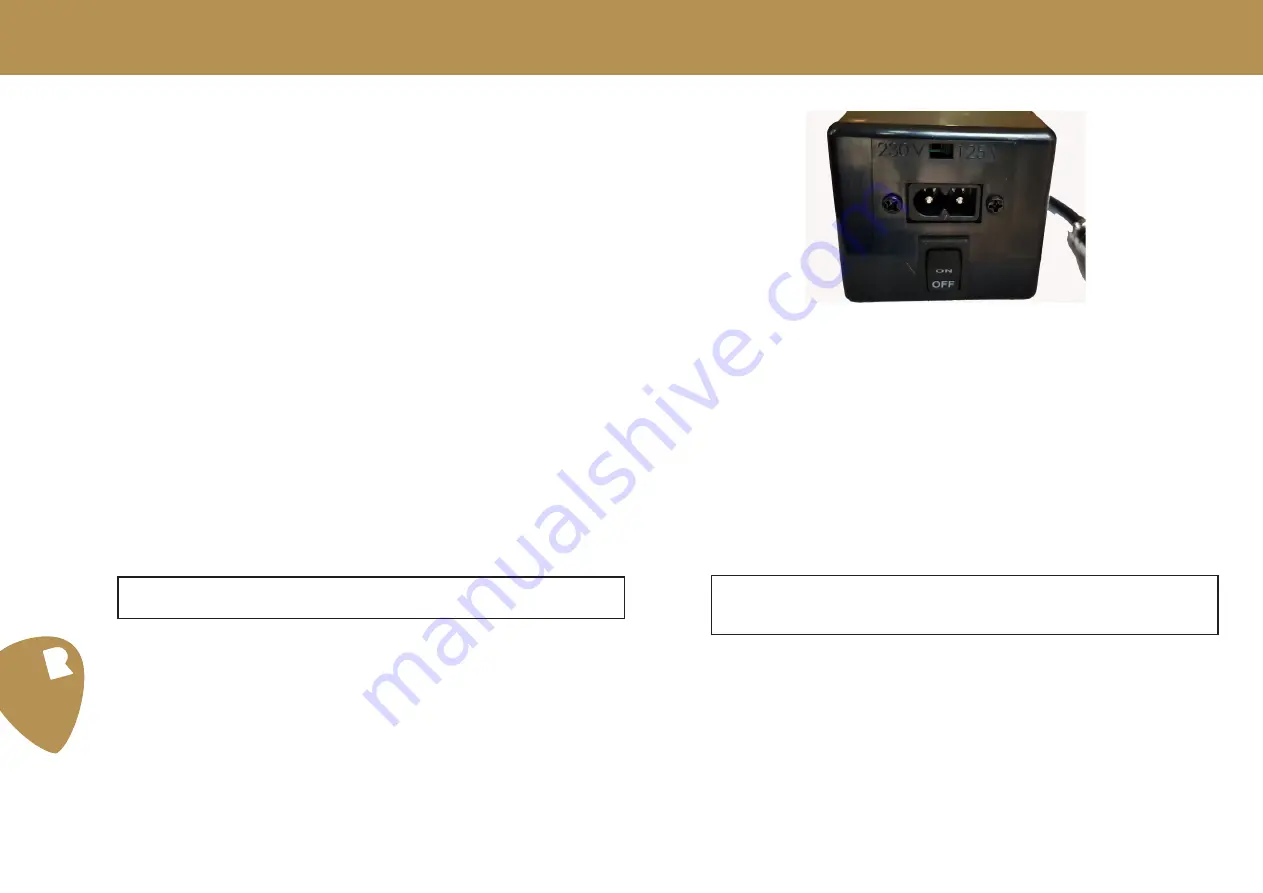
Before connecting the power supply to the power socket,
make sure that
the proper voltage is selected according to the mains of your country.
For US use 125V, for Europe 230V.
Before turning the power supply via the main switch, make sure that all
the cables are firmly connected to the preamp. Including headphone
cable, XLRs and JACK cables. To preserve the long term performances
of the preamp avoid detaching/connecting any of the cables while the
Acoustic Box is powered on.
Before powering on the preamp make sure that the output knobs are not set
to maximum. Keep in mind that XLR output knobs control the headphone vol-
ume as well. A good starting point for the output knobs is in the middle at 12
o’clock. Turn on the Abox using the power switch on the power supply and
mute the output using the mute button on the Abox.
Power supply:
:
Select the AC voltage corresponding to your local AC power
(125V-230).
Verify using the light monitors that the pickup/mic are producing a signal in the
channels. Disengage the mute button.
Ensure that the phantom voltage is correctly set via pref. menu. Condenser
mics need phantom power. If you are using dynamic and ribbon mics turn off
your phantom power.
Adjust impedance of your pickup. Try both setting and see which one is better
for your pickup. Passive piezo prefer
High impedance
setting. Active piezo and
magnetic coil prefer
Med impedance.
Connect/disconnect your power connector to the Acoustic box II al-
ways when the power switch is OFF.
If you need to plug in to your headphone connector while the unit is on,
press the mute button before inserting the mini-jack in to the headphone
connector.
Summary of Contents for Acoustic Box II
Page 1: ...Acoustic box II Owner s Manual Ver 2 1...
Page 17: ...17 My notes...


