User Manual
Espace Walk-in Cellar
15
Installing your cellar (cont'd)
NOTE: The shorter support frame must be installed
in the front right corner of the cellar, underneath the
conditioner unit (see below).
Shorter vertical support to
allow space for conditioner unit
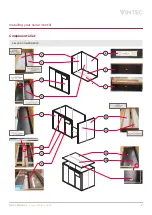
38 Sort and arrange the two types of metal cross-bars.
Those with pre-drilled holes –
– are for attaching to
walls and the floor. Those without holes –
– are for
lateral bracing between the vertical support frames.
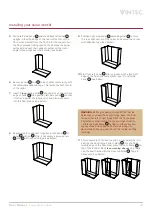
39 Begin assembly by positioning the first
single-sided
support frame in the front left corner of the cellar. Using
screws, attach it to the inside face of front wall panel
by screwing through the larger pre-drilled holes in
the timber of the support frame and into the wall panel.
40 Loosely attach drilled cross-bars to the rear and
base of the support frame using screws, following the
partially drilled guide marks for their location, then also
screw through the holes in the cross-bars into the wall
and floor. Use 1x cross-bar to attach the bottom front
edge of the vertical supports to the floor of the cellar,
and
2x cross-bars to attach the rear edges
of the
vertical supports to the wall of the cellar (see below).
2x wall
1x floor
41 Position the central double-sided
support frame and
screw it to the drilled cross-bars
to secure it, then go
back and firmly secure the screws attached at step
40.
42 Repeat steps 40 and 41 to attach drilled cross-bars
to the other side of the central support frame, then
another single-sided
support frame at the far end.
43 Check that all vertical supports and cross-bars are
firmly secured and aligned.
NOTE: The last vertical support at the end of the row
does not need to be screwed to the back wall of the
cellar. There is likely to be a small gap between the
support and the back wall.
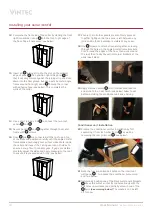
44 Attach the non-drilled cross-bracing bars between
the front edges of the support frames
(see warning
and note below). This completes assembly of the
shelving frames for the left side of the cellar.
WARNING: At the location where cross-bracing bars
are to be attached to the central, double sided timber
support frame , two partially drilled screw guide
marks have been provided on each side, one above the
other. Screw into the upper guide mark on one side of
the support frame, and into the lower guide mark on the
opposite side – this avoids the two screws bumping into
each other and splitting the timber (see below).
NOTE: Whilst the position of cross-bracing bars is
adjustable, it is recommended to install them as close
as possible to the shelf above to prevent the bars from
rubbing against the labels of bottles on the shelf below
(see below).

