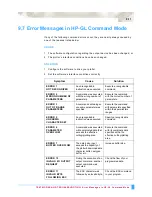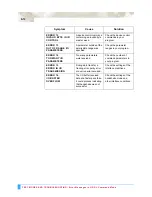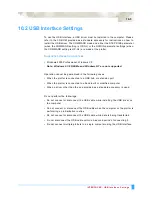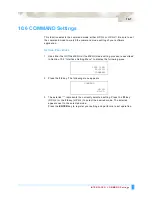
INTERFACES: Setting the RS-232C Interface Transmission Conditions
10-6
10.5 Setting the RS-232C Interface Transmission
Conditions
S
ETTING
P
ROCEDURE
1
Use either the INITIAL MENU or the MENU mode setting procedure described
in Section 10.3 “Interface Setting Menu” to display the following menu. Setting
Procedure
2
Press the
F3
key. The following menu appears
3
Press the
ENTER
key to confirm the menu settings without making any
changes.
Press the
F1
key to change the BAUD RATE.
Press the
F2
key to change the DATA LENGTH.
Press the
F3
key to change the PARITY BIT.
Press the
F4
key to change the HANDSHAKING mode.
The blinking cursor moves to the selected setting.
4
Use the (
▲▼
)
POSITION
keys to change the value for each of the settings.
Transmission speed selection: 19200, 9600, 4800, 2400, 1200, 600, 300 baud
Data length selection: 7 BIT, 8 BIT
Parity bit selection: NONE PARITY, EVEN PARITY, ODD PARITY
Handshaking mode selection: Hardwire, Xon/Xoff, Enq/Ack (when the
command setting is HP-GL)
Specify the same values as those used in the application.
5
Press the
ENTER
key to register your settings. Press the
NEXT
key if you do
not wish to make any changes. The following menu appears.
6
Press the
MENU
key to return the plotter to READY status.
STEP SIZE>
RS-232C>
COMMAND>
RS-0
9600 BAUD
8
BIT
NONE PARITY
HARDWIRE
STEP SIZE>
RS-232C>
COMMAND>
Summary of Contents for Q100
Page 34: ...Cutter Blades and Cutter Pens Adjusting the Blade Length 2 6 ...
Page 64: ...Pen Setting Conditions Adjusting the Blade Length 4 12 ...
Page 140: ...ADVANCED FUNCTIONS AND OPERATIONS Selecting the Type of Perforated Line 6 62 ...
Page 148: ...OPTIONS Pen Offset for 2 pen models only 7 8 ...
Page 174: ...INTERFACES COMMAND Settings 10 8 ...

